So now that you have Virtualmin installed and up and running, here’s a few things you may want to do to tweak the system just a little.
I’m not offering any opinion on whether these changes are advised or ill-advised. But they are things that I generally do, for better or for worse.
Remove Apache on Hostname
If you forgot to enter the port number when entering your hostname, and trying to login to Virtualmin for the first time, you may have discovered a page like this:
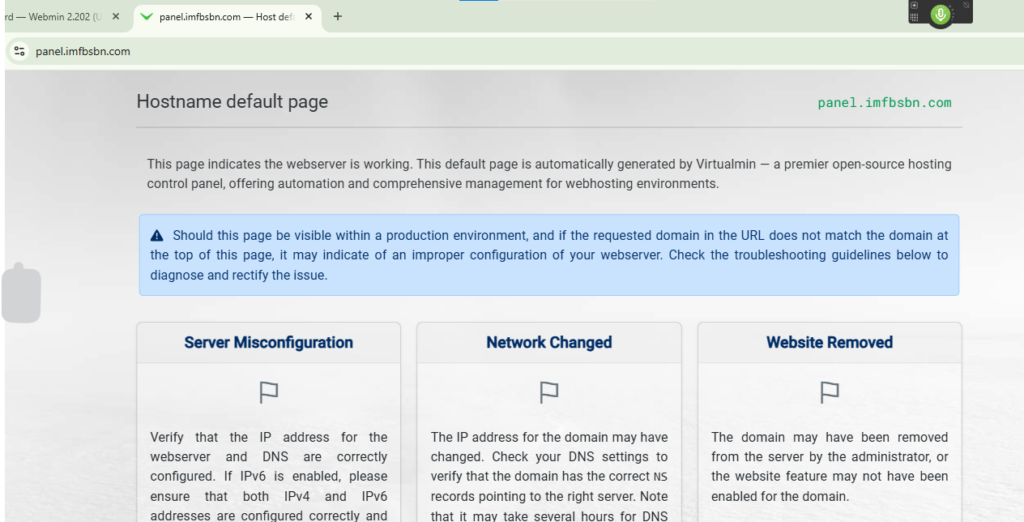
This is unnecessary. I don’t believe it poses any real risk (security or otherwise.) But I would like it to go away. No sense in advertising anything about your server you don’t need to. So what we need to do is remove Apache from the hostname. We do it like this:
In the left-hand menu click on System Settings -> Features and Plugins. You should get a screen like this:
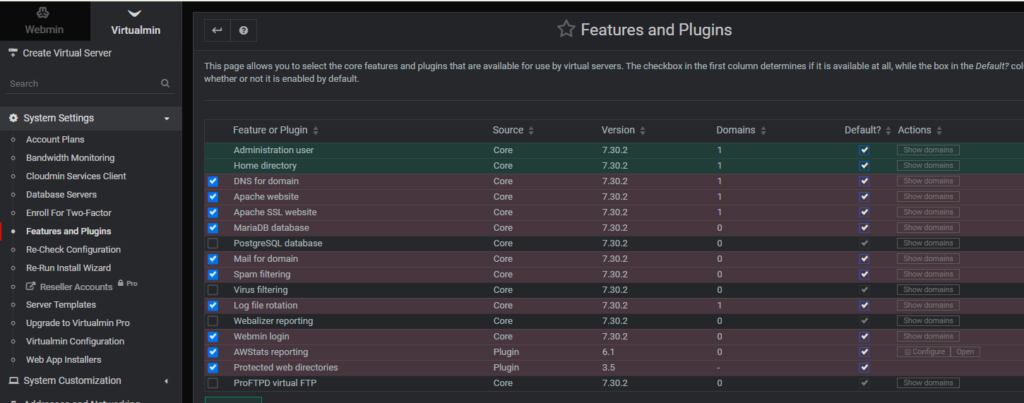
Now go ahead and click on any one of the “Show domains” buttons in the right-hand column. Well, be sure to click on one that has a domain associated with it.
That will take you to a page like this:

Next you want to click on that link with the hostname.
This is the only way – that I have figured out – how to edit the hostname server’s account.
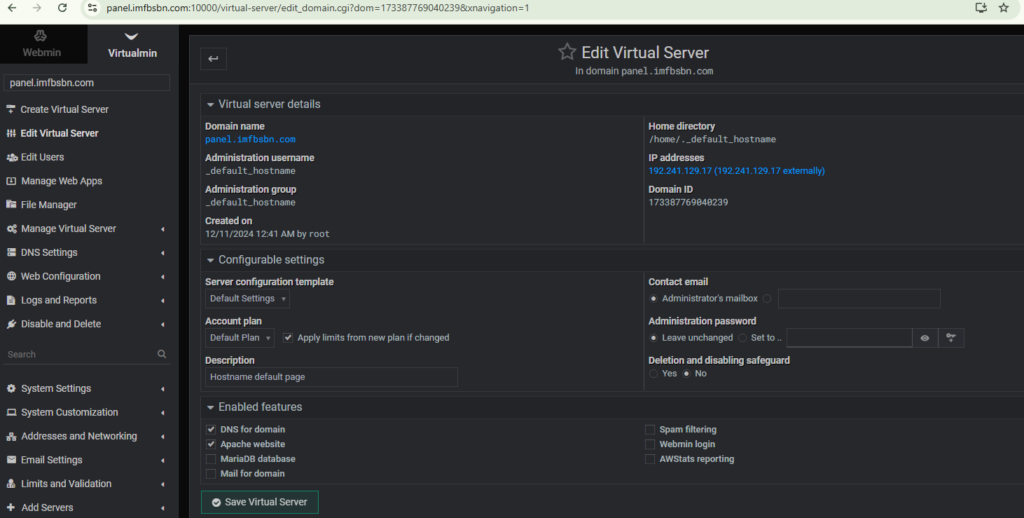
You should note that the domain selection box at the top left now contains “panel.imfbsbn.com”.
On this screen you want to uncheck the box in front of Apache website. Then go ahead and click the Save Virtual Server button.
Virtualmin may give you a warning screen, suggesting you might be doing something stupid, go and click through that as well.
Once that’s done you can reload the panel website and see that no longer exists. Virtualmin will still continue to function on port 10,000.
Disabling DNS For the Server
Virtualmin has the ability to run DNS for all the domains set up on the server. And it works really well actually. So why would anyone not want to use it?
Well, the nameservers operated by your registrar (the place where you buy your domain names) are redundant and fault-tolerant. It would be extremely rare for any of the nameservers run by any reputable registrar to be down for more than a couple of seconds a month (if that.) A lowly VPS server or even a piece of bare-metal hardware are far more likely to experience downtime. If only to update the kernel twice a year… It’s still downtime. So it is just seems silly to ask your Virtualmin server to do something that other servers – that you are already paying for anyway – can do better.
Naturally, this does not apply to people using Virtualmin in a redundant and fault-tolerant manner (a.k.a. people who know what they’re doing.)
Thankfully disabling DNS is extremely easy.
Just follow the same steps as you did above. When you get to the “Edit Virtual Server” page, simply uncheck the “DNS for domain” checkbox and click save.
Setup Automatic Updates
One of the most important security items that you can do for your server is to enable automatic updates. This will ensure that your server always has up-to-date security patches not only for the operating system but for most of the applications running on. Thankfully Virtualmin makes it super easy.
On the dashboard you may get used to seeing that updates are available.
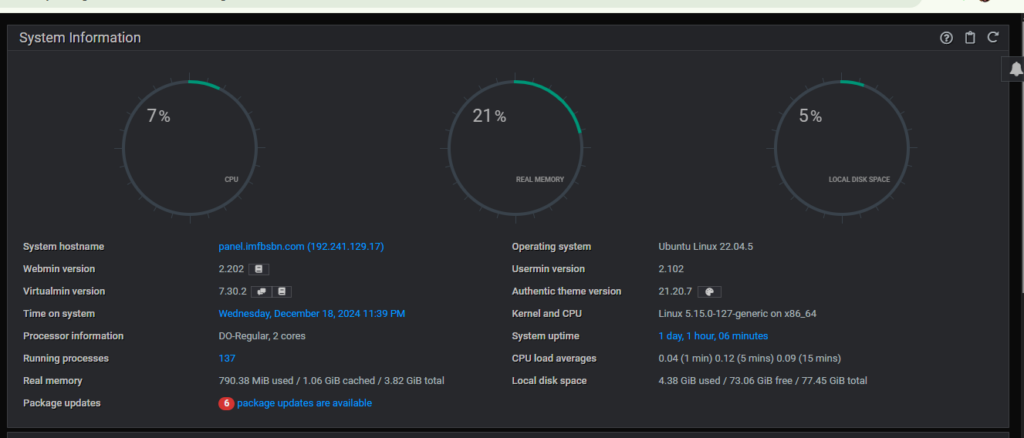
Go ahead and click on “package updates are available”.
That will take you to the Software Package Updates page.
In this page you can see what software packages from your Linux distribution are available to update.
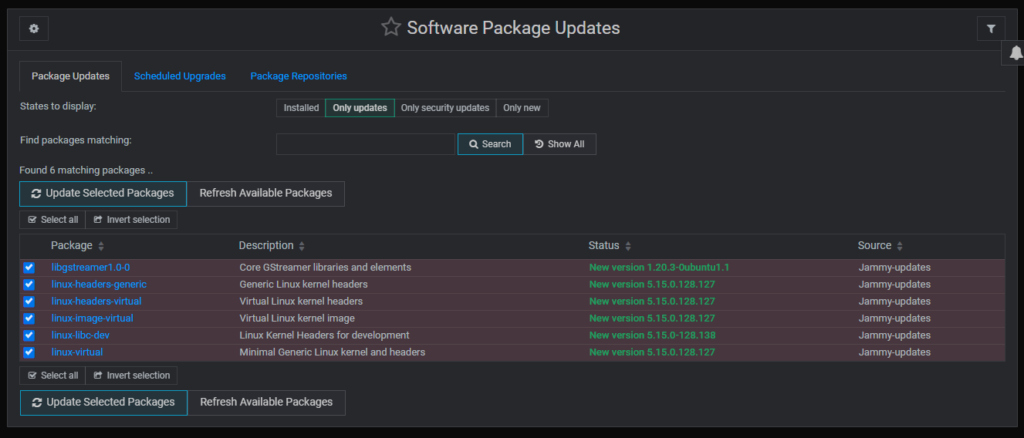
You can go ahead and click on either “Update Selected Packages” button, or…
You can click on “Scheduled Upgrades” tab and set it up so that Virtualmin takes care of this for you.

Go ahead and click on the “Yes” radio button and select your desired update frequency from the drop-down box.
Similarly, select the radio button which describes what you want Virtualmin to do when it finds updates available.
If you enter email address, Virtualmin will send you an email letting you know what’s happening.
– –
That’s it for now. In the next post I will show you how to create off-site backups.