In the last post we got Nextcloud AIO up and running. Here we are going to cover how to make sure your installation stays up-to-date and has off-site backups.
Thankfully Nextcloud AIO makes all this extremely easy. But we will need to create a few cron jobs in Virtualmin as well. No big deal; this will only take a few minutes.
Start by logging in to Nextcloud. Click on the circle at the top right to open up the menu.
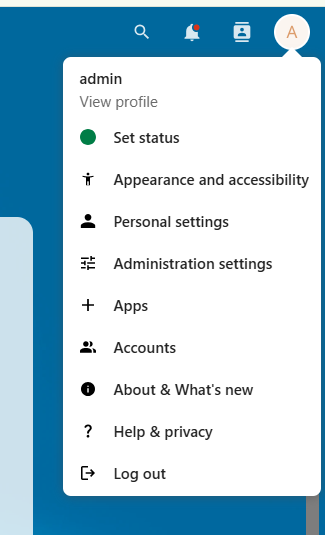
From here click on Administration settings. Which will take you here:
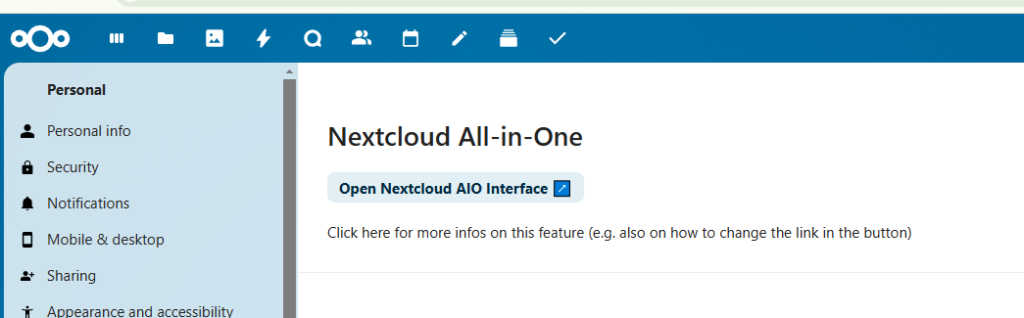
Click on that button. The Open Nextcloud AIO Interface button.
Just like it says, it will open the Nextcloud AIO interface.
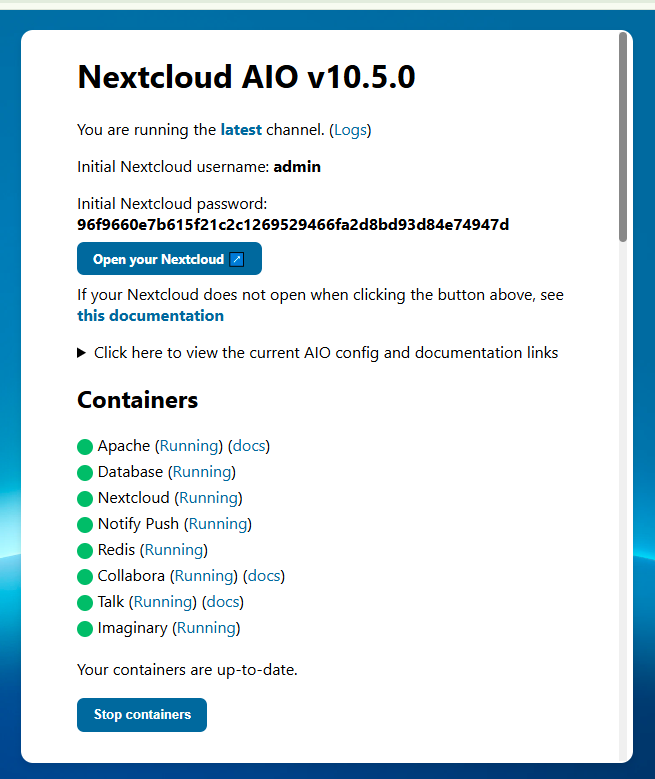
You want to scroll down on that page until you get to the backup section.

Okay – now we need to cover a few things before moving on.
I have been running the backup “my way” since before they added additional options. So today, options exist that did not exist several months ago.
In the olden days, the backup location was /mnt/backup. That was it. You did not get an option. Also (in the olden days) the option to use a remote Borg repo did not exist.
In theory you should be able to change the local location to something like /home/nextuser/backup and Virtualmin would automatically backup the folder. However, you may run into a problem with folder/file permissions as the files created by Nextcloud will be owned by root and not nextuser.
Also in theory, you can use a remote Borg repo as your off-site storage. But “my way” uses S3 object storage which is much cheaper than volume storage.
For these reasons – and because I know that my system works – I’m going to continue to show you how I do it. (Dear experts/pros/gurus: I’m not saying this is the best way. I’m saying this is “a way” that I happen to know works because I have had to restore the system from a backup done this way.)
So in the local backup location field go ahead and enter: /mnt/backup just like in the image above and click the Submit Backup Location button.
The page will reload and if you scroll down you will see your backup encryption key. You don’t need to write that down. It will always be able to get it off of this page.
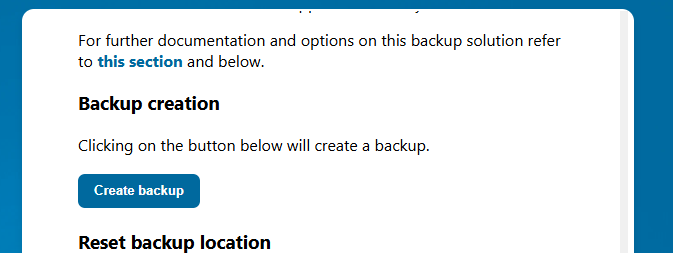
Keep scrolling down until you get to the Create Backup button.
Go ahead and click that.
Let the system do its thing. Nextcloud is going to stop all of the containers and run the backup container. If you want to watch this, you can login to Portainer and see what is running. The first backup always takes a few extra minutes; so be patient.
When finished you should get a screen like this:
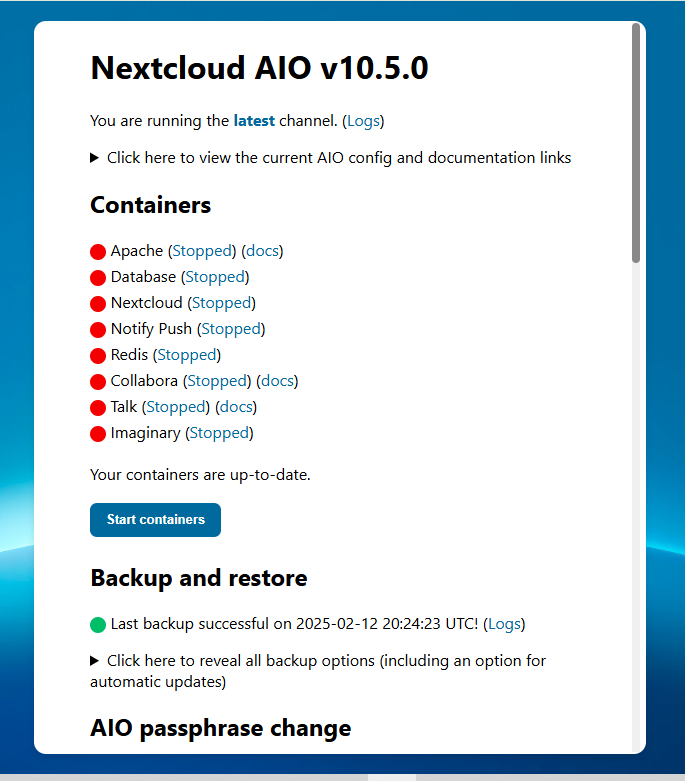
The system leaves you with ALL CONTAINERS STOPPED.
Underneath “backup and restore” there is the spot the arrow that says “click here to reveal all backup options”. Go ahead and do that. Click on that sentence to reveal more options. Then scroll down on that page until you get to here:
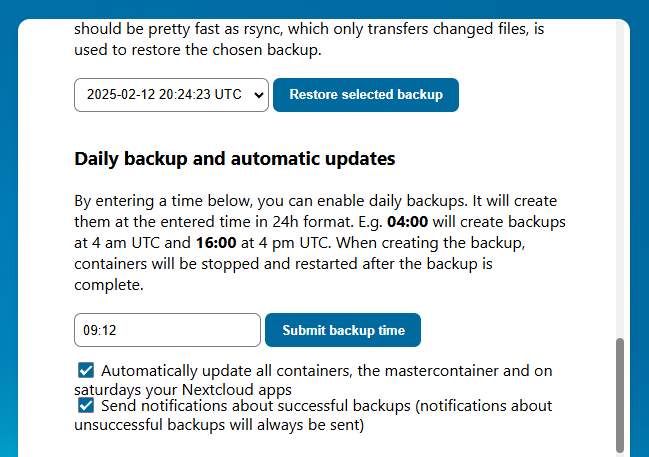
When you submit a backup time, you need to think a little bit. Whatever time you put in the box will be UTC. When it’s 09:00 UTC that is either 04:00 or 05:00 in New York (depending on DST.) While the backup is running the containers will be stopped and your users unable to access the system. So choose your time wisely for your particular time zone.
Also, the system is running other cron jobs all the time. So I try not to deliberately schedule things at the top or bottom of the hour. I entered 12 minutes after the hour.
One of the beautiful things about Nextcloud AIO is its ability to take care of itself. Make sure that first checkbox is checked and every Saturday the system will update everything in addition to performing the backup.
Once you’ve selected your time go ahead and click the Submit Backup Time button.
And don’t forget to START YOUR CONTAINERS.
We are done in Nextcloud. We know that our server will be backed up every day at either 4 or 5AM New York time.
All that’s left is to make sure the backup files get stored into the cloud. For that we will use Virtualmin.
Go ahead and log into your Virtualmin panel/portal.
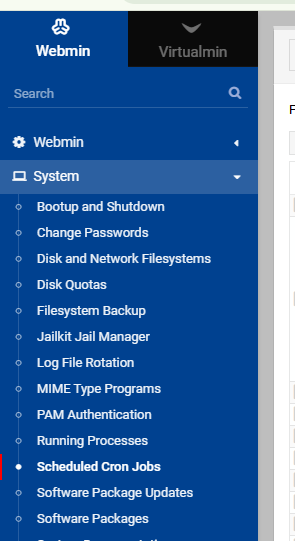
Click on “Webmin” at the top left (or press Alt-W.)
Then click on System. Then click on Scheduled Cron Jobs.
Should get something like this:
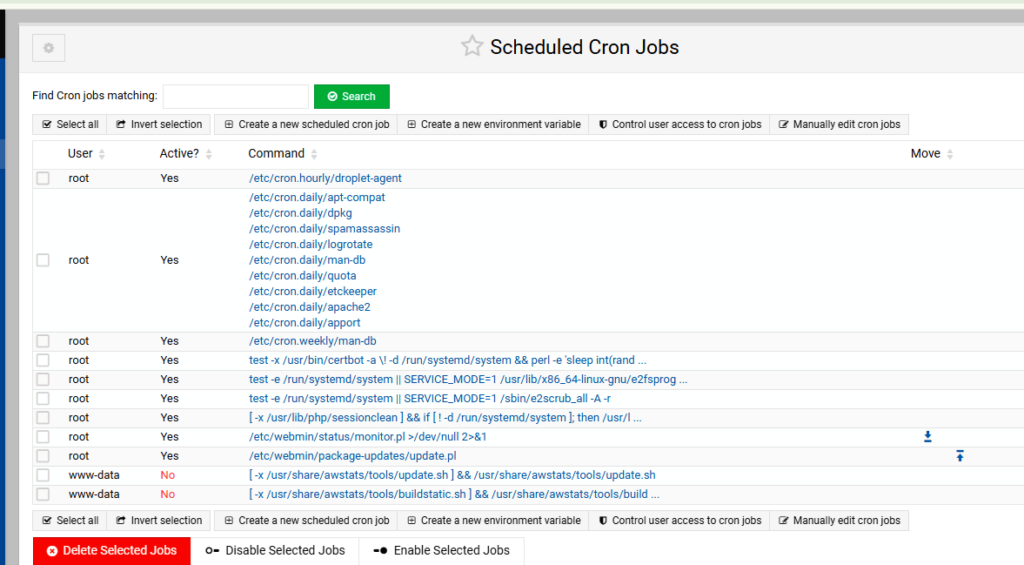
Click on either of the buttons that say “Manually edit cron jobs”.
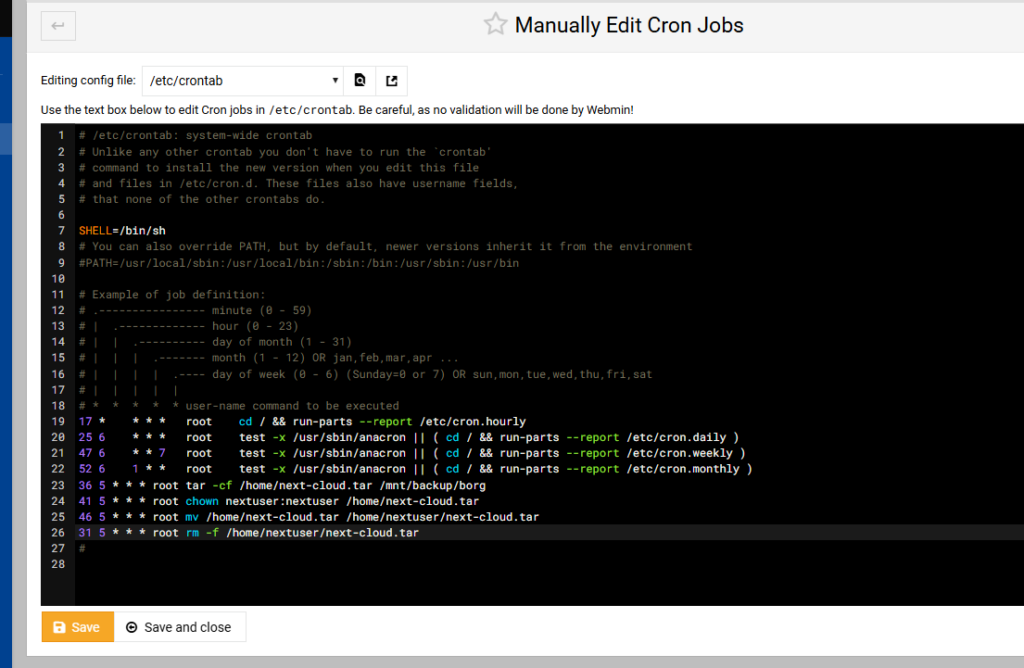
To the bottom of that file we want to add the following lines:
36 5 * * * root tar -cf /home/next-cloud.tar /mnt/backup/borg
41 5 * * * root chown nextuser:nextuser /home/next-cloud.tar
46 5 * * * root mv /home/next-cloud.tar /home/nextuser/next-cloud.tar
31 5 * * * root rm -f /home/nextuser/next-cloud.tar
Let’s go through each of these commands:
- Every day at 5:36 root is going to create a tar archive of the backup directory.
- Every day at 5:41 root is going to change the owner of that file to nextuser.
- Every day at 5:46 root is going to move the backup file into nextuser’s directory so it can be backed up by Virtualmin.
- The next morning… Every day at 5:31 root is going to delete yesterday’s file so the process can start over.
With these lines added, your file might look something like this:
NOTE: I understand the “pros” will tell me that this could be done with a single command and a Perl script. If you want to research doing that be my guest.
Provided you have already scheduled daily backups Virtualmin will now backup that tar archive file to your S3 object storage in the cloud every day.
Of course there are other ways to do this. But this way has been working well for over a year without issue.