Whatever you do with your Virtualmin server, you’re gonna want to make sure it gets backed-up regularly.
One of the safest, and most cost-effective ways to do that is to use S3 or object storage “buckets” at an off-site provider.
Here I’m going to show you how to set up a bucket and download your API keys so that you can integrate cloud storage backup into your Virtualmin server.
I’m just going to assume you already have an account at Linode/Akamai and that you are logged in.
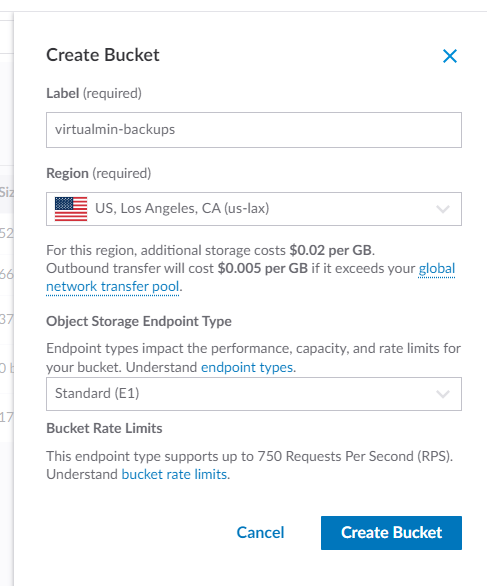
Over on the left-hand side of their portal click on “Object Storage”. Then click on “Create Bucket”.
Enter a label/bucket name. Then select the data warehouse you wish to use. The “Object Storage Endpoint Type” field will automatically select whatever service is available in your region. As of this writing the options are Legacy (E0) or Standard (E1). You don’t need to worry too much about it; either option will work with Virtualmin.
Go ahead and click the “Create Bucket” button.
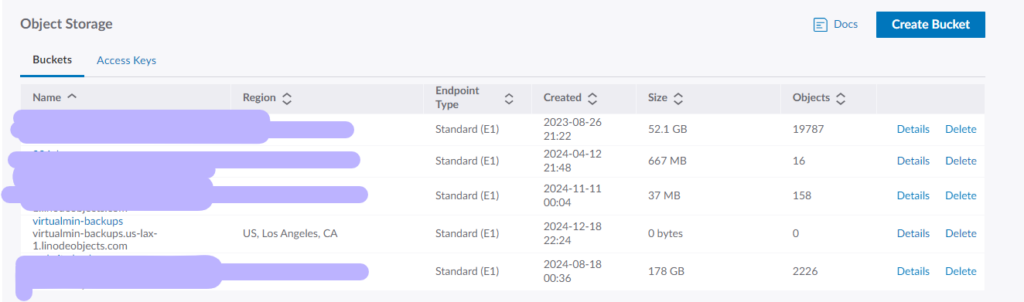
Now you should be looking at something like this:
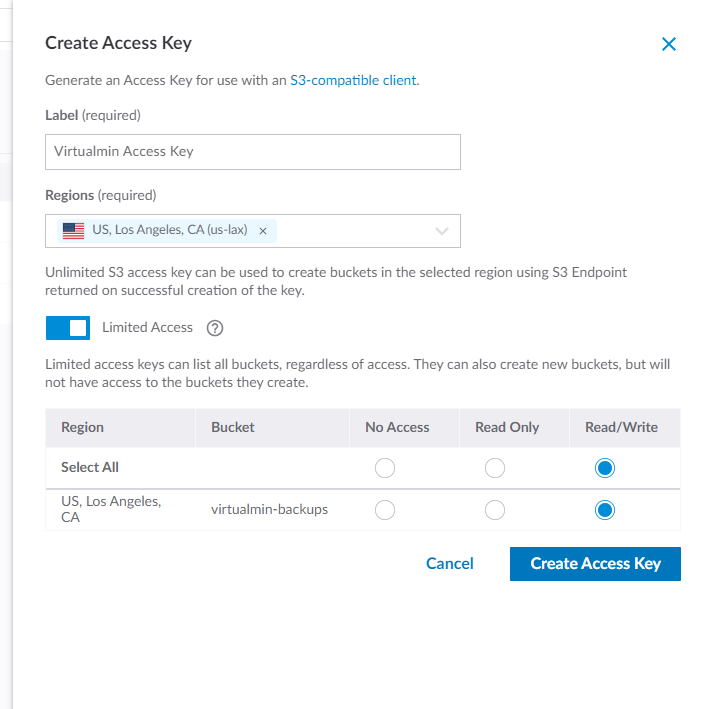
Now we need to set up the API keys. Go ahead and click on “Access Keys”.
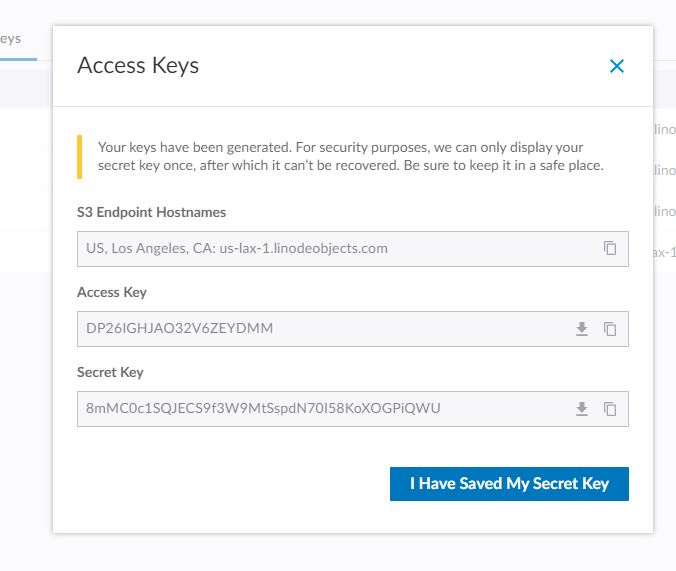
Your access keys will be given to you like this. Make sure you store this info in a safe place. While you will be able to view the “Access Key” again, this will be the last time you will be able to see the “Secret Key”.
That’s it!
If for whatever reason you misplace the Secret Key don’t worry; you can always create a new key pair for your S3 bucket.
In the next post I’ll show you how to plug this information into Virtualmin and schedule automatic backups.
So now that you have Virtualmin installed and up and running, here’s a few things you may want to do to tweak the system just a little.
I’m not offering any opinion on whether these changes are advised or ill-advised. But they are things that I generally do, for better or for worse.
Remove Apache on Hostname
If you forgot to enter the port number when entering your hostname, and trying to login to Virtualmin for the first time, you may have discovered a page like this:
This is unnecessary. I don’t believe it poses any real risk (security or otherwise.) But I would like it to go away. No sense in advertising anything about your server you don’t need to. So what we need to do is remove Apache from the hostname. We do it like this:
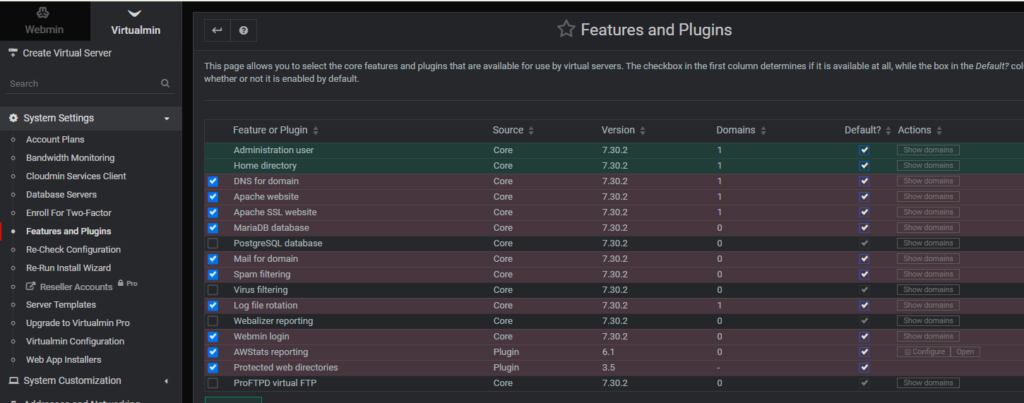
In the left-hand menu click on System Settings -> Features and Plugins. You should get a screen like this:
Now go ahead and click on any one of the “Show domains” buttons in the right-hand column. Well, be sure to click on one that has a domain associated with it.
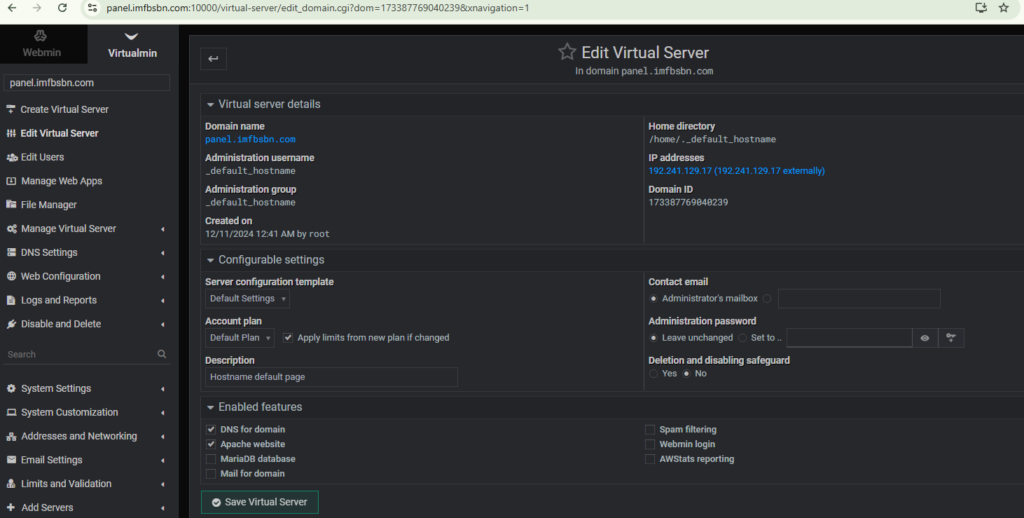
That will take you to a page like this:
Next you want to click on that link with the hostname.
This is the only way – that I have figured out – how to edit the hostname server’s account.
You should note that the domain selection box at the top left now contains “panel.imfbsbn.com”.
On this screen you want to uncheck the box in front of Apache website. Then go ahead and click the Save Virtual Server button.
Virtualmin may give you a warning screen, suggesting you might be doing something stupid, go and click through that as well.
Once that’s done you can reload the panel website and see that no longer exists. Virtualmin will still continue to function on port 10,000.
Disabling DNS For the Server
Virtualmin has the ability to run DNS for all the domains set up on the server. And it works really well actually. So why would anyone not want to use it?
Well, the nameservers operated by your registrar (the place where you buy your domain names) are redundant and fault-tolerant. It would be extremely rare for any of the nameservers run by any reputable registrar to be down for more than a couple of seconds a month (if that.) A lowly VPS server or even a piece of bare-metal hardware are far more likely to experience downtime. If only to update the kernel twice a year… It’s still downtime. So it is just seems silly to ask your Virtualmin server to do something that other servers – that you are already paying for anyway – can do better.
Naturally, this does not apply to people using Virtualmin in a redundant and fault-tolerant manner (a.k.a. people who know what they’re doing.)
Thankfully disabling DNS is extremely easy.
Just follow the same steps as you did above. When you get to the “Edit Virtual Server” page, simply uncheck the “DNS for domain” checkbox and click save.
Setup Automatic Updates
One of the most important security items that you can do for your server is to enable automatic updates. This will ensure that your server always has up-to-date security patches not only for the operating system but for most of the applications running on. Thankfully Virtualmin makes it super easy.
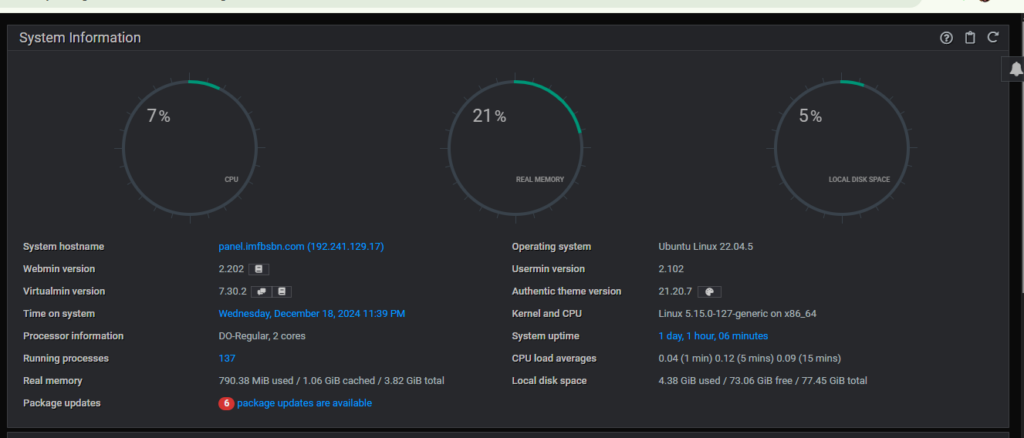
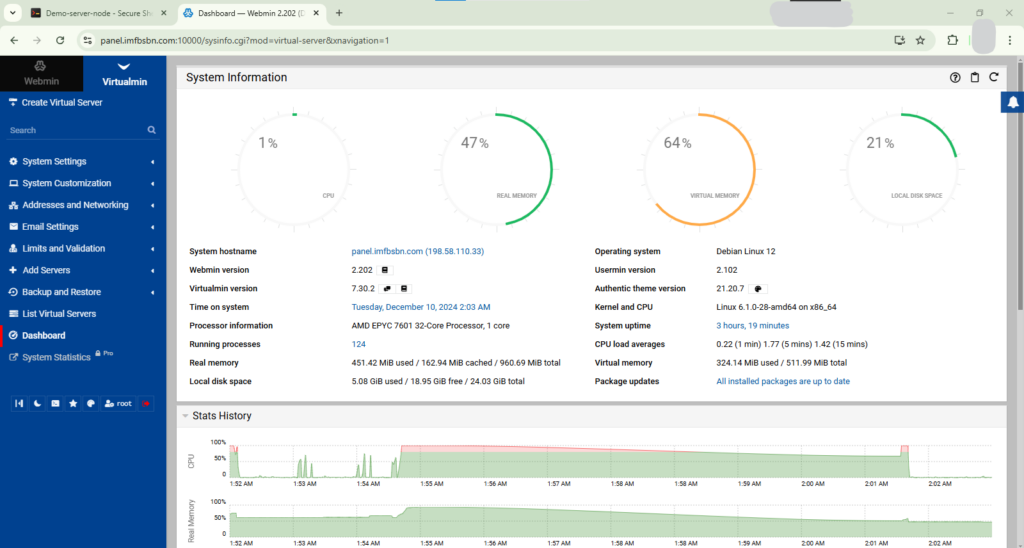
On the dashboard you may get used to seeing that updates are available.
Go ahead and click on “package updates are available”.
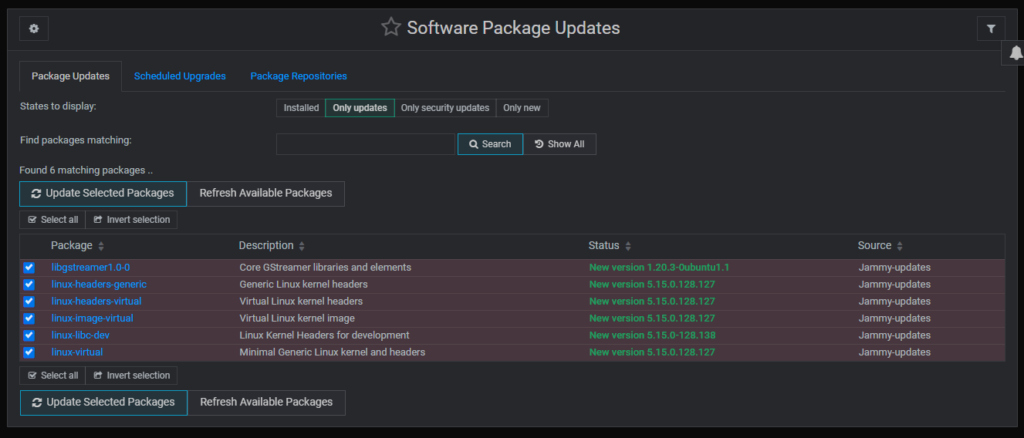
That will take you to the Software Package Updates page.
In this page you can see what software packages from your Linux distribution are available to update.
You can go ahead and click on either “Update Selected Packages” button, or…
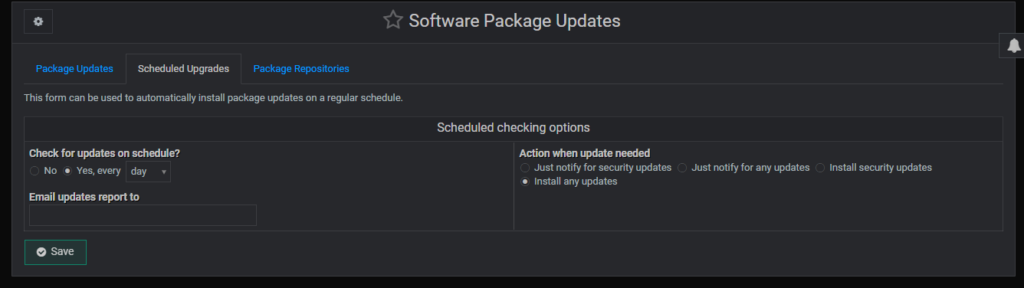
You can click on “Scheduled Upgrades” tab and set it up so that Virtualmin takes care of this for you.
Go ahead and click on the “Yes” radio button and select your desired update frequency from the drop-down box.
Similarly, select the radio button which describes what you want Virtualmin to do when it finds updates available.
If you enter email address, Virtualmin will send you an email letting you know what’s happening.
– –
That’s it for now. In the next post I will show you how to create off-site backups.
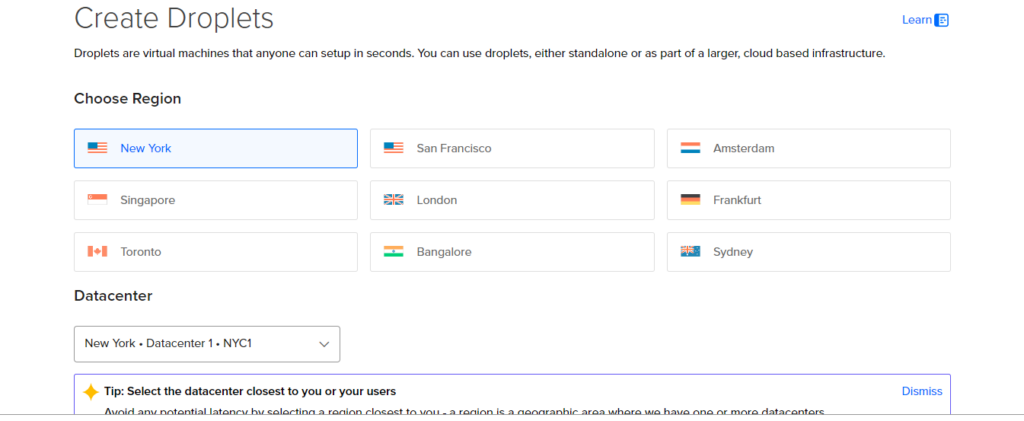
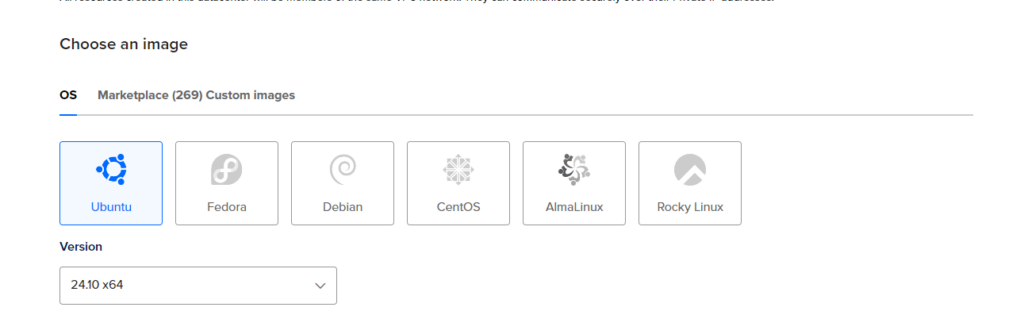
Next, choose your server’s specifications. I have a $200 credit that I want to take for a test drive. So I’m selecting a set up beyond my needs.
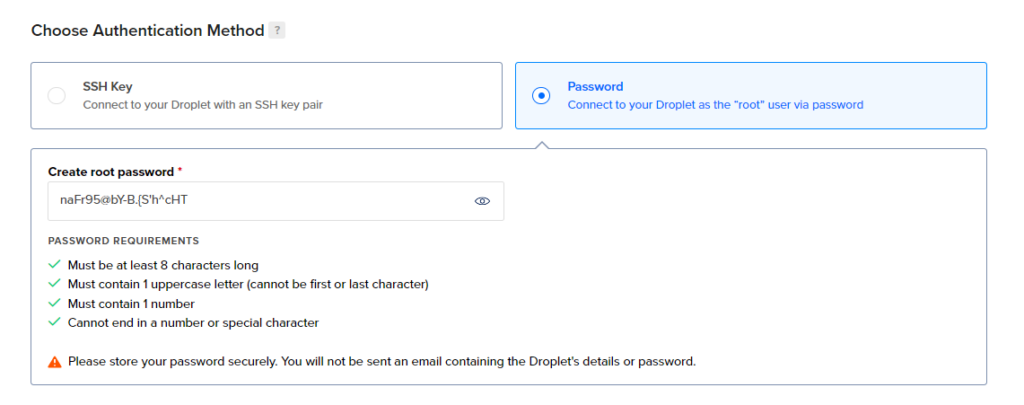
Scroll down on the page and enter a robust password.
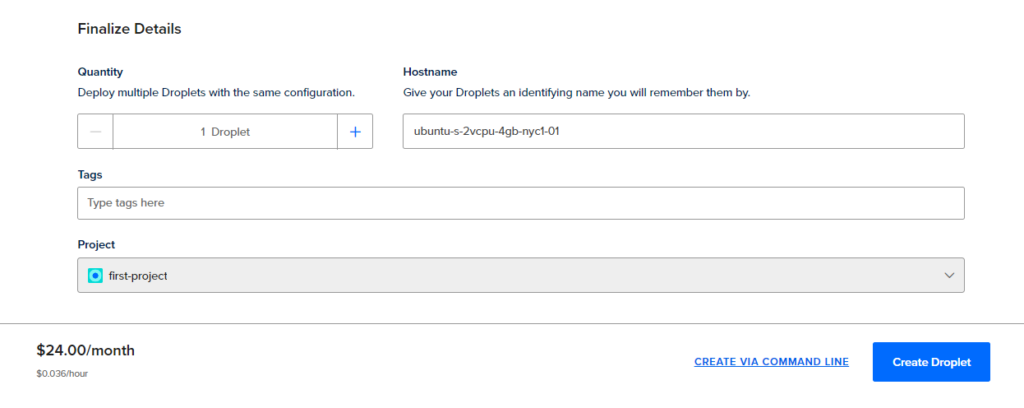
Now you can go ahead and click on the “Create Droplet” button on the bottom right.
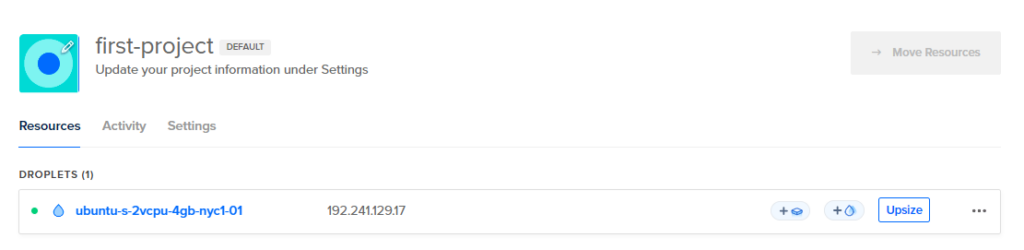
DigitalOcean is going to create your server. Will probably take several seconds. When complete, you will see something like this:
Now you have the IP address of the server. So we are ready to create the DNS records.
If your system does not have a fully qualified domain name (FQDN), the installer will stop and ask you to choose one. This is mandatory because many services rely on having a fully qualified domain name in order to function. Mail, in particular, but some Apache configurations and many of the Virtualmin-created configuration files, also require a valid fully qualified domain name to function correctly. A fully qualified domain name is one of the form host.example.com, or simply example.com (but do not use a name you’ll be hosting in Virtualmin). – Virtualmin Documentation: https://www.virtualmin.com/docs/installation/automated/#questions-virtualmin-installsh-might-ask-you
Go back and read that last part again: but do not use a name you’ll be hosting in Virtualmin.
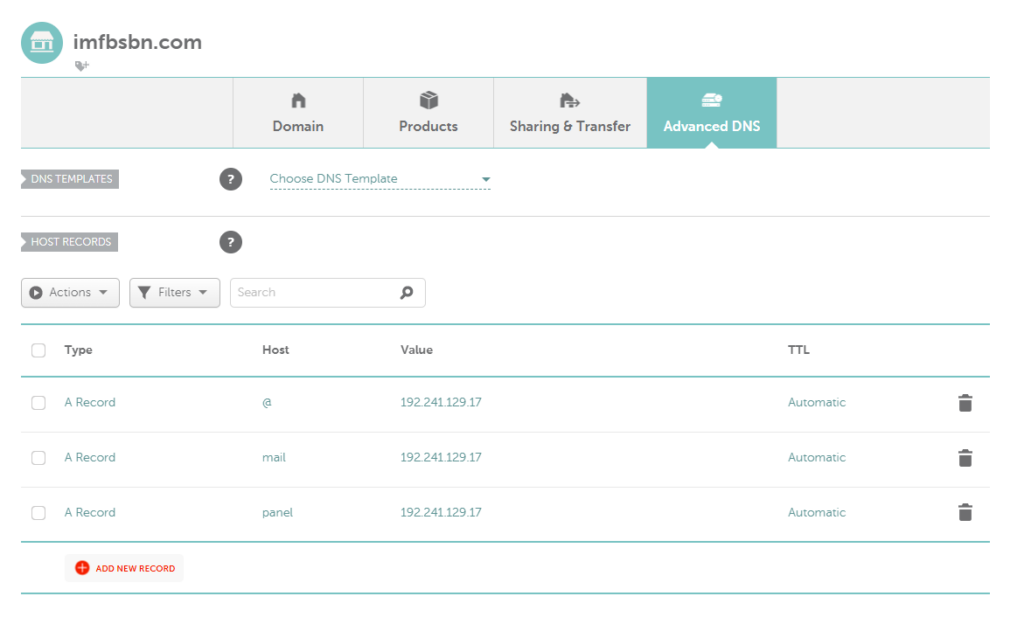
My test domains happened to be hosted at Namecheap. So I will add the following DNS records there.
On our new server, Virtualmin is going to use the FQDN panel.imfbsbn.com.
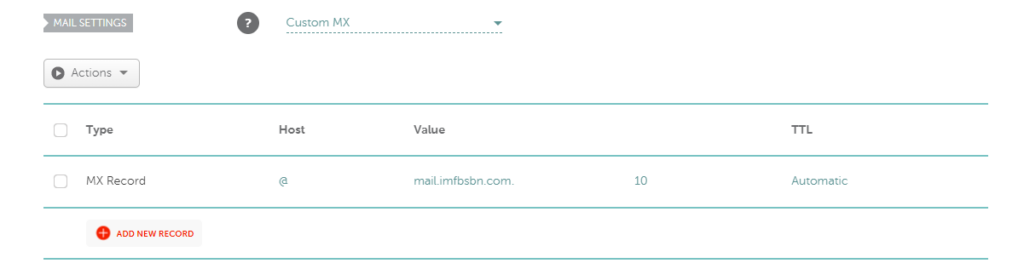
A little further down on the page (if NameCheap is your registrar) you can enter the MX record.
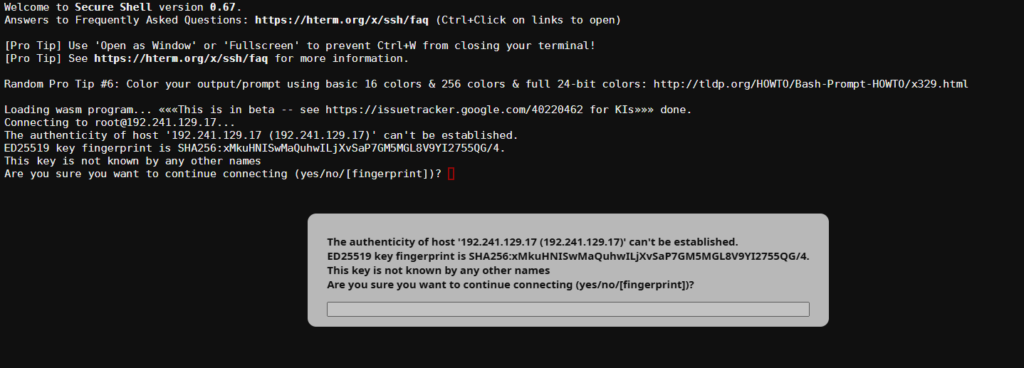
We are now ready to log into the server. Using your favorite SSH client, navigate to the server and login with user root and the robust password you previously entered.
The very first time you log into the server the SSH client will not recognize the server’s digital fingerprint/key. So you will have to enter “yes” in order to continue.
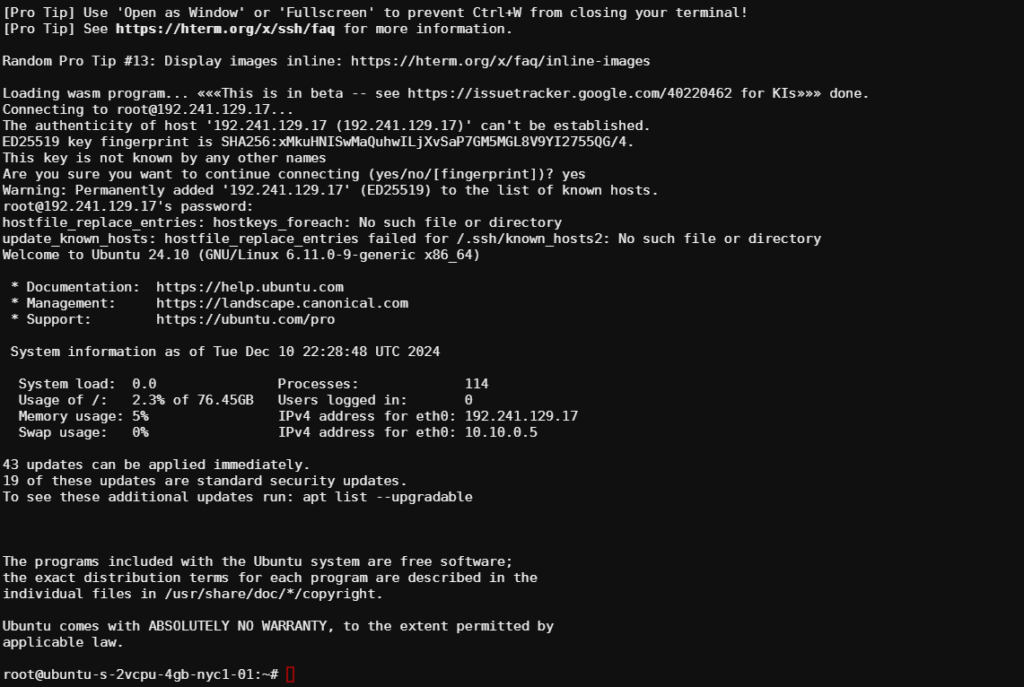
After that, you will be prompted for your password. Enter it & press enter.
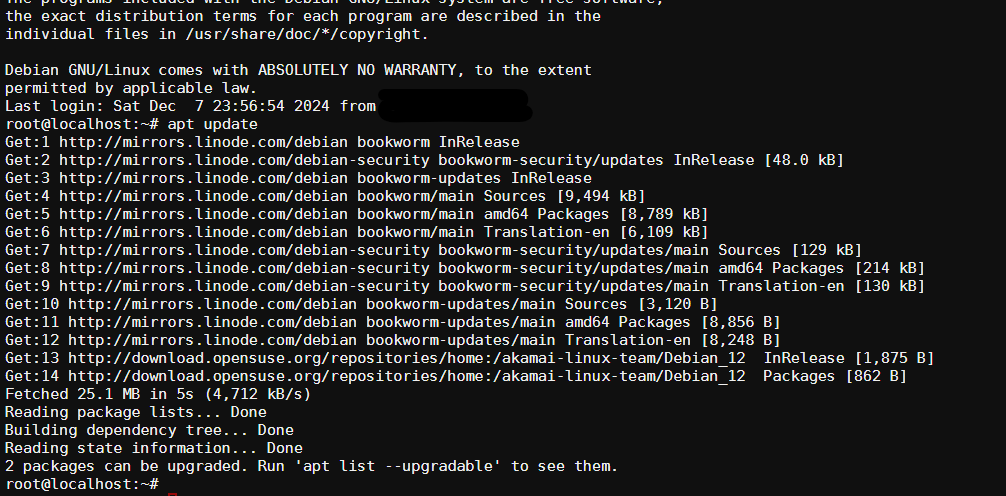
On our initial login, we see the OS is telling us that updates are available:
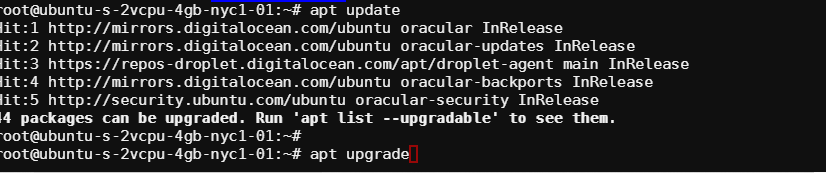
The first thing we want to do here is run the update command. Type in the following:
apt update
Like this:
Press enter to run the command.
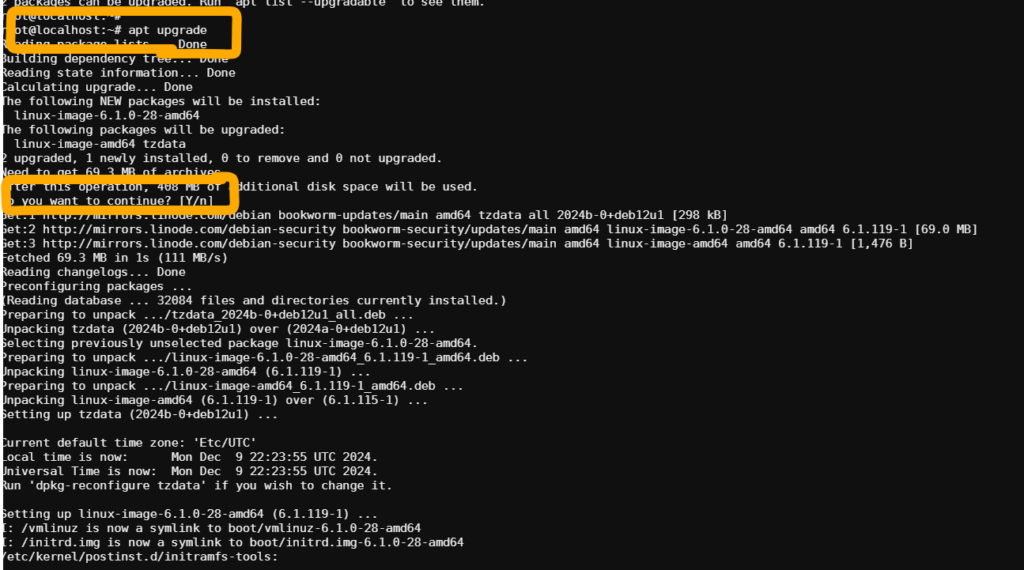
Then we want to run the upgrade command. Type in the following:
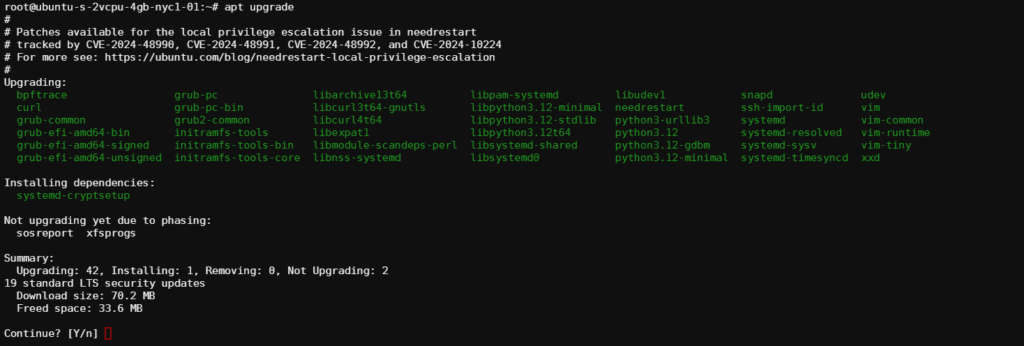
apt upgrade
Like this:
As usual, you have to press enter to run the command.
The system will show you a list of all the packages that will upgrade. When prompted, the “Y” is the default. So you can just press enter.
Just in case one of the packages updated the kernel is always a good idea to restart the machine. Type in:
reboot
After you hit enter the machine will automatically restart. Should take about a minute.
Go ahead and log back in via SSH.
Now it’s time to install Virtualmin itself.
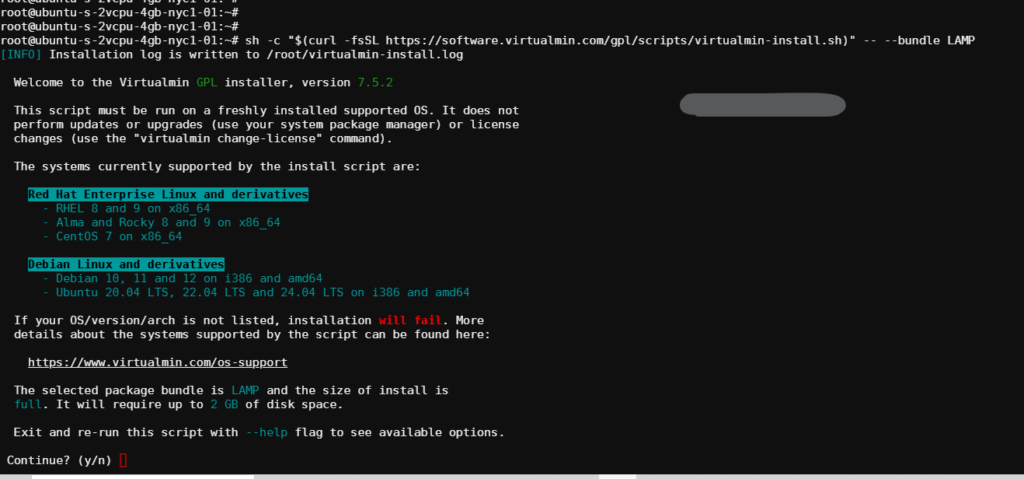
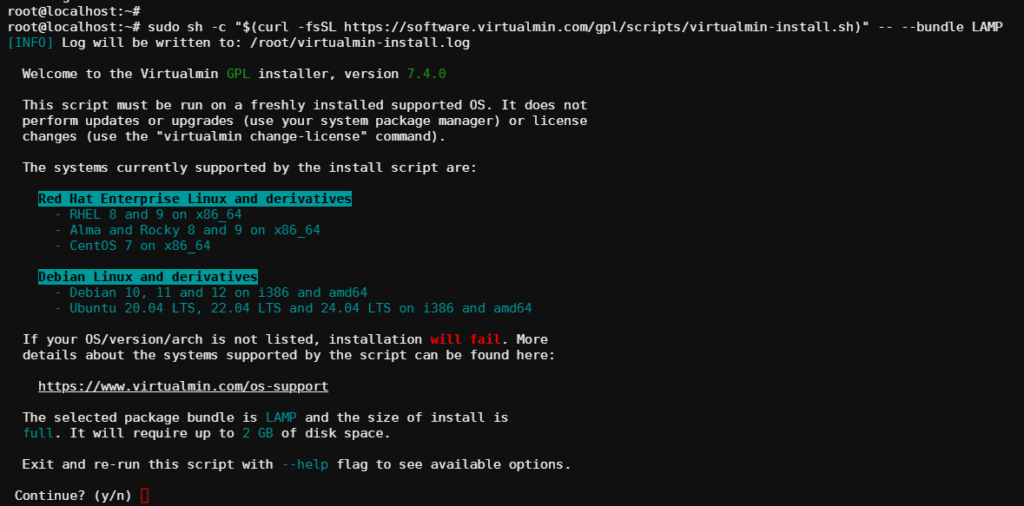
Copy and paste the following line into your SSH client:
sh -c "$(curl -fsSL https://software.virtualmin.com/gpl/scripts/virtualmin-install.sh)" -- --bundle LAMP
Your server will download the installation script and begin to run it.
If everything appears to be in order, and you’re ready to go, press “y” and then press enter.
This script will download and begin the loading process.
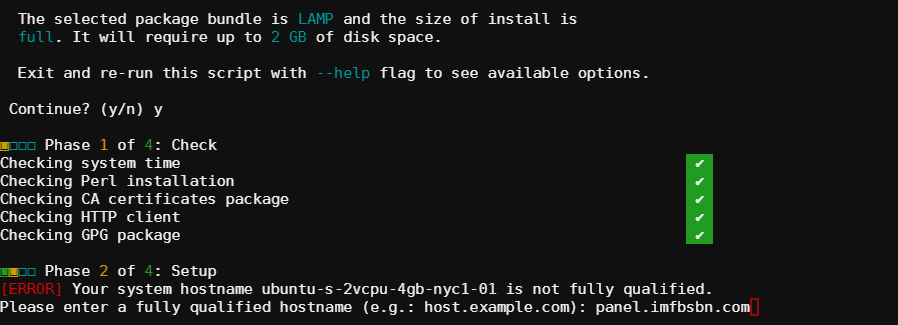
At some point the installation is going to ask you about a fully qualified domain name. This is where you are going to enter:
panel.imfbsbn.com
Like this:
The installer will continue. Be patient. On small underpowered systems it may take 10-15 minutes. Even on medium horsepower servers it will take several minutes.
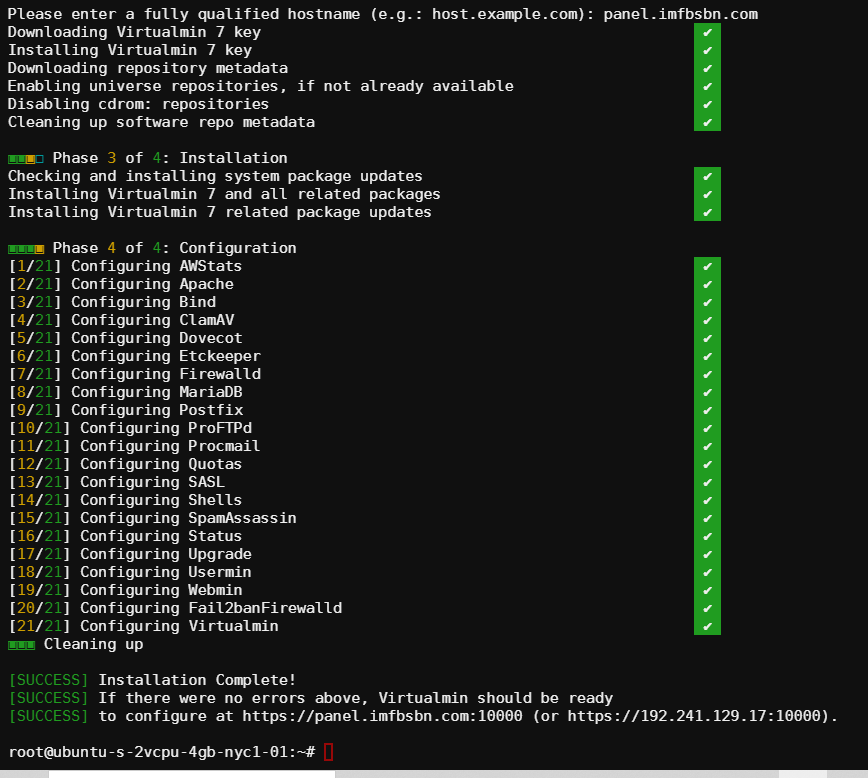
When it’s done you’ll get something like this:
Congratulations! You have successfully installed Virtualmin.
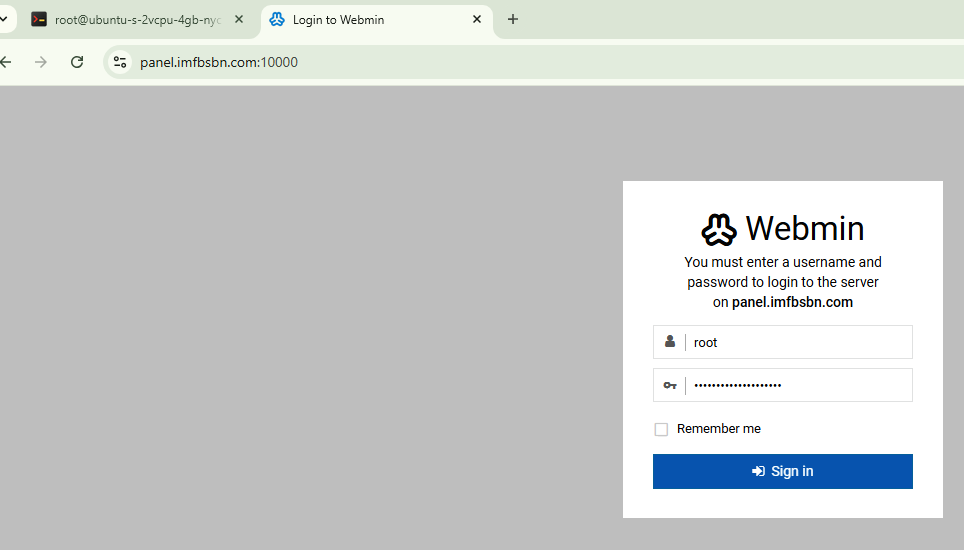
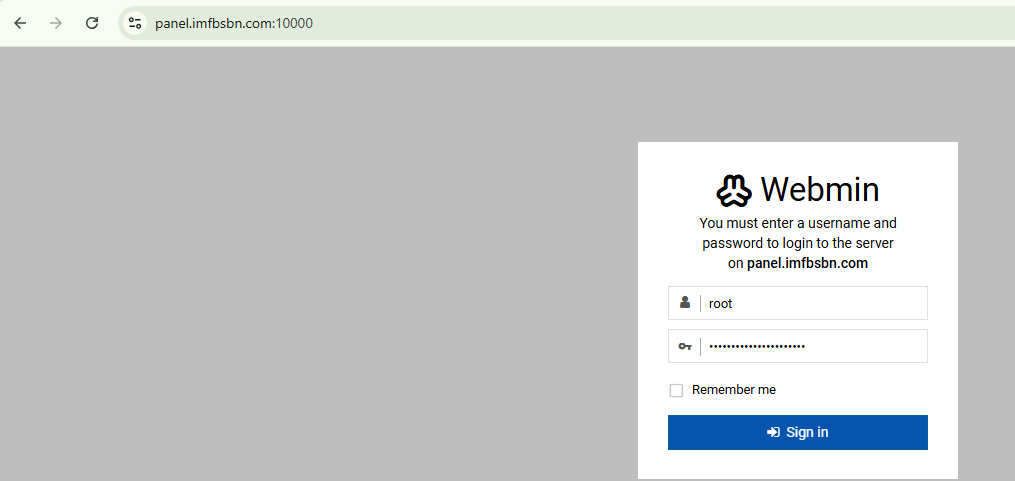
Direct your favorite browser to the FQDN at port 10000 just as instructed at the bottom of the image above.
Once you sign in you will be taken to the Post-Installation Wizard.
The first time you login to Virtualmin you’re going to be greeted with the post-installation wizard. It looks something like this:
Go ahead and click next.
The first question asks if Virtualmin should run an email domain lookup server. If your server is going to be handling a lot of email then choose yes. This server here is not going to be processing a lot of email. So I chose no.
Choose your option and click next.
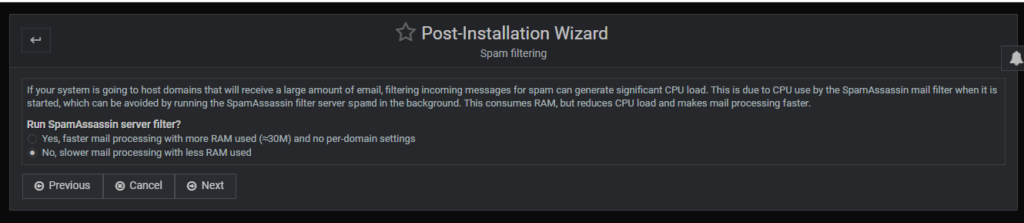
The next question deals with SpamAssassin. Again, if you choose to run it email will be processed faster but at the expense of memory. Like before, my server is not processing a lot of email so I choose no.
Choose your option and click next.
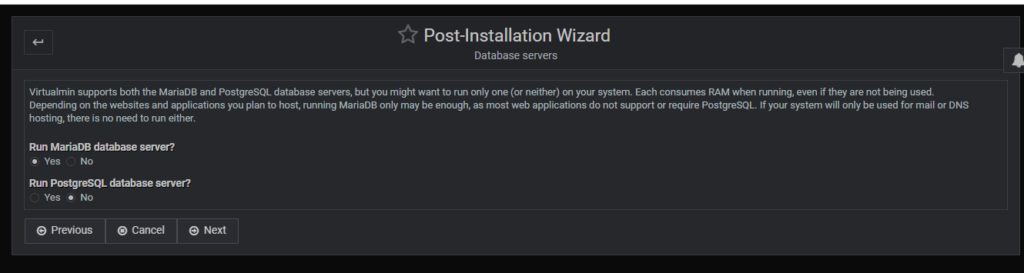
This next one is kind of odd. It asks what databases you want to run, however be aware that if you did not install a database during the initial installation you cannot install it here. That is, if you installed the LAMP stack, PostgreSQL will not be installed. You can click “Yes” here but you will only generate an error message telling you that it’s not installed. So don’t over think it. Just go ahead and click next.
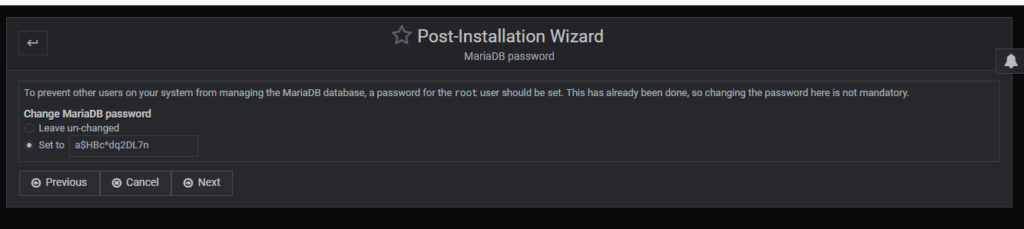
Now you’re going to set the MariaDB password for the root user. You can accept whatever is in the box. But make sure you save the password someplace safe.
And now you should be mostly finished.
Let’s go ahead and configure the “optional features.”
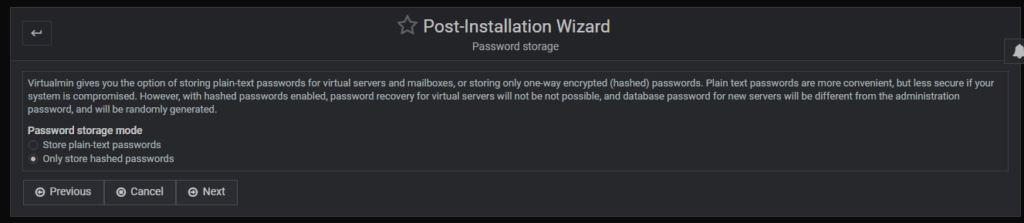
In regards to password storage, were only interested in storing hashed passwords. Just go ahead and click next.
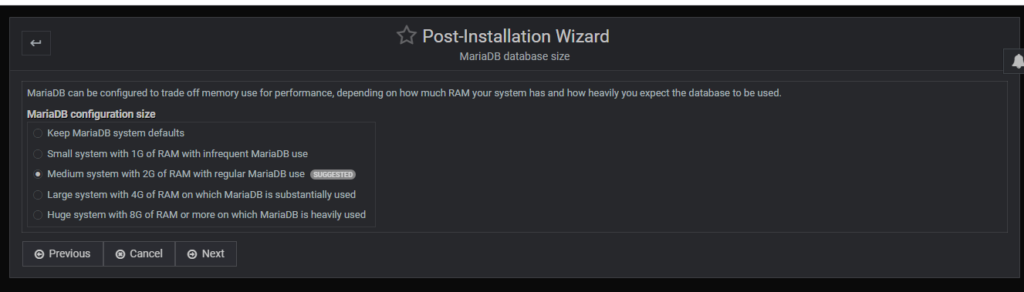
Here the system is asking about the MariaDB should be configured to use memory. If your servers handling a lot of email and won’t have any (or much) database usage then select a small or medium system. If your server is going to handle nothing but WordPress sites, e-commerce, or other applications which involve heavy database usage and select a system that the limit of the memory installed.
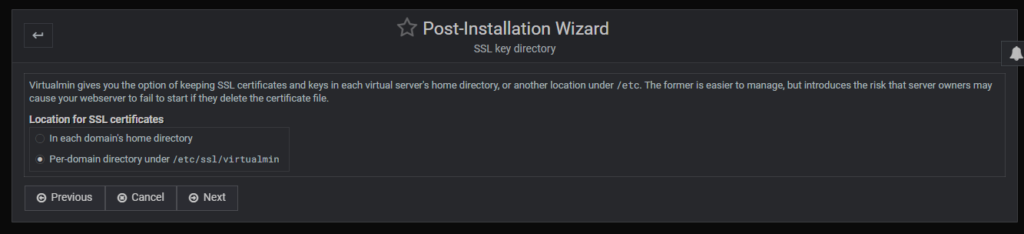
Next it asks about the location for SSL certificates. Make your life easy and go with the default.
Nice job! Looks like we finished.
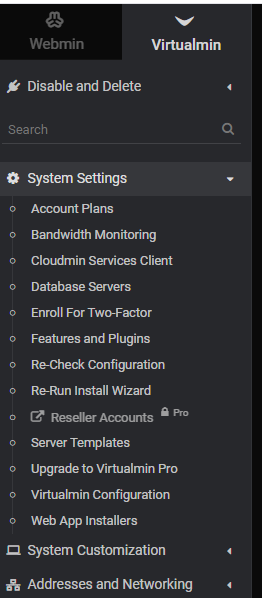
If you ever wish to run the wizard again, the option can be found under System Settings.
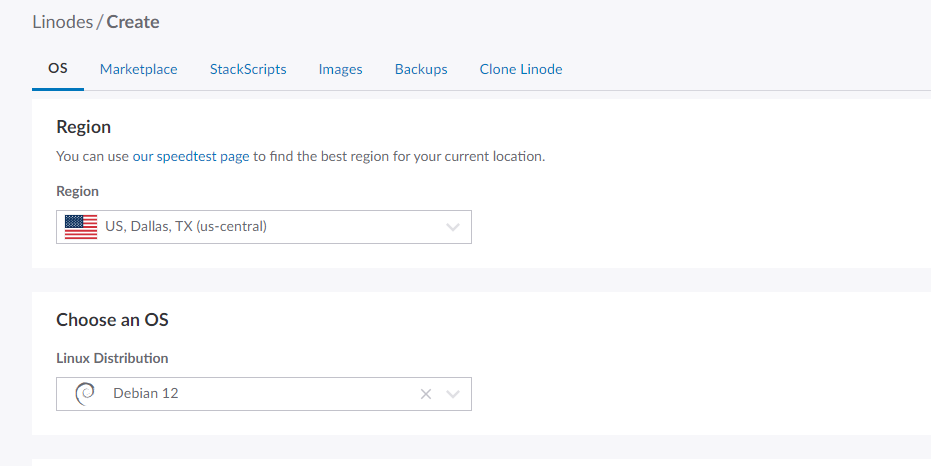
Next you need to choose your plan. Here I chose Debian 12. While I have used other distributions, I’m most familiar with Debian.
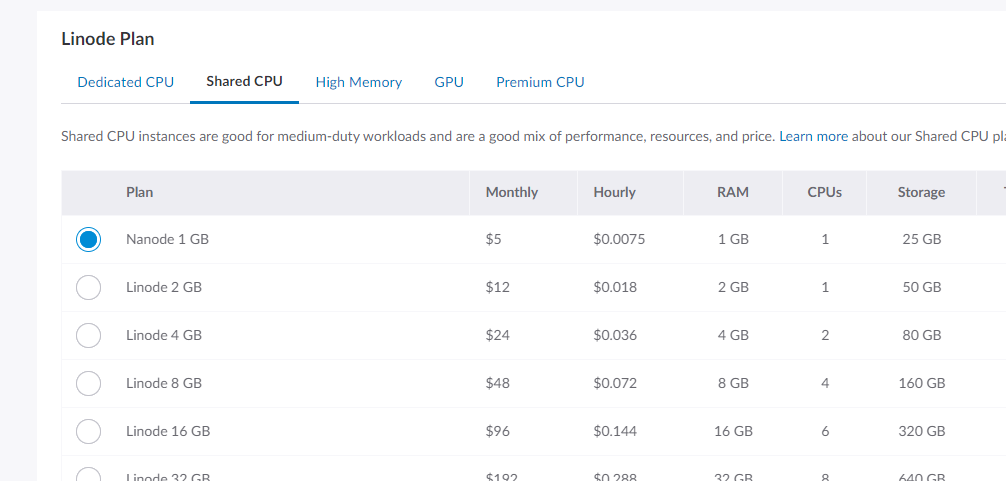
Because we’re not going to be doing a whole lot with this server (at this time) a Nanode will do just fine.
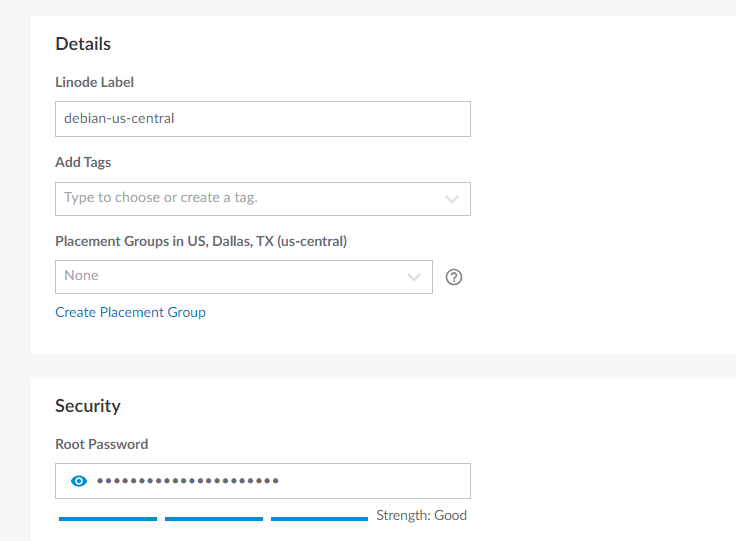
Scroll down the page and enter a robust password. For more on passwords read this short post here.
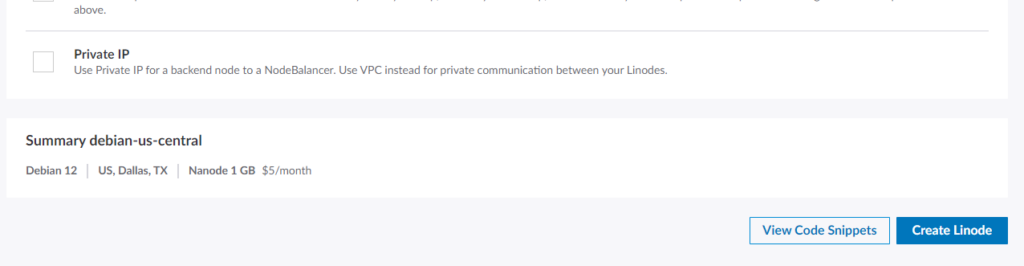
As you scroll down, don’t worry about SSH Keys or anything else. Just keep going… All the way to the bottom.
Click on the button that says “Create Linode”.
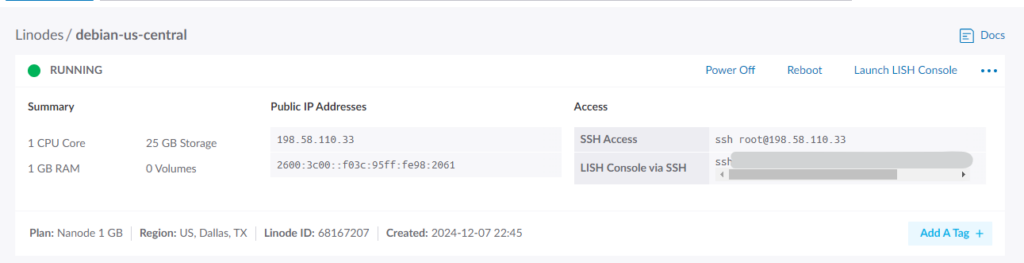
Your server will begin provisioning. And after a few minutes you’ll get a screen like this:
Now that you have your IP address, your ready to go to your registrar and point your domain name(s) at this address. NOTE: for the sake of simplicity we are only going to be dealing with IPv4 addresses (although IPv6 addresses are cool.)
If your system does not have a fully qualified domain name (FQDN), the installer will stop and ask you to choose one. This is mandatory because many services rely on having a fully qualified domain name in order to function. Mail, in particular, but some Apache configurations and many of the Virtualmin-created configuration files, also require a valid fully qualified domain name to function correctly. A fully qualified domain name is one of the form host.example.com, or simply example.com (but do not use a name you’ll be hosting in Virtualmin). – Virtualmin Documentation: https://www.virtualmin.com/docs/installation/automated/#questions-virtualmin-installsh-might-ask-you
Go back and read that last part again: but do not use a name you’ll be hosting in Virtualmin.
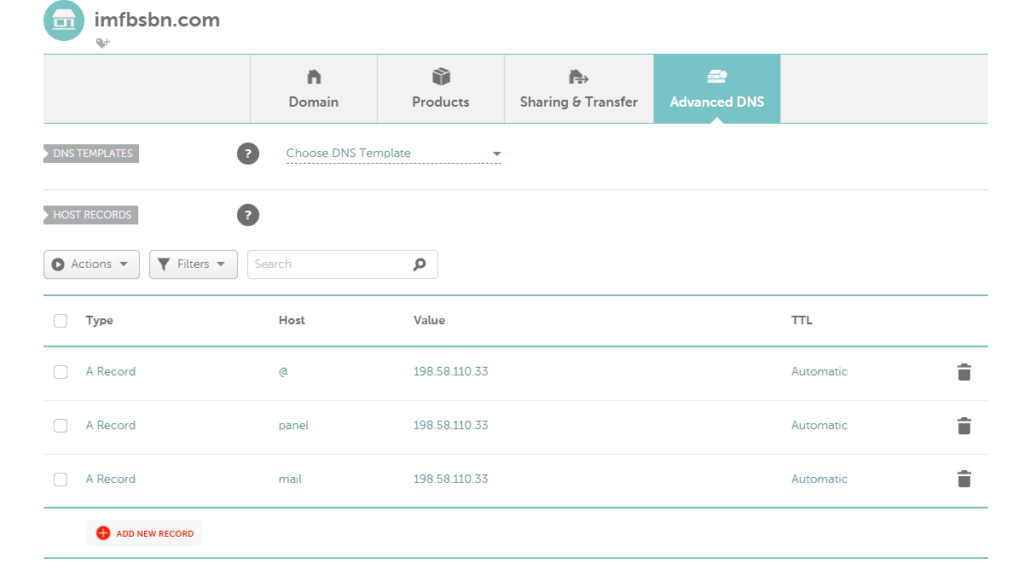
My test domains happened to be hosted at Namecheap. So I will add the following DNS records there.
On our new server, Virtualmin is going to use the FQDN panel.imfbsbn.com.
Below that is the MX record so that the server can receive email.
Now that the server is running and the DNS records are pointing to the right place, we are ready to install Virtualmin.
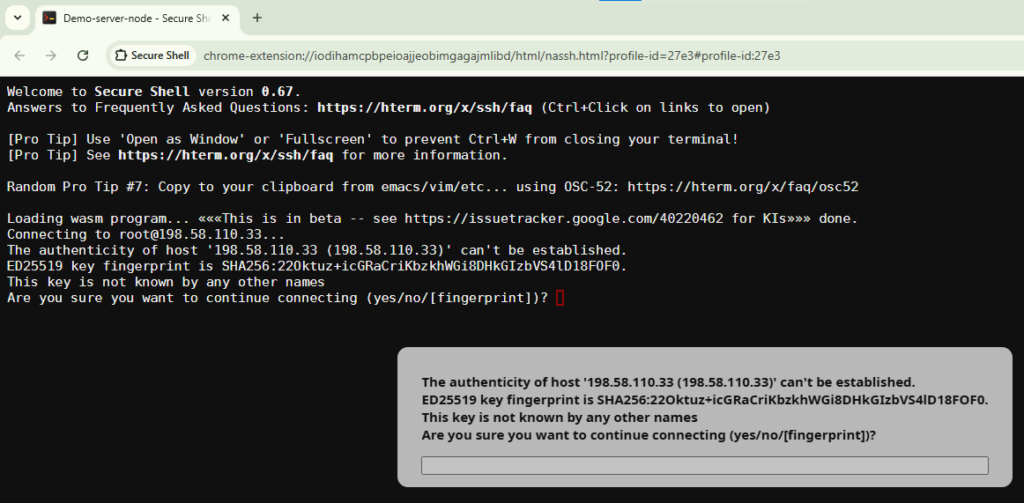
So now we use our favorite SSH client. Putty is very popular; but doesn’t work well for me (for reasons we’re not getting into here.) So instead, I tend to use Google Chrome with the SSH extension.
The very first time you log into the server your SSH client will record the server’s fingerprint. You will most likely need to acknowledge this by entering “yes”.
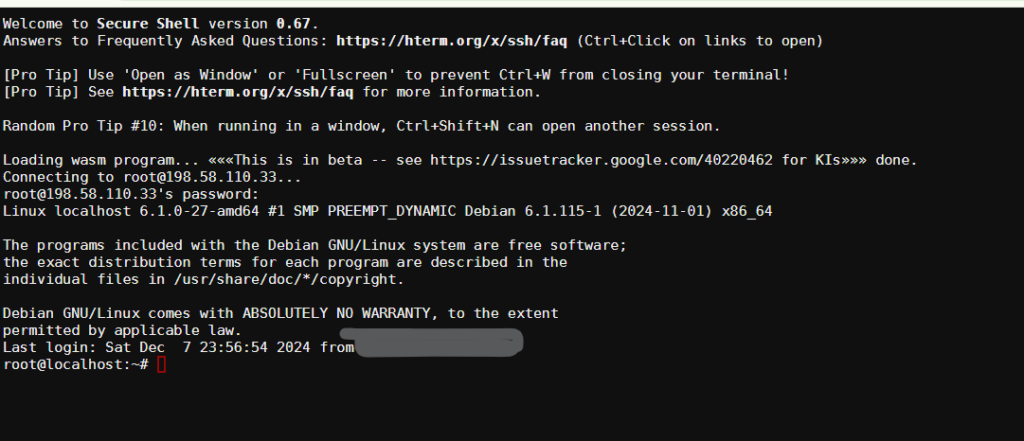
Once you log-in, you’ll be greeted by the # prompt:
The first command you need to run is: apt update
Type in:
apt update
and press the enter key.
This is because the operating system on the server was created by an “image” that could be one week, one month, or five years old. So this command tells the package manager to contact the distribution’s servers and make a list of all of the updated packages.
Next, type in:
apt upgrade
and press the enter key.
You will most likely be prompted, asked, if you really want to upgrade the packages. Press Y or y or enter to continue. NOTE: see how in the question below the Y is capitalized? That means that “yes” is the default option. So you can just press enter.
Only two more steps to go.
Type in:
reboot
and press the enter key.
This is to make sure the operating system is loaded with the most updated kernel available.
The server should reboot within a minute or two.
Go ahead and log back in through SSH. Then you’re going to enter the following command:
sh -c "$(curl -fsSL https://software.virtualmin.com/gpl/scripts/virtualmin-install.sh)" -- --bundle LAMP
Your server will download the installation script and begin to run it.
The script is going to prompt you to make sure you’re running an approved OS and that you want to proceed. To continue press y & press enter.
The installation script will start and give you updates along the way.
Somewhere in the process it will likely ask you to provide the “fully qualified hostname.”
This is where we will enter the FQDN where we created the DNS records above:
panel.imfbsbn.com
and press enter.
Virtualmin will continue the installation process. It may take a minute; be patient (on this tiny nanode it is going to take 10 minutes. But it will go faster on bigger hardware.) The script will keep you up-to-date on progress.
That’s it!
Virtualmin is now installed.
You should be able to access the panel/UI by using either the domain name or the IP address.
Enter “root” for the username and the password is whatever you set it to when you created the server.
The first time you login the system will take you through the Post-Installation Wizard.
This is not going to be a PhD dissertation on server security. Just a few tips that I have found helpful along the way. The bottom line is if you take security seriously you should never have any problems. If you don’t take security seriously you are guaranteed to have some problems. Consider yourself warned.
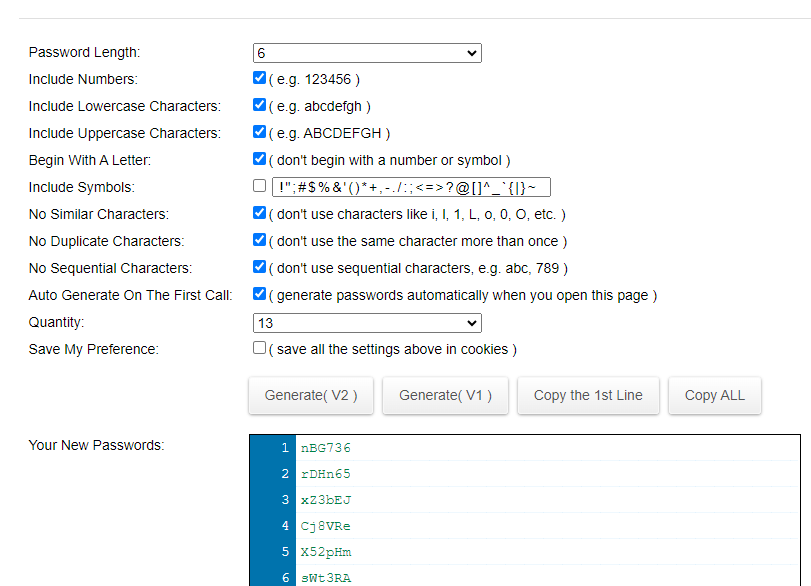
Adjust the settings to your liking, and it will give you a list something like this:
What I tend to do is copy 10-15 passwords at a crack and place them in a Notepad file so I have them for easy reference.
Pretty simple actually.
Usernames… More Complicated
Choosing usernames like “admin” or “user” or anything else that is incredibly basic and non-descriptive is probably asking for trouble. We will get into this in a little more detail in later posts but suffice it to say, if the name of your server is bblaze.xyz it’s probably not a good idea to use “bblaze” as the administrative user login. See what I mean?
If you’re going to have a whole bunch of different logins that you want to keep separate, you can use a list of things:
Fruits: apple, grape, banana, pear, cherry…
Trees: maple, oak, ash, pine, willow…
Planets: Mercury, Earth, Venus, Mars…
Animals: cheetah, moose, squirrel, aardvark…
You get the idea.
If you really want to be serious about it, you can use the password generator to generate random usernames as well as follows:
I’m not saying this is required. I’m not even saying this is a brilliant idea. I’m throwing it out there is something you should be aware of.
Nearly all of the low cost hosting available is considered “shared” hosting. What that means is your website(s) and data are stored on the same operating system installation as other people’s [websites and data.] Your data is protected by the security features of the operating system and all the users share the same CPU, memory, hard drive.
The next step up is called VPS hosting. VPS stands for Virtual Private Server. In this configuration you get your own private installation of the operating system on shared hardware. However it’s worth mentioning, that the CPU, memory, and hard drive are partitioned. So you’re not sharing “your” CPU with anyone else.
Beyond that you can have your own Dedicated Server, which means you’re renting the entire piece of hardware. Naturally this is considerably more expensive. If you’re considering a dedicated server odds are you’re not reading this post.
We are not going to get into the pros and cons of the various technologies. This is not an essay on shared versus VPS hosting. Plenty of other people have written plenty about that already.
The point here is to demonstrate that with Virtualmin you do not want shared hosting. You want VPS hosting.
The upside of VPS hosting is that your provider does not need to pay a software company for a “panel”. So, generally, you will get better performance for the same price with VPS over shared hosting. You’re also getting better security.
There are (literally) dozens of hosting companies. It’s an extremely competitive business. Any search will show you. I’ve personally used 6-7 different companies over the years. When a server had to essentially be bulletproof for business purposes I managed a dedicated server at Rack Space. Yes, it was ridiculously expensive. But that was the business need.
Now, I’m retired and only host a few WordPress sites. Nothing critical; so cost is a driving factor.
As of this writing, here’s a few options in the marketplace on the cheaper/lower end of the spectrum:
Namecheap Pulsar
Namecheap Quasar
Go Daddy 1 vCPU
Go Daddy 2 vCPU
Digital Ocean*
Linode/ Akamai*
CPU Cores
2
4
1
2
2
2
Memory
2 GB
6 GB
2 GB
4 GB
4 GB
4 GB
Disk Space
40 GB
120 GB
40 GB
100 GB
80 GB
80 GB
Bandwidth
1000 GB
3000 GB
~
~
4000 GB
4000 GB
Price
$9.88/mo
$15.88/mo
$14.99/mo
$29.99/mo
$24.00/mo
$24.00/mo
*Digital Ocean and Akamai use a hybrid shared CPU model. It’s not truly a VPS machine; but I don’t think it matters.
I don’t have any deal with any of these companies. Do your own research and figure out what works best for you.
My goal is not to walk you through the process of getting a domain name. It’s to help you learn a little bit about Virtualmin.
I’m just gonna assume that you already that you already own a domain name. We’ll pick this up with securing some hosting.
I’ve been hosting websites and online services for at least 20 years. Generally, the way it’s always been done, was that your hosting provider (GoDaddy, NameCheap, Linode/Akamai, etc) would have a deal with some “panel” software company thus giving you a nice graphical interface to control your website. The most common of these for many years has been cPanel.
One of the very cool things about cPanel was/is a set of installation scripts called Softaculous. This would allow you to install web various applications with just a few clicks. The downside is that the software license is expensive and the hosting company simply passes that cost on to the consumer.
Another nagging problem was SSL certificates. For years cPanel has had the ability to install free Let’s Encrypt certificates, however many hosting providers disable the feature so they can sell you more products. I found that exceptionally frustrating.
Should also mention there is a really cool server management tool called YUNOHOST. If you have a serious fear of learning new things but still would like to host your own server this is a really good way to start. Absolutely zero coding knowledge required and they have dozens of applications ready to install. Really good stuff, but not quite as flexible as I would like. So…
Over the last few years more applications are being released as either “packages” or ready for a Docker container. What this means is that you now have the ability to install web applications without the need for expensive software scripts.
Virtualmin is the easiest, most secure, and most powerful way to manage all of your web application servers.
Whether you’re hosting a simple WordPress blog or a high-availability network cluster, Virtualmin will make your life easier.
The plan is to create a few posts to show you how to get started.