Category: Docker

  • Firefly III | Virtualmin | MariaDB

    [et_pb_section fb_built=”1″ admin_label=”section” _builder_version=”4.16″ global_colors_info=”{}” theme_builder_area=”post_content”][et_pb_row admin_label=”row” _builder_version=”4.16″ background_size=”initial” background_position=”top_left” background_repeat=”repeat” global_colors_info=”{}” theme_builder_area=”post_content”][et_pb_column type=”4_4″ _builder_version=”4.16″ custom_padding=”|||” global_colors_info=”{}” custom_padding__hover=”|||” theme_builder_area=”post_content”][et_pb_text admin_label=”Text” _builder_version=”4.16″ background_size=”initial” background_position=”top_left” background_repeat=”repeat” global_colors_info=”{}” theme_builder_area=”post_content”]

    Firefly III is a very cool personal finance manager application. What really makes the application exceptional is its ability to be multi-user (where multiple users access the same set of bank accounts) and also multi-accounts (whereas you can run several different personal finances/businesses on the same installation.)

    These instructions are based on the official documentation with edits so everything works with Virtualmin.

    Let’s get started.

    Preinstallation checklist:

    • I’m using Debian 12, but you’re free to use a different flavor.
    • Virtualmin should be installed as per the previous posts (going to assume you have installed the LAMP stack.)
    • Docker & Portainer should also be installed.

    If you don’t have all of these items completed go look at my previous posts.

    First things first. Firefly is going to need 2 sub-domain names. The first is for the application itself. The second will be for the file/transaction importer.

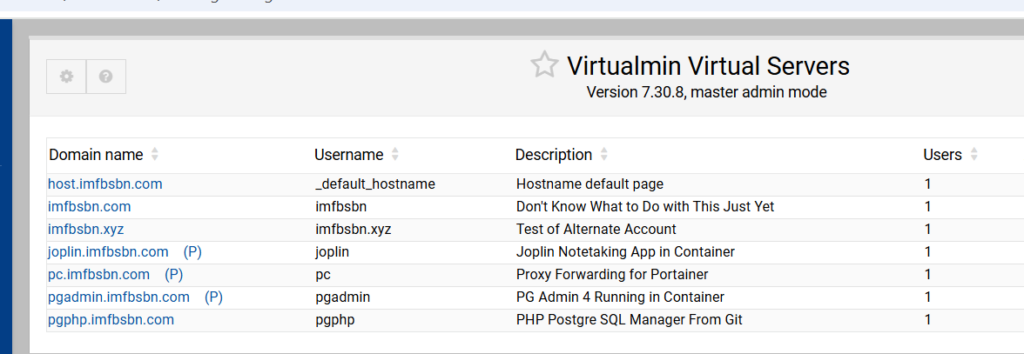
    I’m going to continue to use the server from previous posts hosted by Server Cheap. This time we are going to create 2 sub-servers of an existing virtual server. Here’s the list of servers I currently have on this installation:
    In order to create a sub-server we need to first select the server we want as the primary.

    In this case I’m choosing the imfbsbn.xyz domain name. So I’m going to click on that.

    From there were going to click on the Create Virtual Server link in the menu.

    Then in the main window click on Sub-server as the new virtual server type.
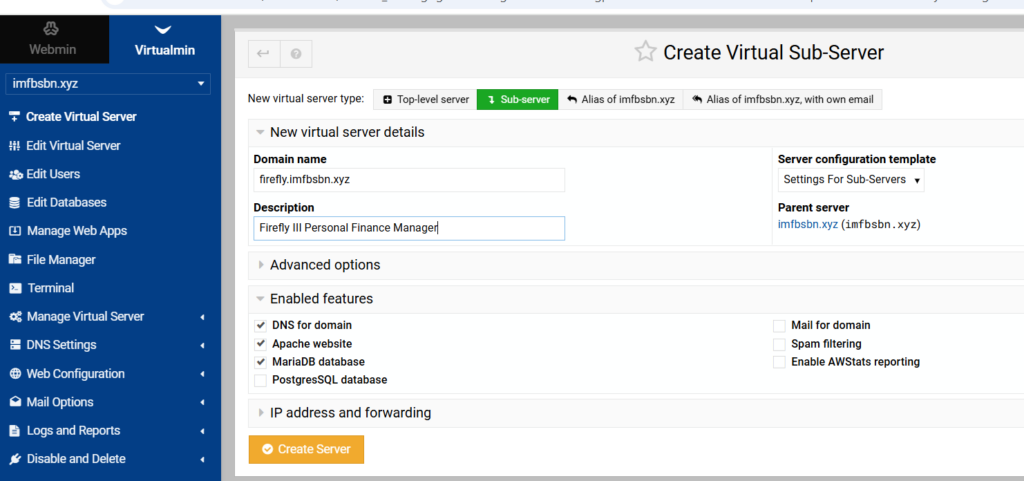
    Enter the sub-domain name. And we won’t need all the features available. So uncheck the boxes for Postgres, mail, spam, & AWS.

    Then go ahead and click the Create Server button.

    While we are here – dealing with this domain – let’s go ahead and add the proxy.

    In the left-hand menu click on “Web Configuration” then click on “Edit Proxy Website”.

    Enable proxying by clicking the appropriate radio button. Enter the proxy to URL as shown above. Then click on save and apply.

    Next are going to create virtual server for the file importer.
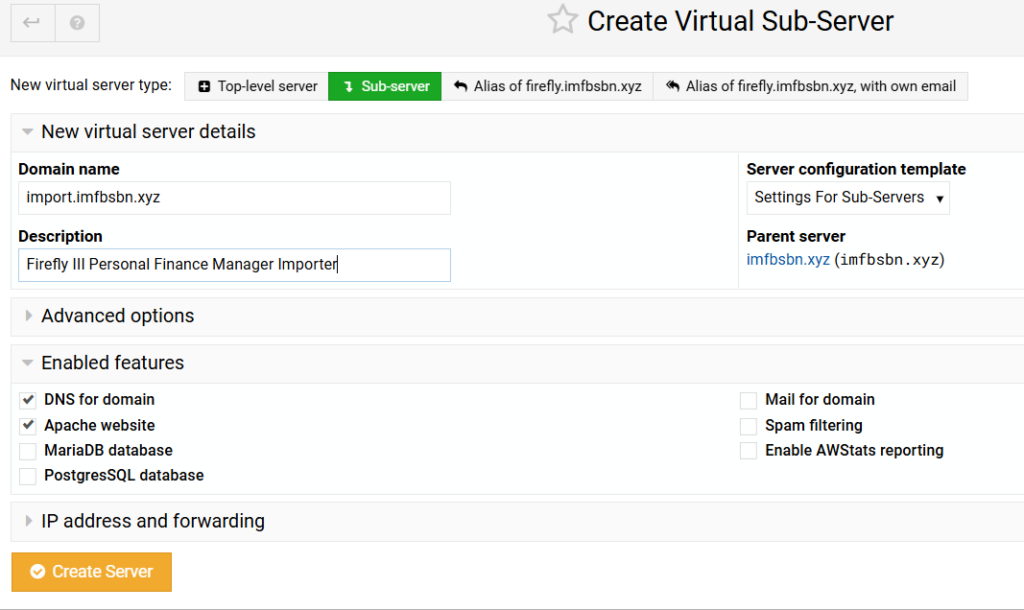
    For this domain we will not be needing a MariaDB. So we can uncheck that box as well. Then create the server.

    Again, we need to set up the reverse proxy for this domain.

    Note that the port number is different for this domain.

    Now when we look at our domain list, we will see the two domains we added as sub-domains.

    A few more things to do within Virtualmin before moving on.

    When we created the firefly.imfbsbn.xyz domain, Virtualmin automatically created a new Maria database called firefly.

    Now we need to create a new MariaDB user and give that user permissions on the firefly database.

    First click on the “Webmin” tab of the left side menu.

    Then click to expand “Servers” & then MariaDB Database Server.
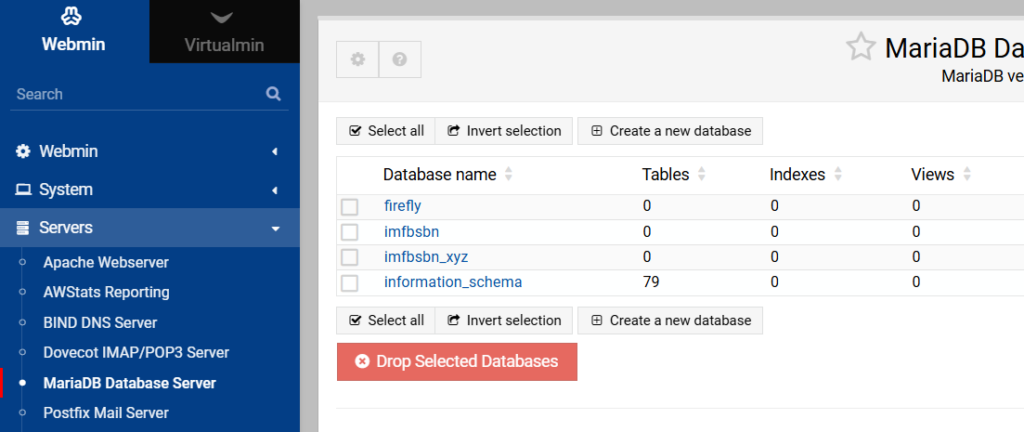
    Here we can see the firefly database already exists.

    On that page click the button labeled “User Permissions”.

    Then click one of the “Create New User” buttons.
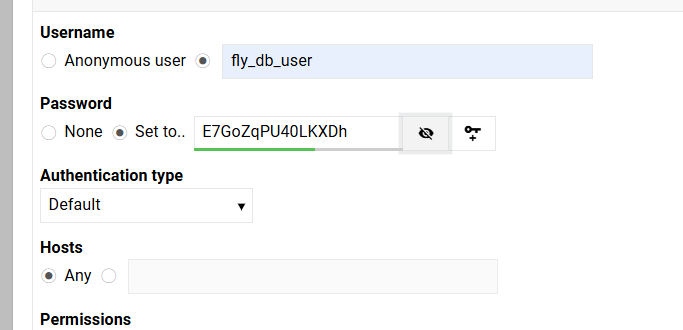
    Create your own username. Be sure to set a robust password. And make sure that Hosts is set to “Any”.

    Go-ahead and create the user.

    Now we have to give that user permissions on the firefly database.

    Within the MariaDB Database module, navigate to “Database Permissions”.
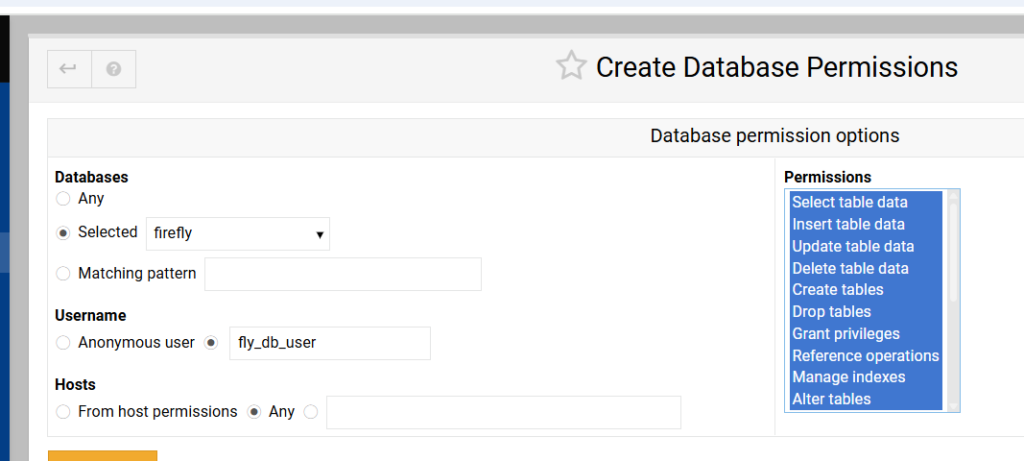
    Choose the correct database. Enter the correct username. Make sure Hosts are Any. And go ahead and select everything in the permissions table.

    Just one more thing to do within the MariaDB Virtualmin module. Click on the button labeled “MariaDB Server Configuration”.
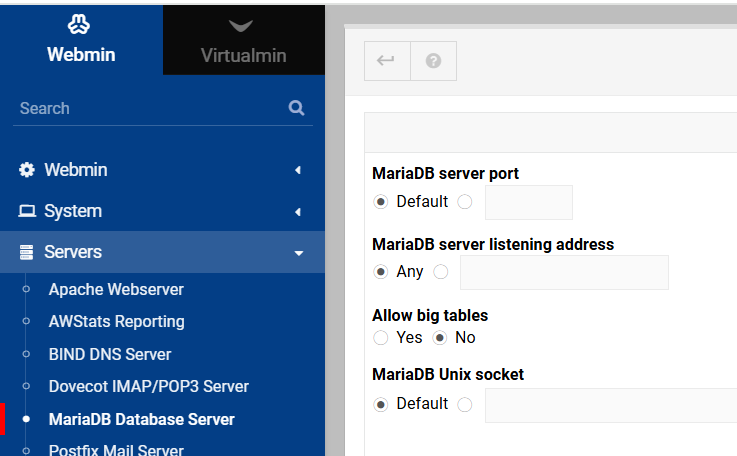
    Make sure the MariaDB server listening address is sent to Any.

    That’s enough within Virtualmin for right now. We will have to come back later and make a few more adjustments, but for now were going to move on.

    Next we’re going to login to our Portainer installation and we are going to create a new stack.

    I started with the docker compose and stack.env files provided in the official documentation. But I did have to make several changes.

    • The official docker compose file calls for running the MariaDB inside the container. This is not an ideal situation while running Virtualmin. Virtualmin is already running MariaDB and will automatically backup the databases tied to virtual servers.
    • The official docker compose file calls for running cron jobs from inside the container. We are going to set up cron jobs from within Virtualmin.
    • As a result of connecting to the native OS database, we have to make some other changes as well.

    Within Portainer click on your installation, then stacks, then the button to create new stack. Give your stack a name.
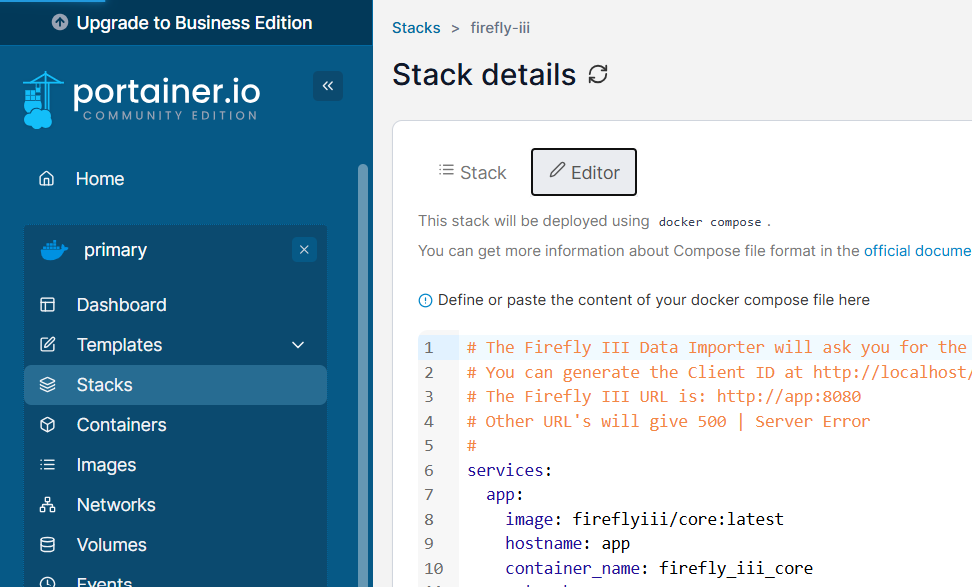
    Here is the modified docker compose file:

    #
    # The Firefly III Data Importer will ask you for the Firefly III URL and a "Client ID".
    # You can generate the Client ID at http://localhost/profile (after registering)
    # The Firefly III URL is: http://app:8080
    #
    # Other URL's will give 500 | Server Error
    #
    services:
      app:
        image: fireflyiii/core:latest
        hostname: app
        container_name: firefly_iii_core
        networks:
          - firefly_iii
        restart: unless-stopped
        volumes:
          - /home/imfbsbn.xyz/domains/firefly.imfbsbn.xyz/upload:/var/www/html/storage/upload
    ###   you will want to modify the line above to match your domain's file location
    ###   the reason to do this is to make sure the firefly uploads get backed up by Virtualmin
        env_file: stack.env
        ports:
          - 8088:8080
      importer:
        image: fireflyiii/data-importer:latest
        hostname: importer
        restart: unless-stopped
        container_name: firefly_iii_importer
        networks:
          - firefly_iii
        ports:
          - 8090:8080
        depends_on:
          - app
        env_file: stack.env
    networks:
      firefly_iii:
        driver: bridge

    Don’t worry about environmental variables yet. Just go-ahead and deploy the container.

    I don’t know why, but I was unable to get Firefly working using any environmental variables without first deploying the container with none.

    Portainer will download the images, create the containers, and start the applications. You should get something like this:

    Take note of the IP address! Within docker the gateways for IP addresses (unless you have made some changes) will always be 0.1. So the gateway for our Firefly stack/containers is going to be 172.20.0.1. You are going to need to know that in just a minute.

    At this point we should be able to check if the domains are correctly forwarding to the right containers.
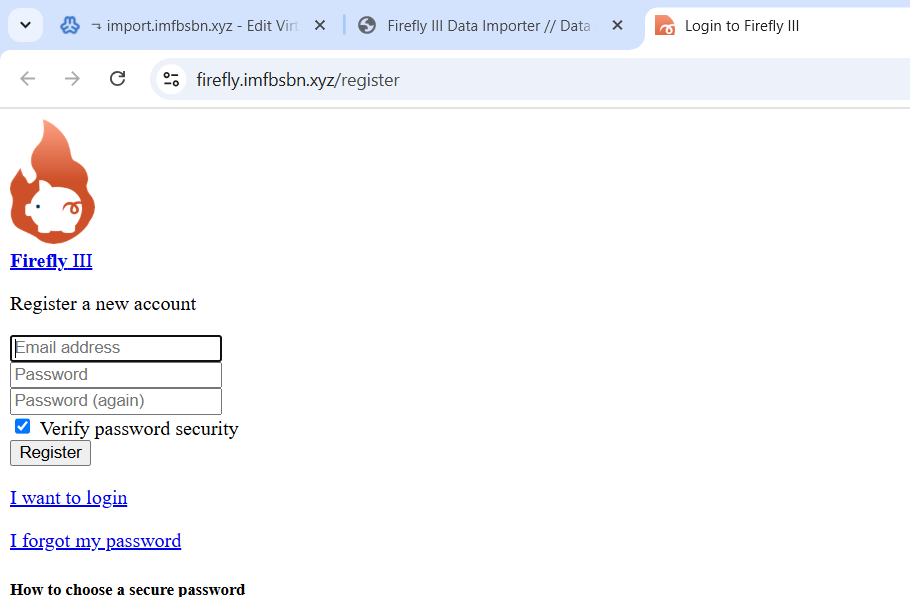
    And…
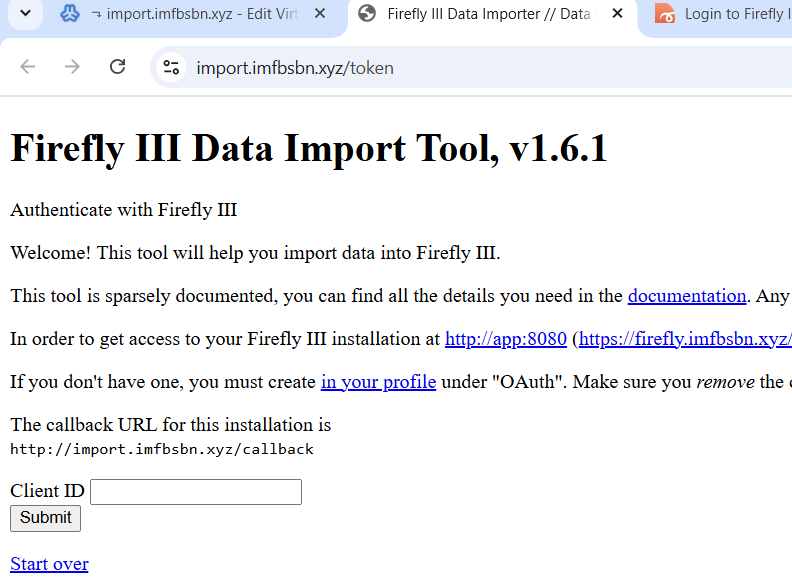
    Now, that’s not what these pages are actually supposed to look like. We will have to make some changes later to the Apache directives. But for right now if you get pages like this everything is working so far.

    Now go back to Portainer, and into the Firefly stack. Click on editor and scroll down to “Environmental Variables.”

    This here is your stack.env file (if you switch the environmental variables into “advanced mode” you can cut-and-paste all of these at once.)

    APP_ENV=production
    APP_DEBUG=false
    SITE_OWNER=mail@example.com
    APP_KEY=sUHKRxr3g8BpTW2hkP6X4bMFDGeVZcav  ##you should change this to your own unique 32 character key
    DEFAULT_LANGUAGE=en_US
    DEFAULT_LOCALE=equal
    TZ=America/Chicago  ## modify this as necessary
    TRUSTED_PROXIES=**  ## this does not appear in the official documentation file but it is necessary
    LOG_CHANNEL=stack
    APP_LOG_LEVEL=notice
    AUDIT_LOG_LEVEL=emergency
    DB_CONNECTION=mysql
    DB_HOST=172.23.0.1  ##make sure you enter the GATEWAY IP address of the containers/stack
    DB_PORT=3306
    DB_DATABASE=firefly  ## make sure this line, and the next two lines, match what you did in Virtualmin
    DB_USERNAME=fly_db_user
    DB_PASSWORD=E7GoZqPU40LKXDh
    MYSQL_USE_SSL=false
    MYSQL_SSL_VERIFY_SERVER_CERT=true
    MYSQL_SSL_CAPATH=/etc/ssl/certs/
    CACHE_DRIVER=file
    SESSION_DRIVER=file
    COOKIE_PATH="/"
    COOKIE_DOMAIN=
    COOKIE_SECURE=false
    COOKIE_SAMESITE=lax
    MAIL_MAILER=log
    MAIL_HOST=null
    MAIL_PORT=2525
    MAIL_FROM=changeme@example.com
    MAIL_USERNAME=null
    MAIL_PASSWORD=null
    MAIL_ENCRYPTION=null
    MAIL_SENDMAIL_COMMAND=
    SEND_ERROR_MESSAGE=true
    SEND_REPORT_JOURNALS=true
    ENABLE_EXTERNAL_MAP=false
    ENABLE_EXCHANGE_RATES=false
    ENABLE_EXTERNAL_RATES=false
    MAP_DEFAULT_LAT=51.983333
    MAP_DEFAULT_LONG=5.916667
    MAP_DEFAULT_ZOOM=6
    AUTHENTICATION_GUARD=web
    AUTHENTICATION_GUARD_HEADER=REMOTE_USER
    AUTHENTICATION_GUARD_EMAIL=
    CUSTOM_LOGOUT_URL=
    DISABLE_FRAME_HEADER=false
    DISABLE_CSP_HEADER=false
    ALLOW_WEBHOOKS=false
    STATIC_CRON_TOKEN=
    DKR_BUILD_LOCALE=false
    DKR_CHECK_SQLITE=true
    APP_NAME=FireflyIII
    BROADCAST_DRIVER=log
    QUEUE_DRIVER=sync
    CACHE_PREFIX=firefly
    USE_RUNNING_BALANCE=false
    FIREFLY_III_LAYOUT=v1
    QUERY_PARSER_IMPLEMENTATION=legacy
    APP_URL=https://firefly.imfbsbn.xyz  ## change this to reflect your domain, note the https protocol
    FIREFLY_III_URL=http://app:8080
    VANITY_URL=https://firefly.imfbsbn.xyz  ## again
    FIREFLY_III_ACCESS_TOKEN=
    FIREFLY_III_CLIENT_ID=
    USE_CACHE=true
    IGNORE_DUPLICATE_ERRORS=false
    IGNORE_NOT_FOUND_TRANSACTIONS=false
    CAN_POST_AUTOIMPORT=false
    CAN_POST_FILES=false
    IMPORT_DIR_ALLOWLIST=
    FALLBACK_IN_DIR=false
    VERIFY_TLS_SECURITY=true
    JSON_CONFIGURATION_DIR=
    CONNECTION_TIMEOUT=31.41
    LOG_RETURN_JSON=false
    LOG_LEVEL=debug
    ENABLE_MAIL_REPORT=false
    EXPECT_SECURE_URL=false
    MAIL_DESTINATION=noreply@example.com
    MAIL_FROM_ADDRESS=noreply@example.com
    POSTMARK_TOKEN=
    QUEUE_CONNECTION=sync
    SESSION_LIFETIME=120
    IS_EXTERNAL=false
    ASSET_URL=
    MYSQL_RANDOM_ROOT_PASSWORD=yes
    MYSQL_USER=fly_db_user  ## again – make sure these lines match what you have in Virtualmin
    MYSQL_PASSWORD=E7GoZqPU40LKXDh
    MYSQL_DATABASE=firefly
    USE_PROXIES=127.0.0.1  ## this too is not included in the official documentation but needs to be added

    Notice that the database credentials appear twice.

    In order for our Firefly container to connect to our MariaDB running natively on the server, we need to point the application to the network gateway for these containers. In case you missed it above, within Portainer you can click on Networks and it will show you the IPv4 Gateway. In this case it is 172.20.0.1.

    Delete everything after the ##’s and re-deploy the stack.

    This would be a good time to check the container logs and look for errors. If everything went well we’re almost done.

    Head back over into Virtualmin.

    We need to edit the Apache directives for the sub-domains we created. There are (at least) two different ways to do this within Virtualmin.

    The first is to select the appropriate domain within Virtualmin, then go to “Web Configuration”, and click on “Configure SSL Website”.

    The other way is to start with Webmin, then click to expand “Servers”, click on “Apache Webserver”, and click on the appropriate virtual server.

    However you get there, click on the “Edit Directives” block.

    Change whatever you have within that window so that it looks more like below.

    SuexecUserGroup #1007 #1007
    ServerName firefly.imfbsbn.xyz
    DocumentRoot /home/imfbsbn.xyz/domains/firefly.imfbsbn.xyz/public_html
    ErrorLog /var/log/virtualmin/firefly.imfbsbn.xyz_error_log
    CustomLog /var/log/virtualmin/firefly.imfbsbn.xyz_access_log combined
    SSLEngine on
    SSLCertificateFile /etc/ssl/virtualmin/17444589333674742/ssl.cert
    SSLCertificateKeyFile /etc/ssl/virtualmin/17444589333674742/ssl.key
    SSLProtocol all -SSLv2 -SSLv3 -TLSv1 -TLSv1.1
    SSLCACertificateFile /etc/ssl/virtualmin/17444589333674742/ssl.ca
    ### the lines above should all be in there already – KEEP THEM!
    ### Actually proxy the traffic and really the only important part ###
    AllowEncodedSlashes On
    RewriteEngine On
    SetEnvIf Cookie "(^|;\ *)csrftoken=([^;\ ]+)" csrftoken=$2
    RequestHeader set  X-CSRFToken "%{csrftoken}e"
    ### Proxy Websockets Section 1 (works for me) ###
    RewriteCond %{HTTP:UPGRADE} ^WebSocket$ [NC]
    RewriteCond %{HTTP:CONNECTION} Upgrade$ [NC]
    RewriteRule ^/?(.*) "ws://127.0.0.1:8088/$1" [P,L]
    ### Proxy everything else ###
    ProxyPass / http://127.0.0.1:8088/ connectiontimeout=6 timeout=60
    ProxyPassReverse / http://127.0.0.1:8088/
    ProxyPreserveHost On
    ProxyRequests Off
    RequestHeader set X-Forwarded-Proto expr=%{REQUEST_SCHEME}
    RequestHeader set X-Forwarded-SSL expr=%{HTTPS}

    After you’ve made your changes, click on Save and Close.

    When Virtualmin tries to apply the changes you may get an error like this.
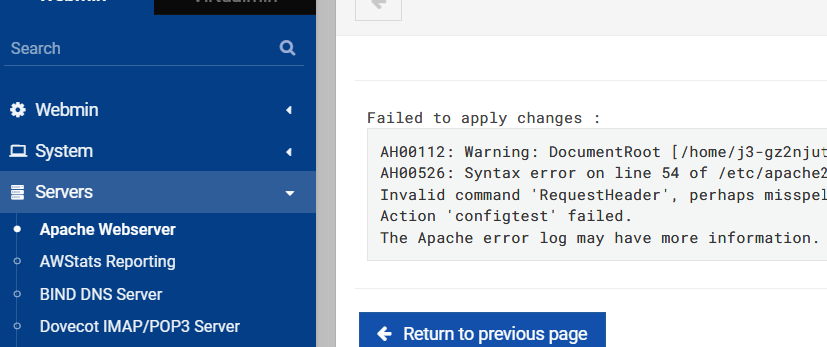
    To correct this, from the Webmin menu select Servers then Apache Webserver.

    Click on Global Configuration tab. Then click the button marked “Configure Apache Modules”.
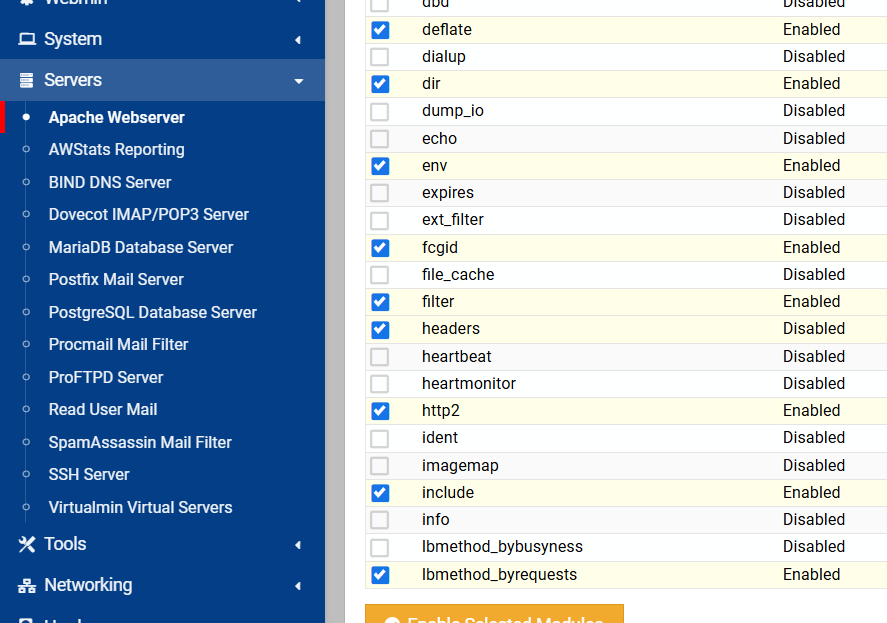
    Select the headers checkbox and click the Enable Selected Modules button.

    *** On the next page that loads, you have to click on Apply Changes. ***

    Now you have to make the same changes to the Apache directives for the “import” domain name. You will do that exactly the same way as you did above. Just pay special attention to the fact that the domain name is a little different and that the port number is now 8090.

    Once you have made those changes, visit the URLs, and the pages should load correctly (they will look different than they did before, more professional.)

    That’s it! You have successfully installed Firefly III. And if you have Virtualmin backing up your system on a schedule, Firefly will get back-up automatically.

    – – – – –

    Last thing to do is to set up the cron job.

    Head into Portainer, Stacks, Firefly stack, & editor. Pop open Environmental Variables and enter a 32 (exactly 32) character key in the STATIC_CRON_TOKEN field.

    Now you have to add that token to the end of this URL like so:

    https://firefly.imfbsbn.xyz/api/v1/cron/z7xGE4y5SsM8jPWkYgZFQ62vBRnCUTtr

    Within Virtualmin, switch over to Webmin. Then click on Servers and then Scheduled Cron Jobs.

    Now you want to click on Manually Edit Cron Jobs.
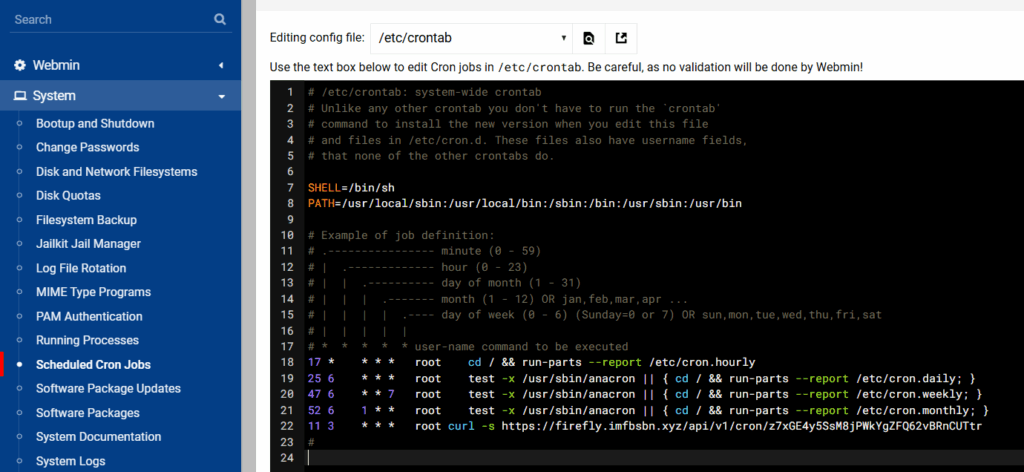
    Add the line below so that the URL will be loaded every day at 3:11.

    11 3    * * *   root curl -s https://firefly.imfbsbn.xyz/api/v1/cron/z7xGE4y5SsM8jPWkYgZFQ62vBRnCUTtr

    Save and close. And you’re done.

    – – – – –

    One more thing before you go. Connecting the import module to the core is not well described in the official documentation. So let’s walk through that really quick.

    Visit the main page and go through the registration process. Go ahead and create an account, and go through the tips.

    When that’s all done go to the address bar and visit the /profile page.

    On that page click on the OAuth tab, and then create a new OAuth client.
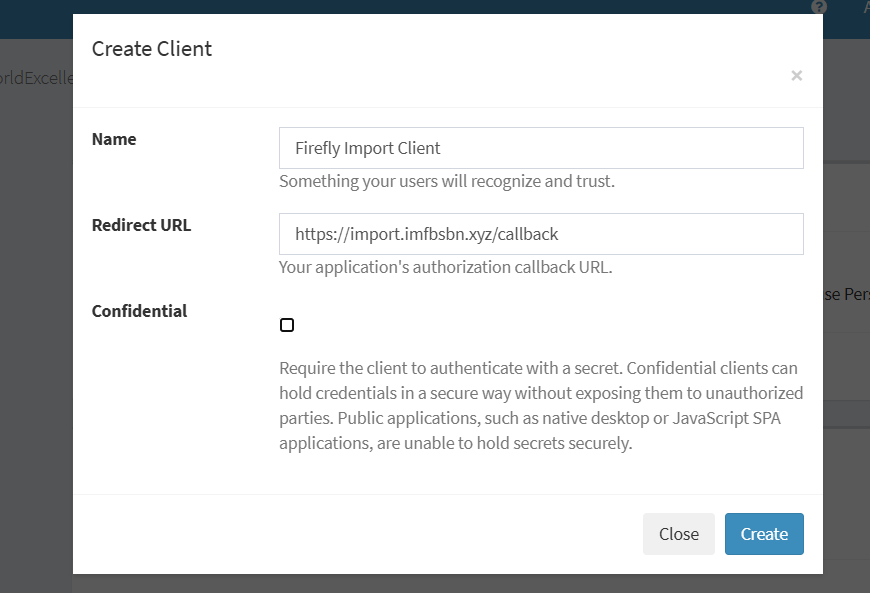
    Go-ahead and click on the create button.

    The system will then give you a page where there is a list of clients. You need the number under Client ID.

    Now go to the URL for the file importer. Enter the number for the Client ID you just located.

    First are going to click the submit button.

    And on the next page you want to click on the authorize button.

    Congratulations! Now you can upload files into your Firefly III installation.

    [/et_pb_text][/et_pb_column][/et_pb_row][/et_pb_section]
  • Virtualmin, PostgreSQL & Containers

    Let’s start with the why.

    The reason you want to use databases (either MySQL or PostgreSQL) which are part of a Virtualmin domain is so they will automatically be included in any VM backups of that domain. That is, when a new domain is added to Virtualmin and either (or both) of the database boxes are checked, VM will automatically create the necessary database(s) and include include them in any backups (assuming the settings are correct.)

    Consider it this way… You want to run Application_A and Application_B inside docker containers. However, each requires MySQL. So you have the option of:

    • Having the server run 3 instances of MySQL: one native to the OS, one within the Application_A container, and one within the Application_B container, or
    • Having the server run 1 instance of MySQL. Only the one native to the OS is required and Application_A & Application_B connect to it.

    Running multiple instances of the same application is not very efficient. Further, backing up databases inside containers is… Well… Complicated.

    Backing up databases tied to Virtualmin domains is incredibly simple and straightforward.

    So let’s have at it.

    Before going any further this tutorial assumes:

    • Virtualmin has been correctly loaded on your system,
    • Docker has been installed on your system,
    • Portainer has been installed on your system, and
    • PostgreSQL and its Virtualmin module have been properly installed.

    If anyone is curious I’m working on the server hosted at Server Cheap (that’s not an endorsement, I have zero relationship with those people.)

    First – We Add the Domain to Virtualmin

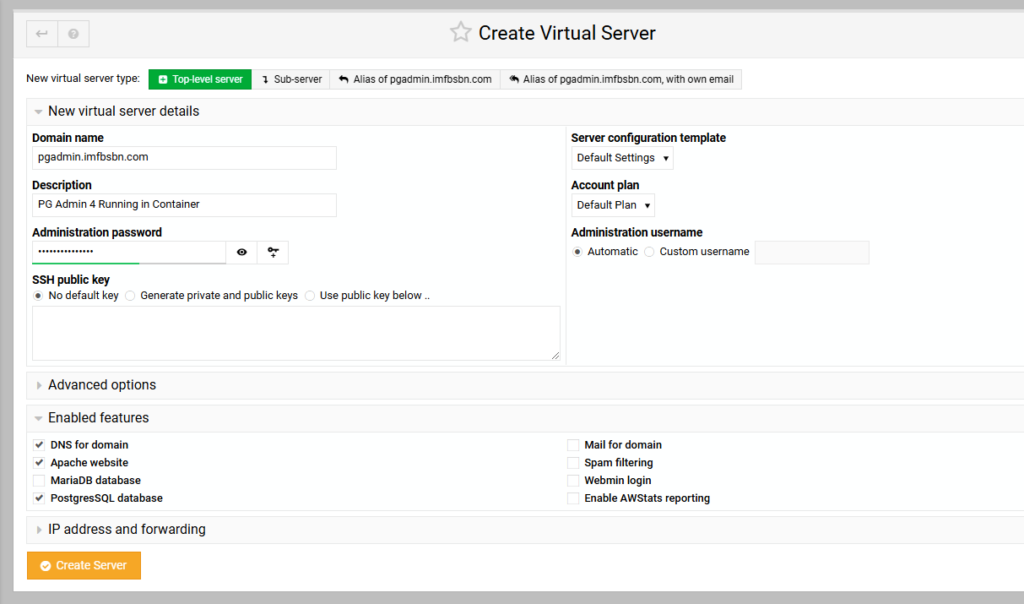
    Here we are adding the domain name “pgadmin.imfbsbn.com”.

    Because the administration username is going to be set automatically it’s going to be “pgadmin”.

    In terms of features, we only need DNS, Apache, and PostgresSQL. Those are the only boxes that need to be checked.

    Go ahead and create the server.

    Second – We Create the Reverse Proxy To the Container

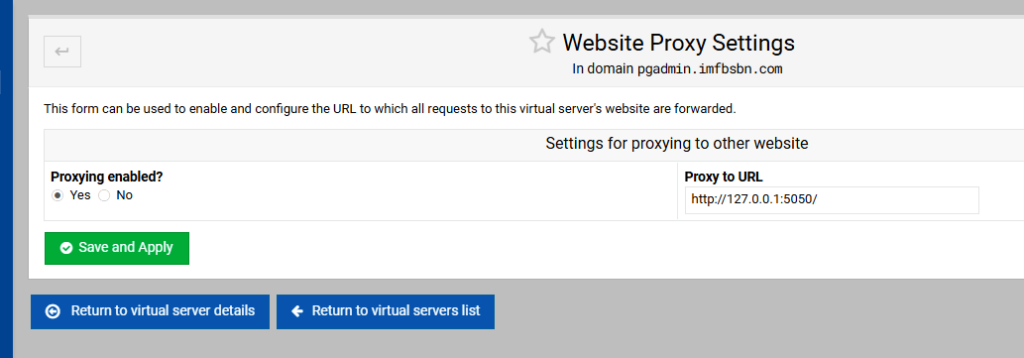
    Now go to Website Configuration – – Edit Proxy Website and make the changes necessary to set up the reverse proxy to the container.

    Third – We get Our Application Running in the Container

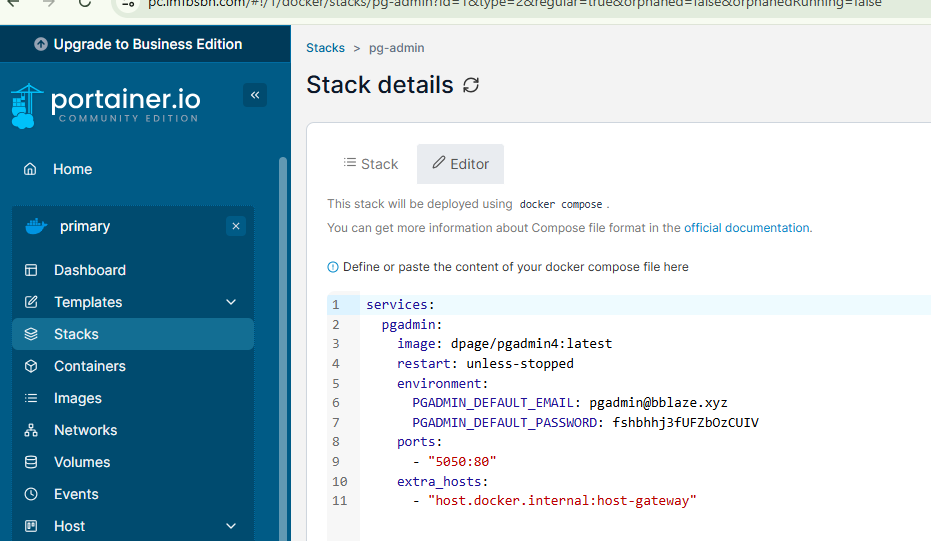
    Next were going to log into Portainer and create a new stack.

    Here’s the code you need to enter in the stack:

    services: 
      pgadmin:
        image: dpage/pgadmin4:latest
        restart: unless-stopped
        environment:
          PGADMIN_DEFAULT_EMAIL: pgadmin@bblaze.xyz
          PGADMIN_DEFAULT_PASSWORD: fshbhhj3fUFZbUIV
        ports:
          - "5050:80"
        extra_hosts:
          - "host.docker.internal:host-gateway"

    Then go ahead and deploy the stack.

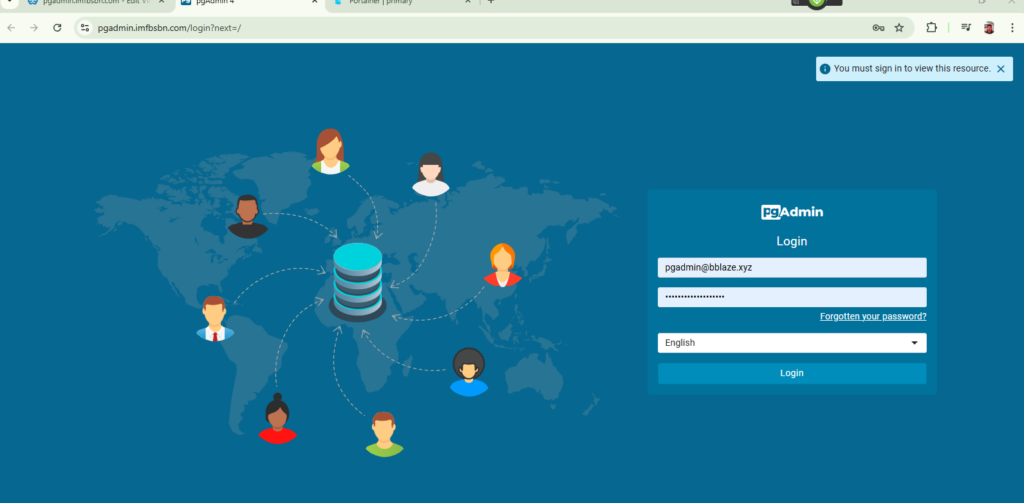
    Once the container has loaded and is running you should be able to visit the domain name and see the login page for PG Admin 4:

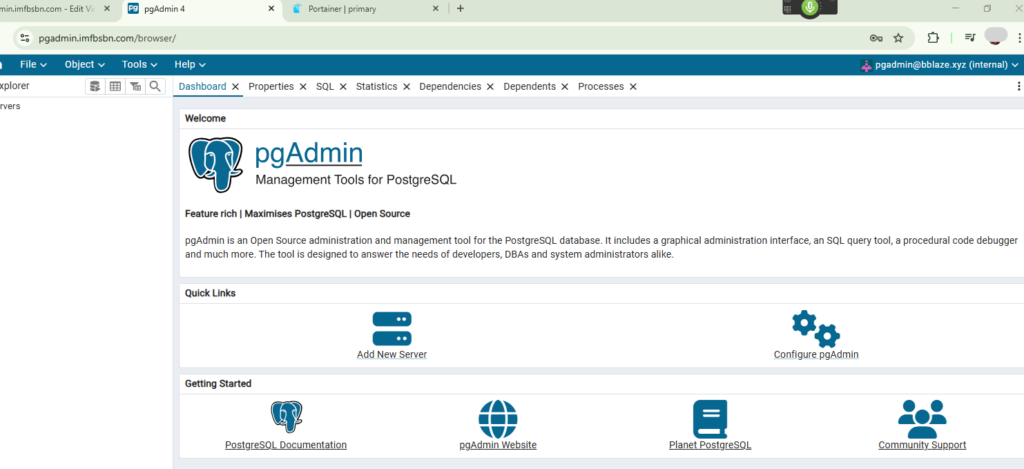
    And if you enter the credentials from the stack you should be allowed to login:

    Fourth – Configure PostgresSQL To Allow Host Connections

    We have to make a few changes to a couple of files before the PostgresSQL server will allow our docker container to connect.

    Let’s do the easiest first.

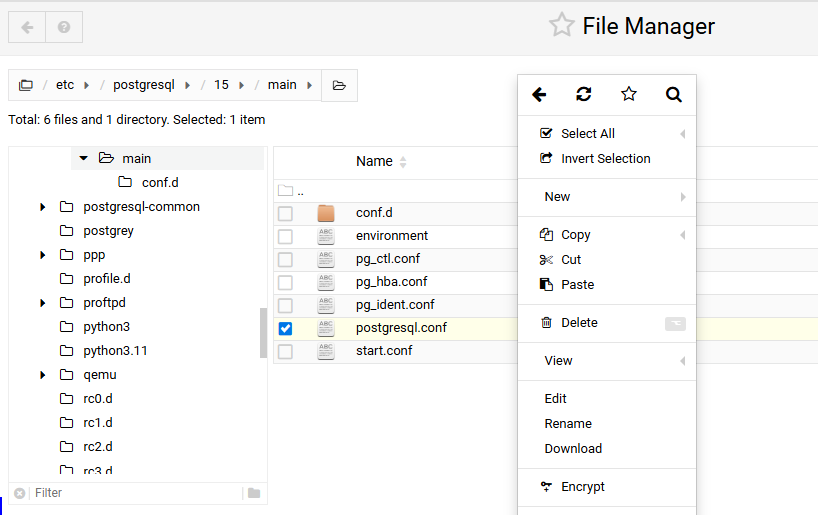
    On our Debian system, we can use the Virtualmin file manager to navigate to /etc/postgresql/15/main…

    NOTE: Because our domain is set up as a proxy, Virtualmin might not show us the file manager has a menu option. To use the file manager you may have to select an alternate domain hosted on the system or use Webmin.

    Now you can right-click on the file postgresql.conf and then click edit from the pop-up window.

    Virtualmin will pop open a window where you can edit this file.

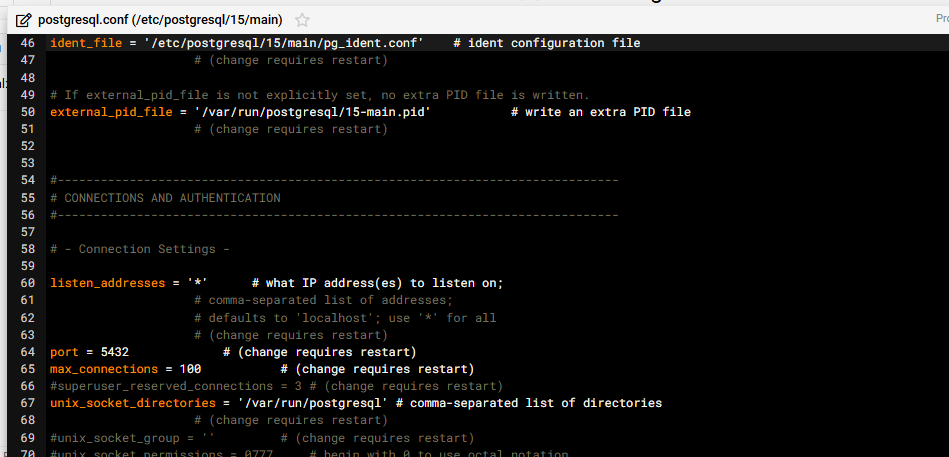
    Scroll down a couple of screens until you get to CONNECTIONS AND AUTHENTICATION.

    In that section you will need to remove the # in front of listen_addresses.

    You also need to delete ‘localhost’ and put in ‘*’ as shown below.

    Save the file by clicking on the diskette at the top right of the pop-up window.

    Now comes the tricky part.

    Before continuing, we need to gather and confirm a little bit of information.

    First we need to find out the IP address of our docker container running PGAdmin4. Thankfully, no commands are necessary. Portainer will simply show us the IP on the container page.

    We can see that our PGAdmin container has an IP address of 172.19.0.2. We’re gonna need to know that in just a little bit.

    Next we are going to confirm – in Virtualmin – our username and database name for Postgres.

    For this we need to navigate over to the “Webmin” side of Virtualmin. To do that either press Alt-W or click on the Webmin tab on the top left side of the menu.

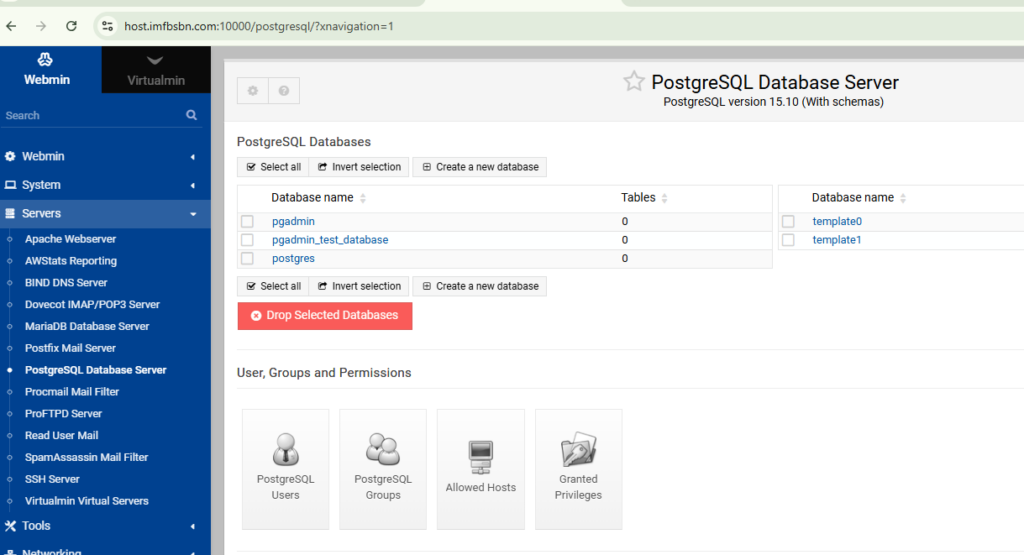
    From there navigate to Servers – – Postgres Database Server:

    On this screen (shown above) we need to confirm that Virtualmin has created a database called “pgadmin”.

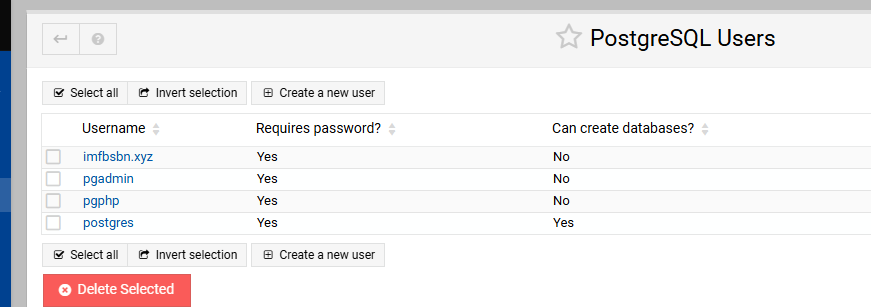
    Now we are ready to click on the PostgreSQL Users button.

    On the users page we want to confirm that Virtualmin has created a user called “pgadmin”.

    Go ahead and click on the user pgadmin.

    Here you want to ABSOLUTELY CHANGE THE PASSWORD and write it down. I’m not exactly sure what is going on here behind-the-scenes. But it appears that Postgres users are not initially assigned a password when created. So setting a password here is absolutely essential for continuing.

    Now that we have confirmed our IP address, database name, username, and password, we are ready to proceed to the next step.

    Click the blue button that says Return to Database List.

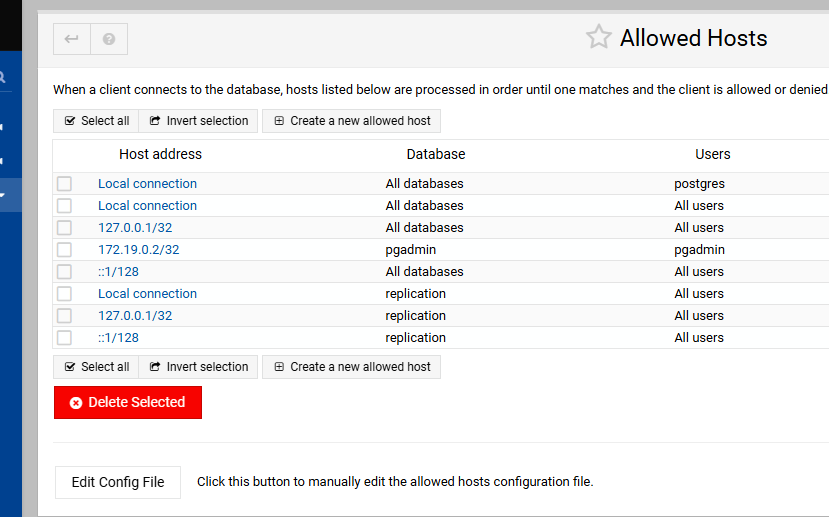
    Click the Virtualmin button “Allowed Hosts”.

    At the bottom left, click on that white button that reads Edit Config File.

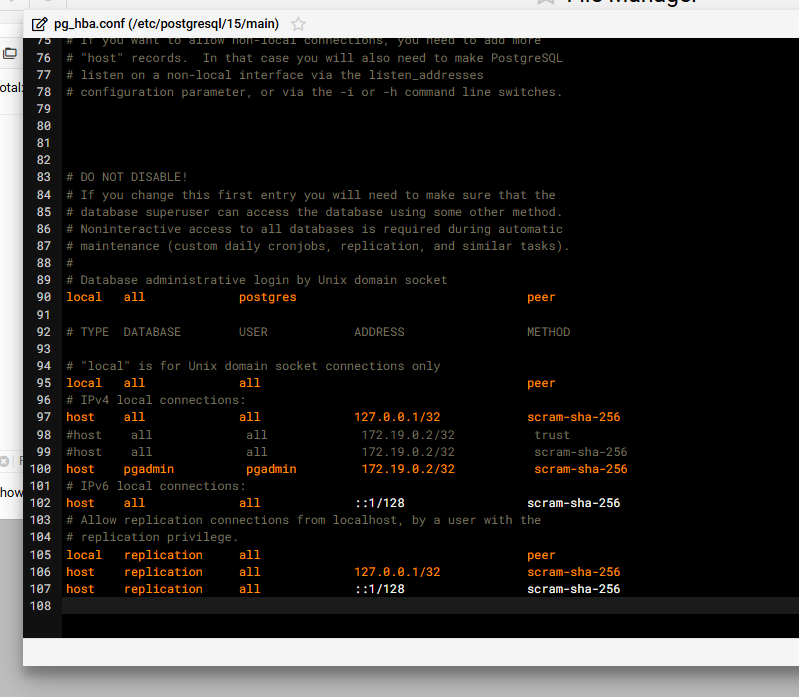
    Scroll down to the end of that file. You want to make it look something like this:

    The line you want to add the look like this:

    host    pgadmin          pgadmin         172.19.0.2/32           scram-sha-256

    This is telling PostgeSQL to allow access to the pgadmin database by the pgadmin user from IP 172.19.0.2 using sha-256 password encryption.

    NOTE: if you get stuck you may want to test with lines #98/99 which I have commented out above.

    After you have made the changes, save the file.

    Again, click the blue “Return to Database List” button.

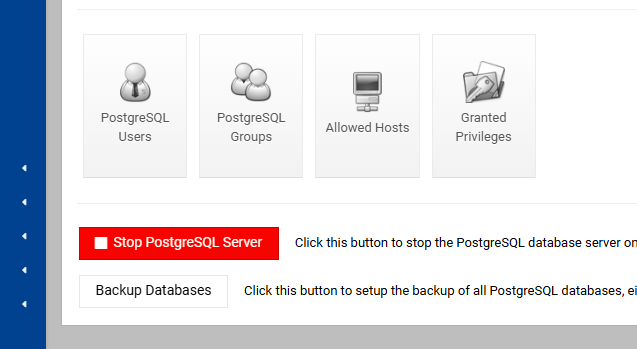
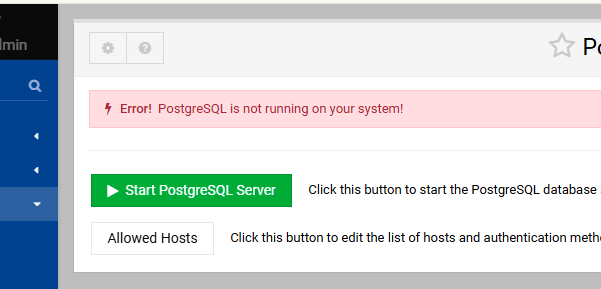
    Restart the PostgreSQL server by using the “Stop” and “Start” buttons within Virtualmin.

    Then…

    Return to the browser tab where you have PG Admin 4 open.

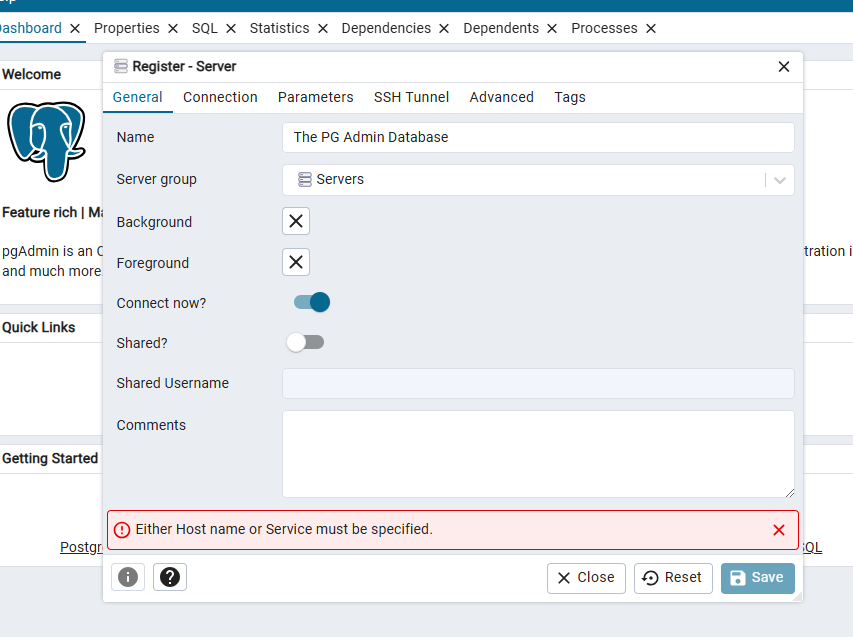
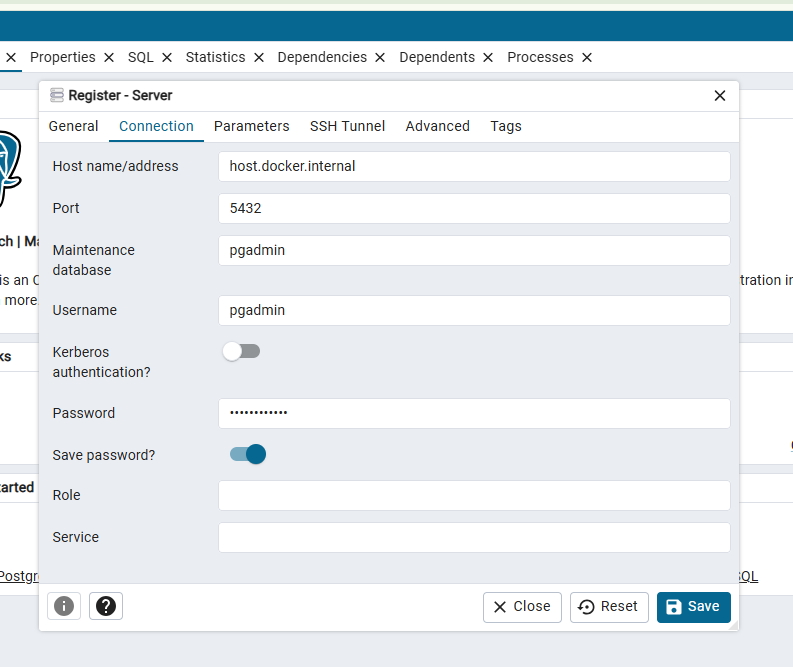
    Click on the button that says “Add New Server”

    Enter whatever you want for the name.

    Then click over to the connections tab:

    Enter data into the fields like above.

    If everything worked as it should, you should see something like this:

    Congratulations!

    You just connected a docker container to the PostgreSQL server hosted natively on the OS.

  • Upgrading Portainer

    Real quick. I was getting ready to write the next post about building a Matrix/Synapse & Element server and I realized I had a server where Portainer was out of date.

    This happens. I want to show you how easy it is to upgrade when necessary.

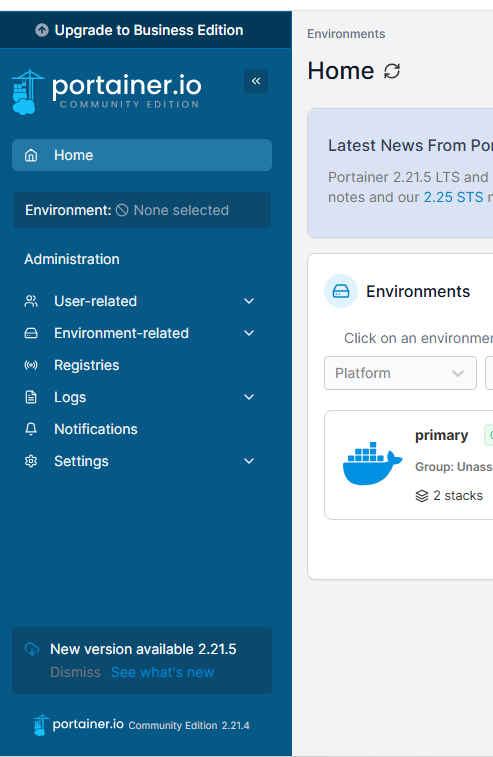
    This is how you know an upgrade is available:

    Worry not! The process to take care of this is super easy.

    First – login to the server as root (or as a user with sudo rights.)

    Next – navigate to the directory where you have the Portainer docker compose file.

    • If you’re following with the Ubuntu server I created at Digital Ocean that will be the /home/portuser directory.
    • On this particular server it happens to be the /home/admin.2 directory.

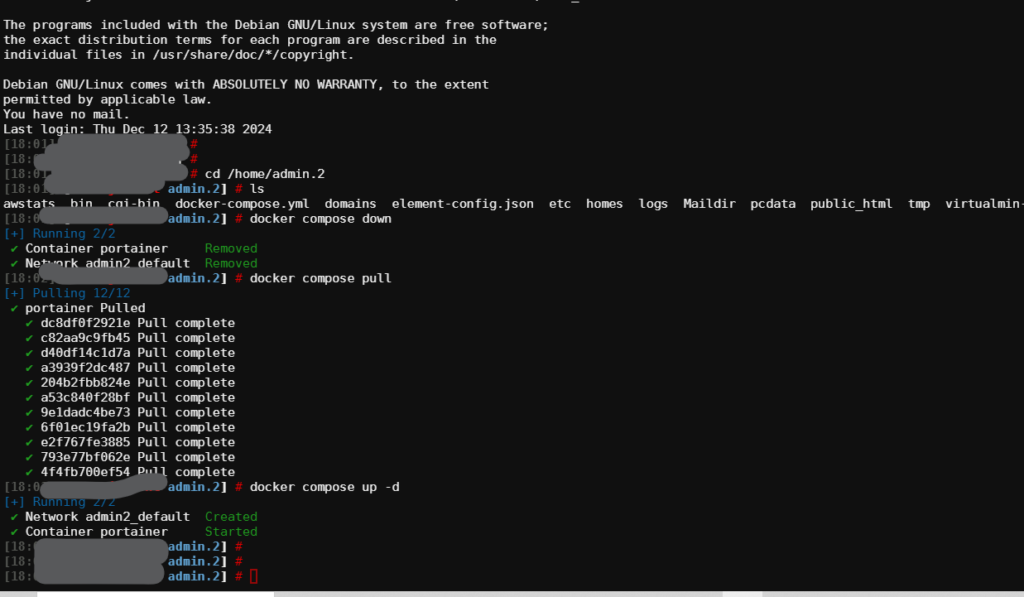
    Run the following three commands:

    docker compose down
    docker compose pull
    docker compose up -d

    That’s it. Seriously.

    In this particular server it looks like this:

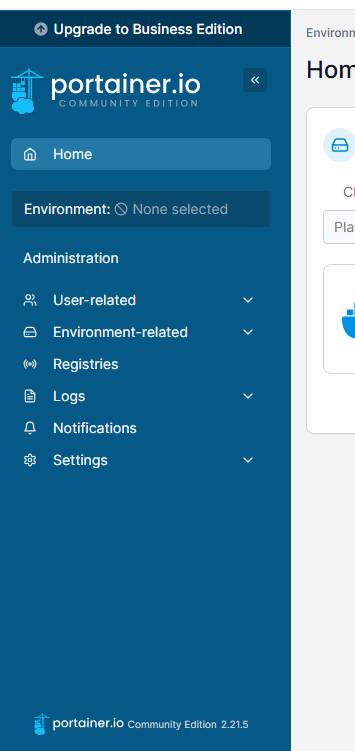
    If you reload the Portainer page you will see it has been updated to the most recent version.

    That’s it. Nice work.

  • Installing Nextcloud AIO

    This is going to be the easiest complex thing you have ever done.

    Nextcloud is kinda like Dropbox meets Zoom and Google Office. You should probably check out the official website.

    Nextcloud AIO is now (wasn’t until recently) the official method to install the open-source, free, community version of Nextcloud. Installing Nextcloud AIO has several advantages over installing only Nextcloud. The AIO version includes automated installation, updates, & backups. It also comes with STUN & TURN servers, and the “high-performance backend” for Talk (Nextcloud’s version of Zoom.)

    The bottom line is that Virtualmin + Docker + Portainer + Nextcloud AIO = Awesomeness!

    So let’s have at it.

    As with all of these examples, the first thing we need is a fully qualified domain name, a URL, where we are going to host Nextcloud. In this example were going to use: nextcloud.imfbsbn.com.

    If you read the previous post about how I setup Virtualmin, you will know that I do not use the DNS features within VM. Just so were clear, VM provides DNS services beautifully. My reasons for not using VM’s DNS has nothing to do with VM. My reasoning is that my domain registrar – a multi-multimillion dollar organization – can provide DNS more reliably than the VPS server I rent for $12/mo.

    So here you have a choice:

    • If VM is hosting your DNS – if you followed the official setup instructions – then all you have to do is add the domain to VM.
    • If you’re like me, and VM is NOT hosting your DNS, then you have to create your DNS record at your domain registrar.
      This is me. So this is what I’m going to do first.

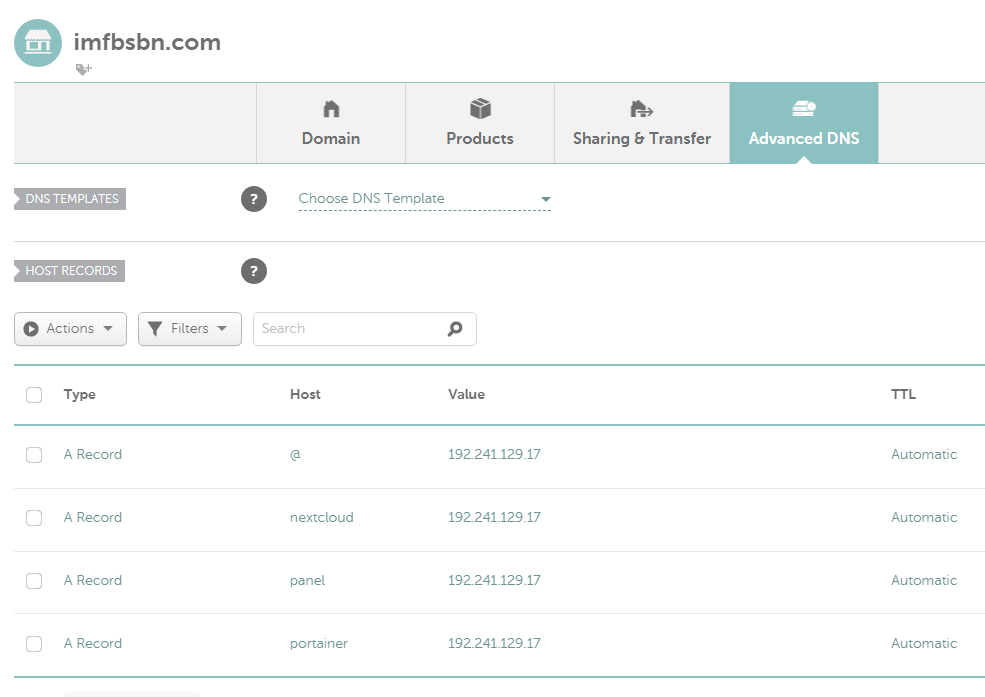
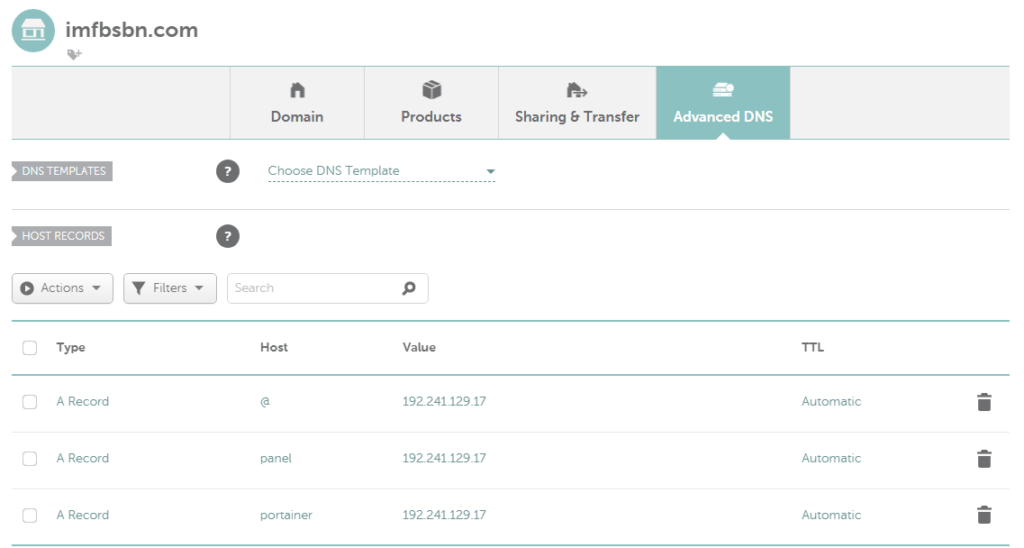
    I’m going to create the Nextcloud DNS record which looks like this:

    Again, this is what it looks like at Namecheap. Things at your registrar may appear different. Also, you can see the records I’ve created in previous projects.

    Next, we need to add the domain name to Virtualmin and set up the reverse proxy. Virtualmin makes this super easy.

    Log into the Virtualmin panel,

    Near the top left of the menu, click on “Create Virtual Server”.

    Quick note on “top-Level” & “Sub-Servers”

    • Top-Level Servers | You can think of these like an account. If you and three friends each own five domains and you wanted to share a server the root account would create four “Top-Level” servers; one for each friend. Each person would be able to login to Virtualmin and be the administrator for their account and whatever “Sub- Servers” (a.k.a. domains) they wish to add.
    • Because I’m the only “admin” with access to my server, I’m always logging in as root. I want to have access to all of the domains hosted on the server at all times. I don’t want to have to log out, and login as a different user to make changes to any particular domain. Therefore I generally add all domains to my server as “Top-Level Servers.”

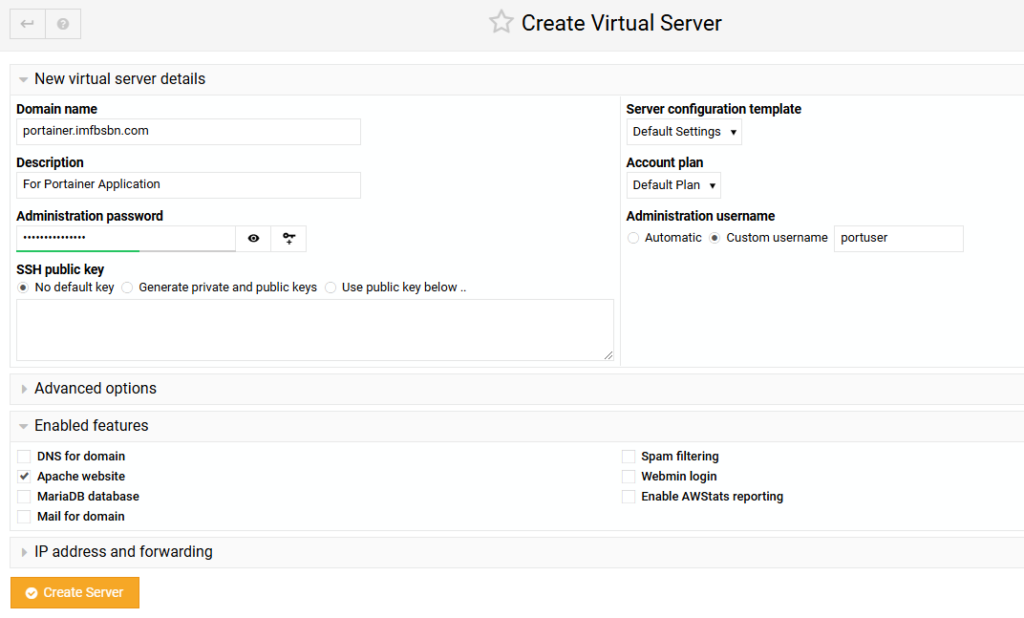
    Just like we added the domain for portainer, we will add this domain for nextcloud.

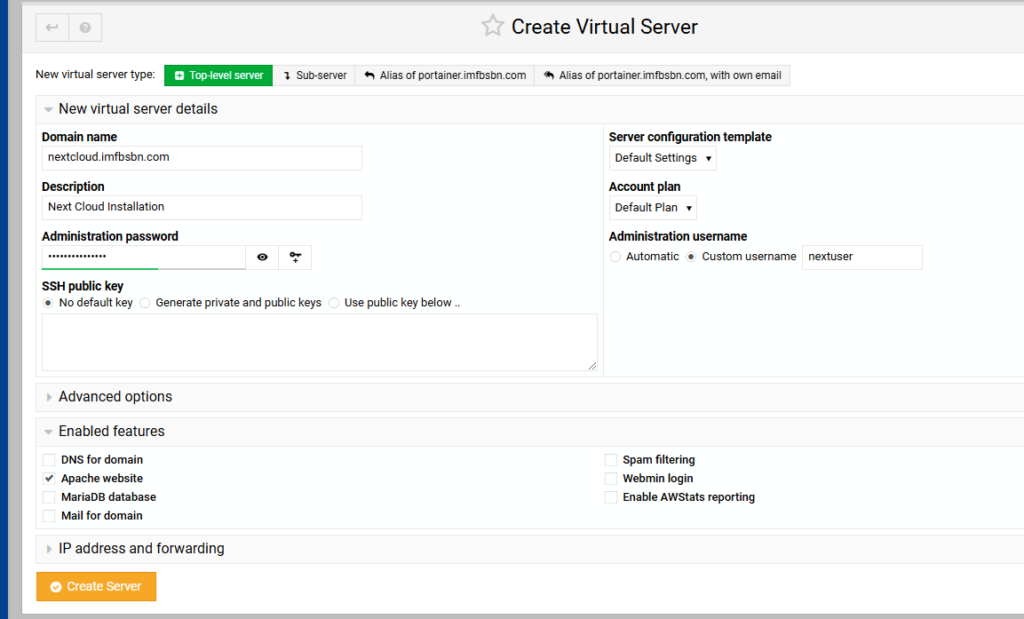
    For domain name we will enter our fully qualified domain name. Description can be anything you want.

    As for the administration password, I just clicked on the little key with the + sign and VM inserted a password for me. I didn’t write it down because I’m the only user of the system and I will always be logging in as root. In fact, I don’t need to write down either the username or the password. We will never use them.

    Just like before, a few changes to the default settings:

    • For the administration username I prefer to use something custom over the automatic feature.
    • I unchecked the boxes for DNS, MariaDB, Mail, Spam, Webmin, & AWStats because this domain will not use any of those features.
    • This domain WILL REQUIRE Apache (as a reverse proxy.) So leave that box checked.

    When you’re all set click the orange Create Server button.

    Virtualmin will work its magic adding the domain to the server. Depending on your hardware the process might take 1-2 minutes.

    When it’s done, click on the blue button at the bottom that says Return to Server Details.

    Before we leave the Virtualmin panel, we’re going to set up the proxy forwarding (so we don’t have to come back later.)

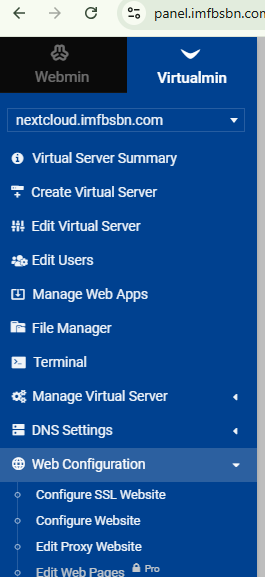
    Confirm VM is ready to modify the correct domain. It should be listed at the top of the left menubar.

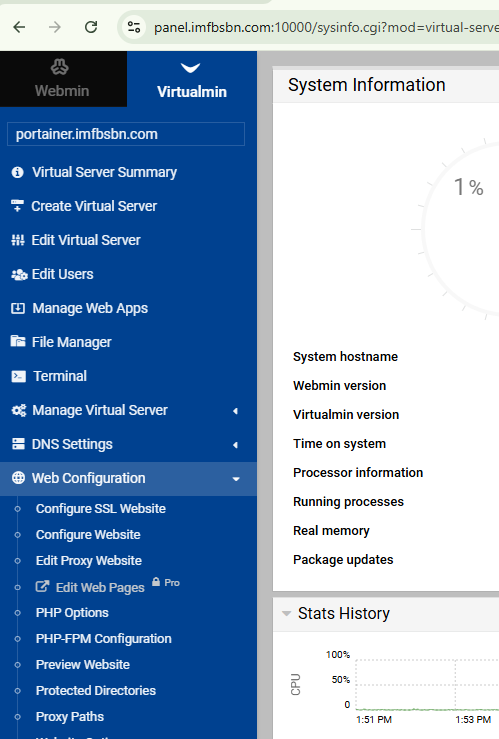
    First click on Web Configuration. Then click on Edit Proxy Website.

    Click on the “Yes” radio button to enable proxying.

    Inside the Proxy to URL box enter: http://127.0.0.1:11100/

    Click on Save and Apply. And we have done everything we need to do inside Virtualmin. 

    Assuming you have installed Portainer – as shown in the previous post – you don’t even need to access the CLI in order to complete the installation.

    Instead, log into Portainer, click on the “primary” installation, and then click on “stacks”.

    Over near the top right, click on the Add Stack button.

    Give your stack a name. Be aware and must meet Linux standards for usernames. The system will bark at you if it’s unhappy.

    The “web editor” is selected by default. That’s what were going to use.

    Then you’re going to copy and paste the following code into the window.

    services:
      nextcloud-aio-mastercontainer:
        image: nextcloud/all-in-one:latest
        init: true
        restart: always
        container_name: nextcloud-aio-mastercontainer # This line is not allowed to be changed as otherwise AIO will not work correctly
        volumes:
          - nextcloud_aio_mastercontainer:/mnt/docker-aio-config # This line is not allowed to be changed as otherwise the built-in backup solution will not work
          - /var/run/docker.sock:/var/run/docker.sock:ro # May be changed on macOS, Windows or docker rootless. See the applicable documentation. If adjusting, don't forget to also set 'WATCHTOWER_DOCKER_SOCKET_PATH'!
        network_mode: bridge # add to the same network as docker run would do
        ports:
    #      - 80:80 # Can be removed when running behind a web server or reverse proxy (like Apache, Nginx, Caddy, Cloudflare Tunnel and else). See https://github.com/nextcloud/all-in-one/blob/main/reverse-proxy.md
          - 8080:8080
    #      - 8443:8443 # Can be removed when running behind a web server or reverse proxy (like Apache, Nginx, Caddy, Cloudflare Tunnel and else). See https://github.com/nextcloud/all-in-one/blob/main/reverse-proxy.md
        environment: # Is needed when using any of the options below
          # AIO_DISABLE_BACKUP_SECTION: false # Setting this to true allows to hide the backup section in the AIO interface. See https://github.com/nextcloud/all-in-one#how-to-disable-the-backup-section
          # AIO_COMMUNITY_CONTAINERS: # With this variable, you can add community containers very easily. See https://github.com/nextcloud/all-in-one/tree/main/community-containers#community-containers
          APACHE_PORT: 11100 # Is needed when running behind a web server or reverse proxy (like Apache, Nginx, Caddy, Cloudflare Tunnel and else). See https://github.com/nextcloud/all-in-one/blob/main/reverse-proxy.md
          APACHE_IP_BINDING: 127.0.0.1 # Should be set when running behind a web server or reverse proxy (like Apache, Nginx, Caddy, Cloudflare Tunnel and else) that is running on the same host. See https://github.com/nextcloud/all-in-one/blob/main/reverse-proxy.md
          # APACHE_ADDITIONAL_NETWORK: frontend_net # (Optional) Connect the apache container to an additional docker network. Needed when behind a web server or reverse proxy (like Apache, Nginx, Caddy, Cloudflare Tunnel and else) running in a different docker network on same server. See https://github.com/nextcloud/all-in-one/blob/main/reverse-proxy.md
          # BORG_RETENTION_POLICY: --keep-within=7d --keep-weekly=4 --keep-monthly=6 # Allows to adjust borgs retention policy. See https://github.com/nextcloud/all-in-one#how-to-adjust-borgs-retention-policy
          # COLLABORA_SECCOMP_DISABLED: false # Setting this to true allows to disable Collabora's Seccomp feature. See https://github.com/nextcloud/all-in-one#how-to-disable-collaboras-seccomp-feature
          # NEXTCLOUD_DATADIR: /mnt/ncdata # Allows to set the host directory for Nextcloud's datadir. ⚠️⚠️⚠️ Warning: do not set or adjust this value after the initial Nextcloud installation is done! See https://github.com/nextcloud/all-in-one#how-to-change-the-default-location-of-nextclouds-datadir
          # NEXTCLOUD_MOUNT: /mnt/ # Allows the Nextcloud container to access the chosen directory on the host. See https://github.com/nextcloud/all-in-one#how-to-allow-the-nextcloud-container-to-access-directories-on-the-host
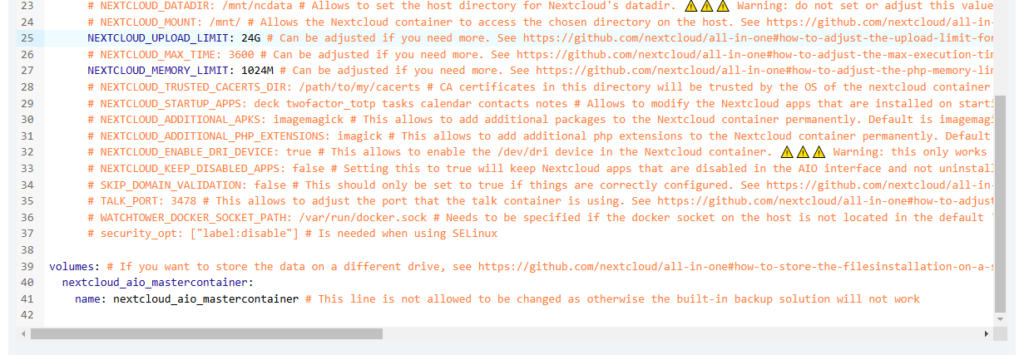
          NEXTCLOUD_UPLOAD_LIMIT: 24G # Can be adjusted if you need more. See https://github.com/nextcloud/all-in-one#how-to-adjust-the-upload-limit-for-nextcloud
          # NEXTCLOUD_MAX_TIME: 3600 # Can be adjusted if you need more. See https://github.com/nextcloud/all-in-one#how-to-adjust-the-max-execution-time-for-nextcloud
          NEXTCLOUD_MEMORY_LIMIT: 1024M # Can be adjusted if you need more. See https://github.com/nextcloud/all-in-one#how-to-adjust-the-php-memory-limit-for-nextcloud
          # NEXTCLOUD_TRUSTED_CACERTS_DIR: /path/to/my/cacerts # CA certificates in this directory will be trusted by the OS of the nextcloud container (Useful e.g. for LDAPS) See https://github.com/nextcloud/all-in-one#how-to-trust-user-defined-certification-authorities-ca
          # NEXTCLOUD_STARTUP_APPS: deck twofactor_totp tasks calendar contacts notes # Allows to modify the Nextcloud apps that are installed on starting AIO the first time. See https://github.com/nextcloud/all-in-one#how-to-change-the-nextcloud-apps-that-are-installed-on-the-first-startup
          # NEXTCLOUD_ADDITIONAL_APKS: imagemagick # This allows to add additional packages to the Nextcloud container permanently. Default is imagemagick but can be overwritten by modifying this value. See https://github.com/nextcloud/all-in-one#how-to-add-os-packages-permanently-to-the-nextcloud-container
          # NEXTCLOUD_ADDITIONAL_PHP_EXTENSIONS: imagick # This allows to add additional php extensions to the Nextcloud container permanently. Default is imagick but can be overwritten by modifying this value. See https://github.com/nextcloud/all-in-one#how-to-add-php-extensions-permanently-to-the-nextcloud-container
          # NEXTCLOUD_ENABLE_DRI_DEVICE: true # This allows to enable the /dev/dri device for containers that profit from it. ⚠️⚠️⚠️ Warning: this only works if the '/dev/dri' device is present on the host! If it should not exist on your host, don't set this to true as otherwise the Nextcloud container will fail to start! See https://github.com/nextcloud/all-in-one#how-to-enable-hardware-acceleration-for-nextcloud
          # NEXTCLOUD_ENABLE_NVIDIA_GPU: true # This allows to enable the NVIDIA runtime and GPU access for containers that profit from it. ⚠️⚠️⚠️ Warning: this only works if an NVIDIA gpu is installed on the server. See https://github.com/nextcloud/all-in-one#how-to-enable-hardware-acceleration-for-nextcloud.
          # NEXTCLOUD_KEEP_DISABLED_APPS: false # Setting this to true will keep Nextcloud apps that are disabled in the AIO interface and not uninstall them if they should be installed. See https://github.com/nextcloud/all-in-one#how-to-keep-disabled-apps
          # SKIP_DOMAIN_VALIDATION: false # This should only be set to true if things are correctly configured. See https://github.com/nextcloud/all-in-one?tab=readme-ov-file#how-to-skip-the-domain-validation
          # TALK_PORT: 3478 # This allows to adjust the port that the talk container is using which is exposed on the host. See https://github.com/nextcloud/all-in-one#how-to-adjust-the-talk-port
          # WATCHTOWER_DOCKER_SOCKET_PATH: /var/run/docker.sock # Needs to be specified if the docker socket on the host is not located in the default '/var/run/docker.sock'. Otherwise mastercontainer updates will fail. For macos it needs to be '/var/run/docker.sock'
        # security_opt: ["label:disable"] # Is needed when using SELinux
    
    #   # Optional: Caddy reverse proxy. See https://github.com/nextcloud/all-in-one/discussions/575
    #   # Alternatively, use Tailscale if you don't have a domain yet. See https://github.com/nextcloud/all-in-one/discussions/5439
    #   # Hint: You need to uncomment APACHE_PORT: 11000 above, adjust cloud.example.com to your domain and uncomment the necessary docker volumes at the bottom of this file in order to make it work
    #   # You can find further examples here: https://github.com/nextcloud/all-in-one/discussions/588
    #   caddy:
    #     image: caddy:alpine
    #     restart: always
    #     container_name: caddy
    #     volumes:
    #       - caddy_certs:/certs
    #       - caddy_config:/config
    #       - caddy_data:/data
    #       - caddy_sites:/srv
    #     network_mode: "host"
    #     configs:
    #       - source: Caddyfile
    #         target: /etc/caddy/Caddyfile
    # configs:
    #   Caddyfile:
    #     content: |
    #       # Adjust cloud.example.com to your domain below
    #       https://cloud.example.com:443 {
    #         reverse_proxy localhost:11000
    #       }
    
    volumes: # If you want to store the data on a different drive, see https://github.com/nextcloud/all-in-one#how-to-store-the-filesinstallation-on-a-separate-drive
      nextcloud_aio_mastercontainer:
        name: nextcloud_aio_mastercontainer # This line is not allowed to be changed as otherwise the built-in backup solution will not work
      # caddy_certs:
      # caddy_config:
      # caddy_data:
      # caddy_sites:

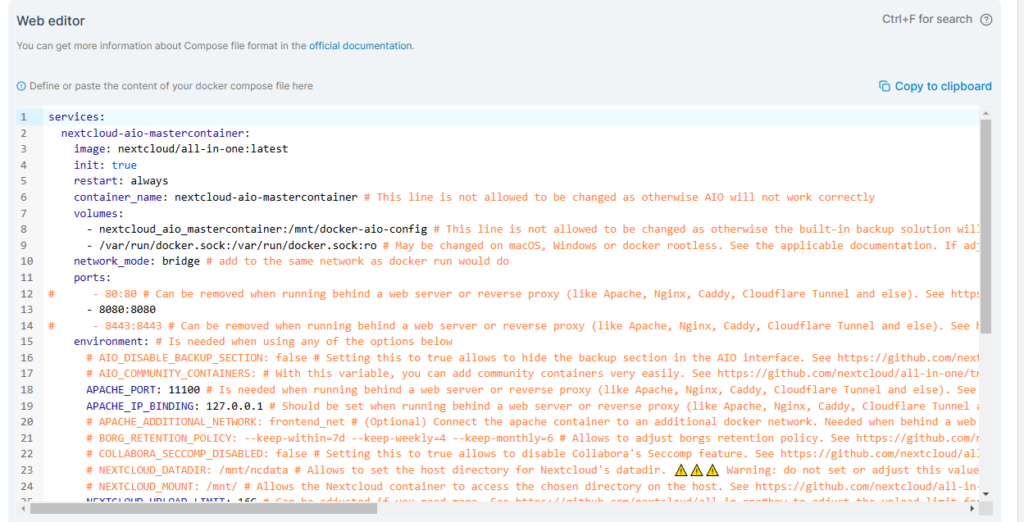
    Sorry it looks so terrible in WordPress. In the editor it should look better; something like this:

    Couple of things to talk about in this file.

    • Always a good idea to check the original source to see if the files been updated. Specifically, this file here.
    • Comment out the line with port 80. We will be using a reverse proxy.
    • Comment out the line with port 8443. Again, we will be using the reverse proxy.
    • In the original file they use Apache_port 11000. That conflicts with Virtualmin’s email spam filter. So change this port to 11100 and things will work better.
    • Because we will be using Apache as a reverse proxy, we need to set Apache_IP_binding as shown.
    • Lastly, I upped the upload limit and the memory limit as shown below.

    Everything else is left the same. But feel free to make any changes you deem necessary.

    Then, scroll down on the page and click on the Deploy the Stack button.

    Once deployed, navigate over to the Containers page which will look like this:

    When the orange “starting” turns green you will be able to navigate to the IP address of your machine at port 8080.

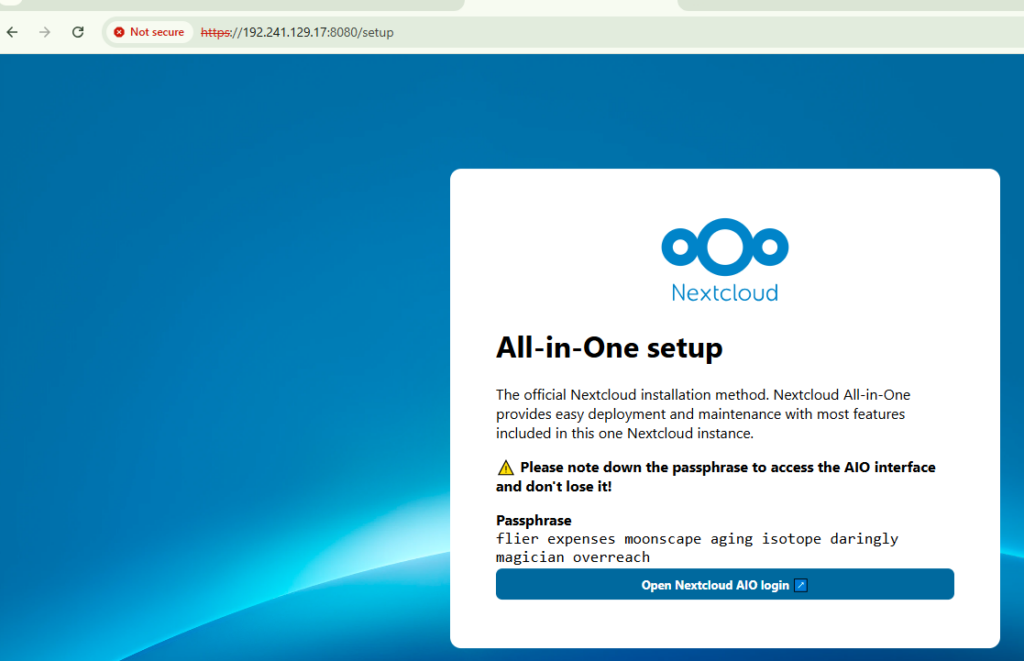
    In our case, were going to use the IP address of the server built at Digital Ocean: https://192.241.129.17:8080/

    You should get a screen like this:

    Make sure you save that passphrase in a safe place, then click on the open button.

    Enter the passphrase and login.

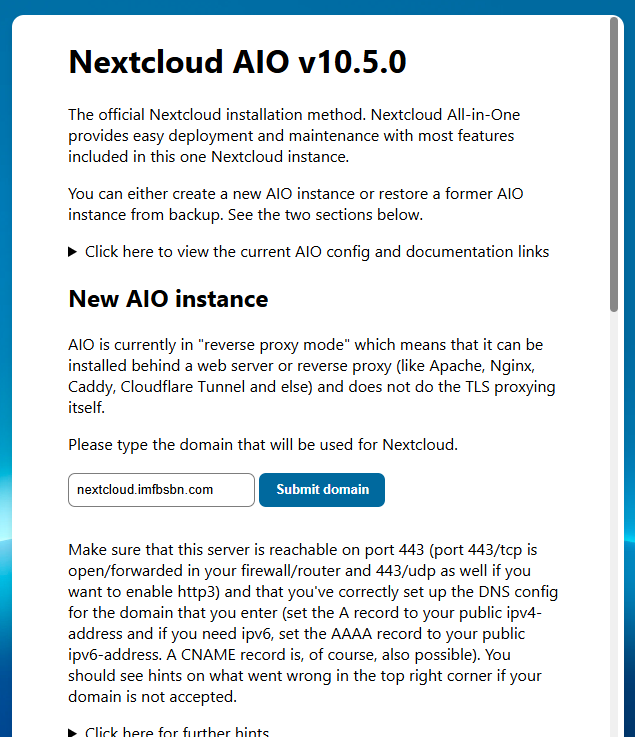
    Here you want to enter the domain – not the URL – just the fully qualified domain name that you added to Virtualmin.

    Go ahead and click on the Submit Domain button.

    If everything goes well, the domain will check out. Meaning that the DNS records are correct and the domain is reachable on port 443.

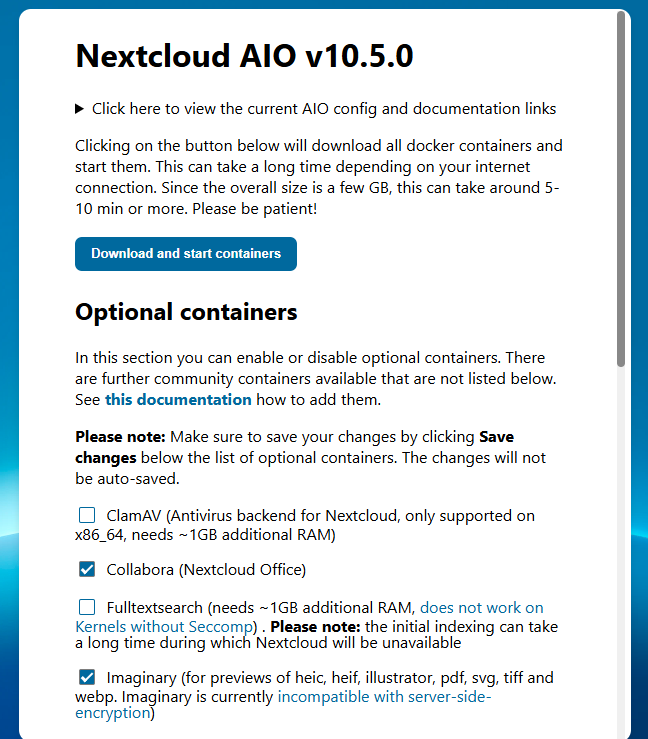
    On the next screen you can choose optional containers to install, and also change the time zone.

    On this installation I’m electing to go with the default options. So I just click on the Download and start Containers button.

    … This is gonna take a little while. Find yourself a refreshing beverage and relax.

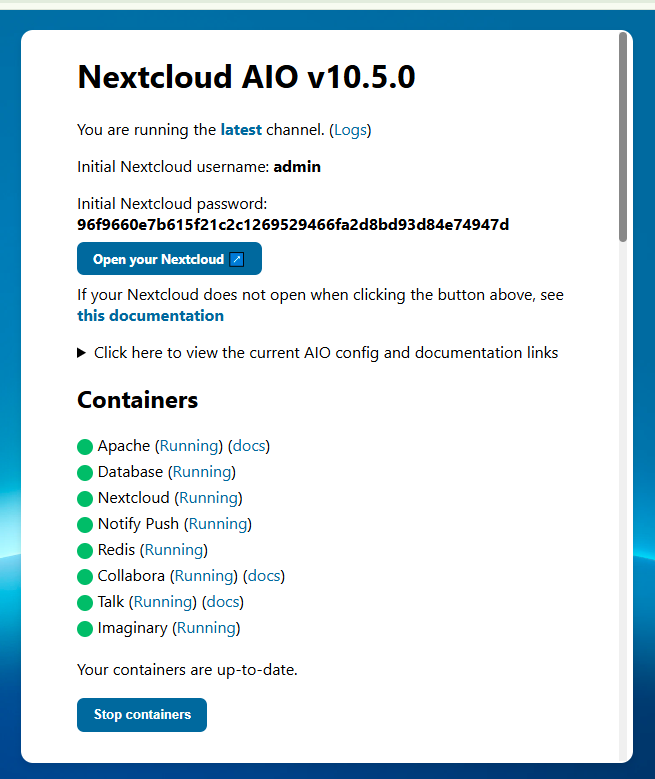
    When it’s all done you will get a screen like this:

    You’re going to want to save that password someplace safe.

    Go ahead and click on the Open your Nextcloud button to login. The default administrative user is “admin” and the password is right there.

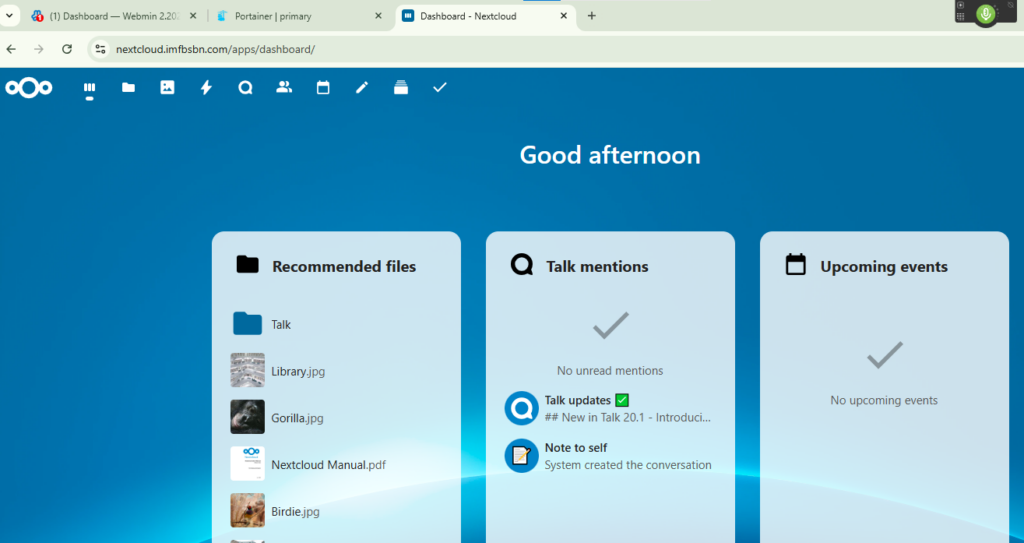
    You are going to get a couple of splash-screens the first time you login. Once you get past that you will be at the dashboard.

    Congratulations!

    You have installed Nextcloud AIO.

    In the next post will walk through setting up daily backups and arranging for backups to be moved off the server and into the cloud.

  • Installing Portainer

    Portainer is an application that helps you manage docker containers.

    Now, just so were clear, using Portainer is not necessary. Some of the hard-core-experts (a.k.a. more experienced folk) may tell you that it’s not preferred. I get that. I really do. But in my experience it’s been a very helpful tool for keeping track of what containers are running, what ports they’re using, and examining their logs, all without having to remember a whole bunch of commands.

    As always, I highly recommend you review the official documentation at the Portainer website. We will be installing the “community” edition.

    To get started we need a URL, or a fully qualified domain name, where we are going to use Portainer. In this example were going to use: portainer.imfbsbn.com.

    If you read the previous post about how I setup Virtualmin, you will know that I do not use the DNS features within VM. Just so were clear, VM provides DNS services perfectly. My reasons for not using VM’s DNS has nothing to do with VM. My reasoning is that my domain registrar – a multimillion dollar organization – can provide DNS more reliably than the VPS server I rent for $12/mo.

    So here you have a choice:

    • If VM is hosting your DNS – if you followed the official setup instructions – then all you have to do is add the domain to VM.
    • If you’re like me, and VM is NOT hosting your DNS, then you have to create your DNS records at your domain registrar.
      This is me. So this is what I’m going to do first.

    I’m going to create the portainer DNS record that looks like this:

    This is at NameCheap. Your registrar’s set up might look a little different.

    Once that’s done we are ready to add the domain to VM.

    On the left side at the top of the menu click on “Create Virtual Server”. It will open up a window like this:

    For domain name you want to enter the fully qualified domain name. Description can be anything you want.

    As for the administration password, I just clicked on the little key with the + sign and VM inserted a password for me. I didn’t write it down because I’m the only user of the system and I will always be logging in as root. But take note of the username because it’s going to be the name of the directory where you have to create a file in just a minute. So in this case my username is: portuser. We are going to need to know that in a minute or two.

    A few changes I did make to the default settings:

    • For the administration username I prefer to use something custom over the automatic feature.
    • I unchecked the boxes for DNS, MariaDB, Mail, Spam, Webmin, & AWStats because this domain will not use any of those features.
    • This domain WILL REQUIRE Apache (as a reverse proxy.) So leave that box checked.

    When you’re all set click the orange Create Server button.

    Virtualmin will work its magic adding the domain to the server. Depending on your hardware the process might take 1-2 minutes.

    When it’s done, click on the blue button at the bottom that says Return to Server Details.

    Before we leave the Virtualmin panel, we’re going to set up the proxy forwarding (so we don’t have to come back later.)

    Confirm VM is ready to modify the correct domain. It should be listed at the top of the left menubar.

    First click on Web Configuration. Then click on Edit Proxy Website.

    Click on the “Yes” radio button to enable proxying.

    Inside the Proxy to URL box enter: http://127.0.0.1:9000/

    Click on Save and Apply. And we have done everything we need to do inside Virtualmin. Seriously, that’s it.

    Now you need to login to your server through the CLI.

    Before moving on we need to talk about Ubuntu and the sudo command.

    – If you have installed Ubuntu on a piece of bare-metal like an old computer you found in the basement or a Raspberry Pi, then during the installation process Ubuntu will have asked you to create an admin user. That means you log into your Ubuntu server with that username & not root. If that’s the case, then you will need to use the sudo statement before your commands.

    – If you have installed Ubuntu on a VPS server like the Digital Ocean droplet we created in a previous post, when you are likely logging into your Ubuntu server as root. If that’s the case, then you will NOT need to use the sudo statement. Although, while older versions of Ubuntu used to scream at you, it appears the current version just simply ignores the sudo if it’s not needed.

    Going forward, I’m just going to assume you’re logging in as root.

    Navigate into the directory of the user you just created which in our case will be: /home/portuser.

    cd /home/portuser

    In this directory we need to create a docker compose file. Will do that using the nano file editor.

    nano docker-compose.yml

    Before you press enter (to execute the command and open the nano editor) your screen will look something like this:

    Now you want to cut-and-paste the following into the nano editor:

    PRO TIP: in most SSH clients Ctrl-V will NOT work to paste. Use a right-mouse-click to paste.

    services:
      portainer:
        container_name: portainer
        image: portainer/portainer-ce:latest
        command: -H unix:///var/run/docker.sock
        restart: unless-stopped
        ports:
          - 9000:9000
        volumes:
          - /var/run/docker.sock:/var/run/docker.sock
          - /home/portuser/pcdata:/data

    Inside the nano editor it will look like this:

    To exit the editor press Control-X. It will ask you if you want to save your work. Press Y. Then it will confirm the file name. You can just go-ahead and press Enter.

    Now, let’s go over what each of these lines is doing.

    • services: | this is essentially telling docker that it will be executing service as opposed to running a command or dealing with the network.
    • portainer: | this is the name of the service that’s going to be executed within docker.
    • container_name: | this is going to be the name of the container within docker. A single service may contain several containers.
    • image: | specifies the code source from Docker Hub.
    • command: | this is literally a command that is passed to portainer when the application is started. This command connects portainer to docker.
    • restart: | tells docker if this container should be restarted if docker discovers it has stopped.
    • ports: | provides docker with the ports used to communicate with this container. The first number is the system port; the second is the docker port.
    • volumes: | similar to ports, this provides mapping between the raw OS and docker. In our case here we want to map /home/portuser/pcdata – which is a folder we know will get automatically backed-up by VM (see post on automatic backups) to the folder /data which exists inside the container. Doing it this way, if the server ever crashes we have all of our portainer data backed up for easy restore.

    One last command to run.

    Into the CLI type:

    docker compose up -d

    Before you press enter – be aware that a timer will start to run where you have about a minute to navigate to: https://portainer.imfbsbn.com/

    This is because when portainer first launches you will create the admin user and its password. So be prepared.

    NOW, go ahead and hit the enter key and then navigate to the website. Note that you do NOT need to include the port number in the URL.

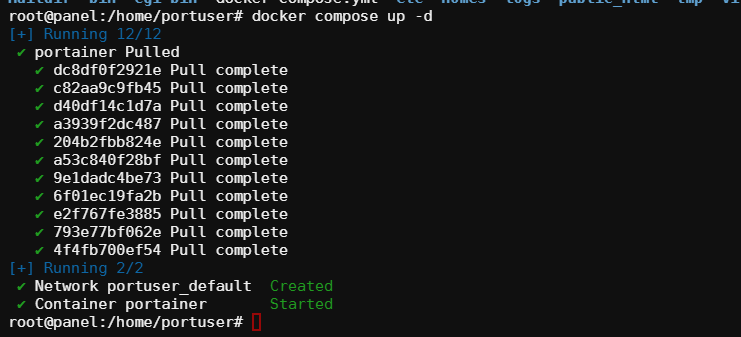
    When you run the command in the CLI, you should get something like this:

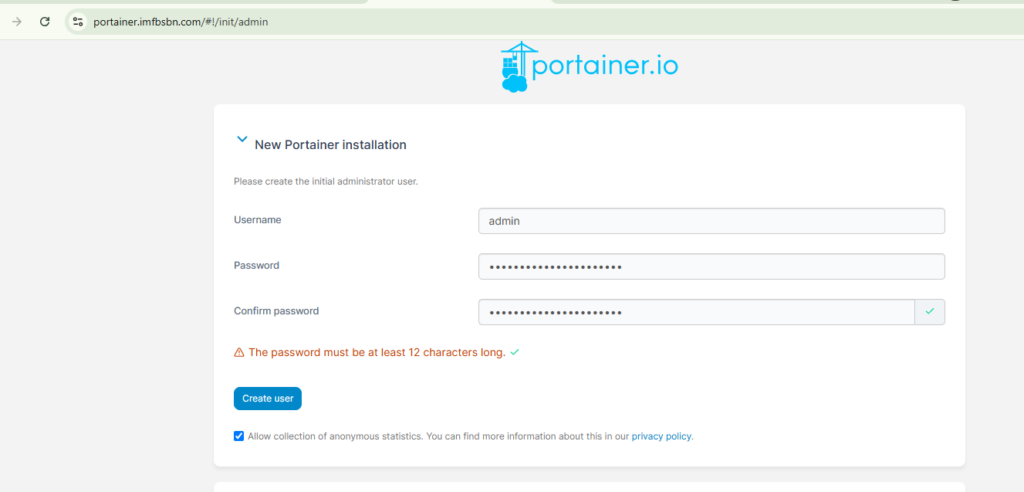
    When you visit the URL you should get this:

    Go-ahead and create your administrative user. You can choose any username and password you want. Then click the Create User button.

    You should get taken to the Home screen. You will see on this machine we have a “primary” installation of Docker. Go ahead and click anywhere in the primary box.

    Clicking inside the primary box will take you to the dashboard for that Docker installation. (No screenshot of that!)

    On the dashboard, click on “Containers”.

    Here you see a listing of all the Docker containers loaded on the system and their status.

    Congratulations! You now have installed portainer.

  • Installing Docker

    Docker is a very nifty application that allows you to run other applications inside “containers”.

    We are going to need Docker to run some other applications down the road. So now is a good time to install it.

    To do this we are going to need to run a few commands. So scared of your favorite SSH client and log into the server.

    We are going to follow the steps outlined in the official documentation for our Ubuntu server hosted at Digital Ocean.

    NOTE: if you’re not using Ubuntu, you CANNOT use the commands below. Your software can keys will be different. Please check the official documentation.

    Before moving on we need to talk about Ubuntu and the sudo command.

    – If you have installed Ubuntu on a piece of bare-metal like an old computer you found in the basement or a Raspberry Pi, then during the installation process Ubuntu will have asked you to create an admin user. That means you log into your Ubuntu server with that username & not root. If that’s the case, then you will need to use the sudo command.

    – If you have installed Ubuntu on a VPS server like the Digital Ocean droplet we created in a previous post, when you are likely logging into your Ubuntu server as root. If that’s the case, then you will NOT need to use the sudo command. Although, while older versions of Ubuntu used to scream at you, it appears the current version just simply ignores the sudo if it’s not needed. (An explanation was needed because I don’t use it in my screenshots.)

    For those of you who have logged in as a user with admin rights, your commands are going to look like this.

    # Add Docker's official GPG key:
    sudo apt-get update
    sudo apt-get install ca-certificates curl
    sudo install -m 0755 -d /etc/apt/keyrings
    sudo curl -fsSL https://download.docker.com/linux/ubuntu/gpg -o /etc/apt/keyrings/docker.asc
    sudo chmod a+r /etc/apt/keyrings/docker.asc
    
    # Add the repository to Apt sources:
    echo \
      "deb [arch=$(dpkg --print-architecture) signed-by=/etc/apt/keyrings/docker.asc] https://download.docker.com/linux/ubuntu \
      $(. /etc/os-release && echo "$VERSION_CODENAME") stable" | \
      sudo tee /etc/apt/sources.list.d/docker.list > /dev/null
    sudo apt-get update
    
    # Install the Packages 
    sudo apt-get install docker-ce docker-ce-cli containerd.io docker-buildx-plugin docker-compose-plugin

    . . .

    For those of you who login as root, your commands are going to look like this:

    # Add Docker's official GPG key:
    apt-get update
    apt-get install ca-certificates curl
    install -m 0755 -d /etc/apt/keyrings
    curl -fsSL https://download.docker.com/linux/ubuntu/gpg -o /etc/apt/keyrings/docker.asc
    chmod a+r /etc/apt/keyrings/docker.asc
    
    # Add the repository to Apt sources:
    echo \
      "deb [arch=$(dpkg --print-architecture) signed-by=/etc/apt/keyrings/docker.asc] https://download.docker.com/linux/ubuntu \
      $(. /etc/os-release && echo "$VERSION_CODENAME") stable" | \
      tee /etc/apt/sources.list.d/docker.list > /dev/null
    apt-get update 
    
    # Install the Packages
    apt-get install docker-ce docker-ce-cli containerd.io docker-buildx-plugin docker-compose-plugin

    . . .

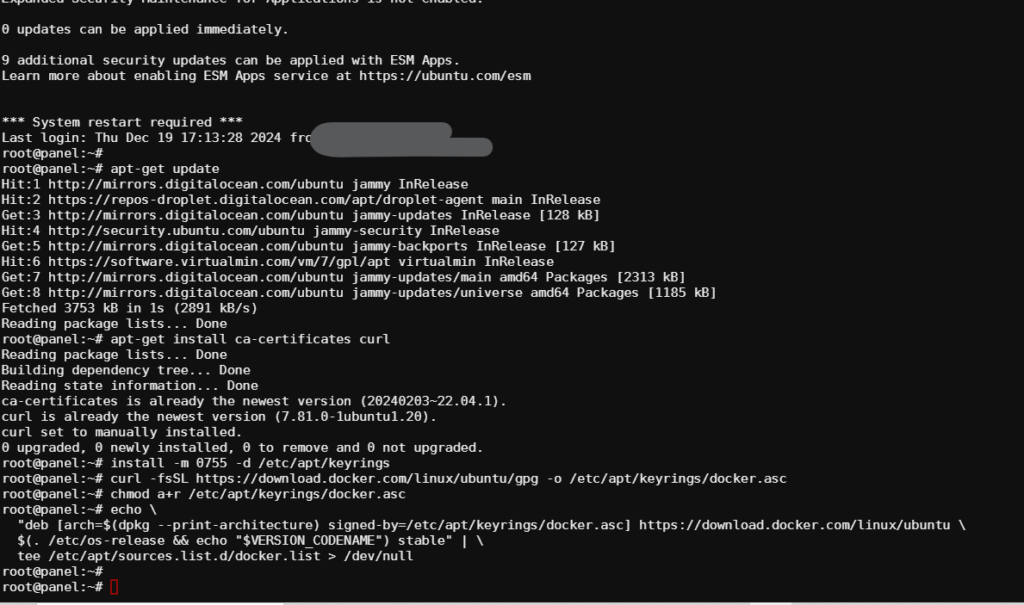
    Working with the Ubuntu server previously created at Digital Ocean, running those commands looks like this:

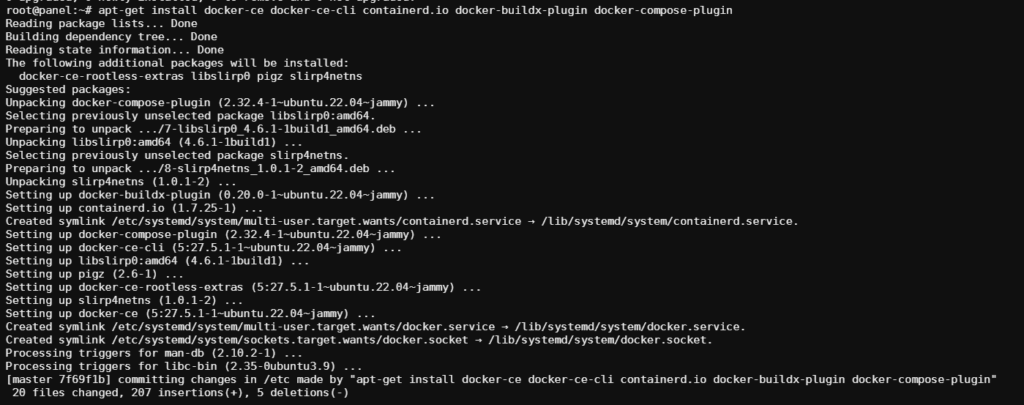
    The server does not give you a lot of feedback running those commands. But when you actually go to install Docker you get more information like this:

    Before the system makes any changes it’s going to require you to hit Y or enter.

    After that, there’s probably a screen or two of scrolling and notifications. If services need to be restarted go ahead and restart them.

    When you’re done it wouldn’t hurt to reboot the whole system.

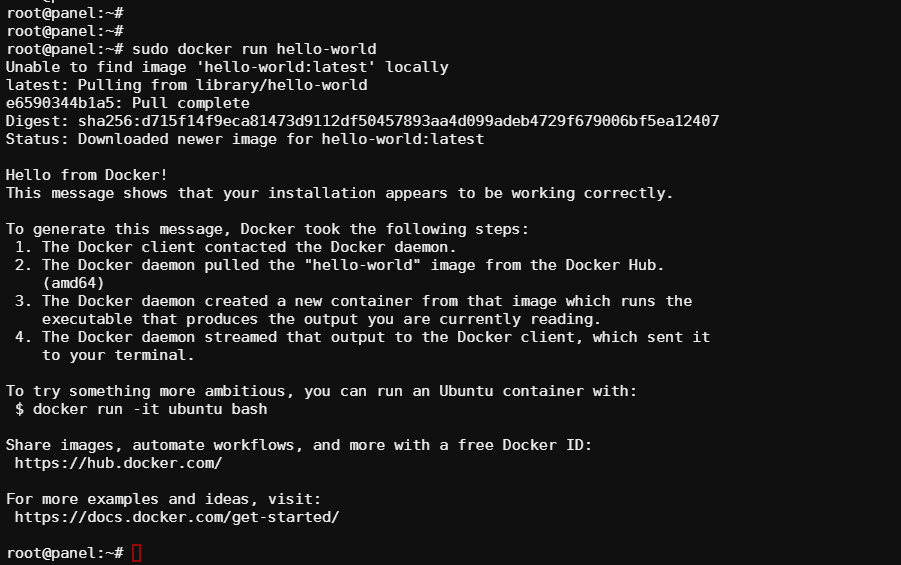
    If everything went well you should be able to run the following command & have this result:

    sudo docker run hello-world

    Congratulations! You’ve just installed Docker.

    Now we can do some cool stuff.