Go-ahead and create your account. Once that’s done you may be a page with a bunch of funky squares.
If so, click on “Explore Our Control Panel”.
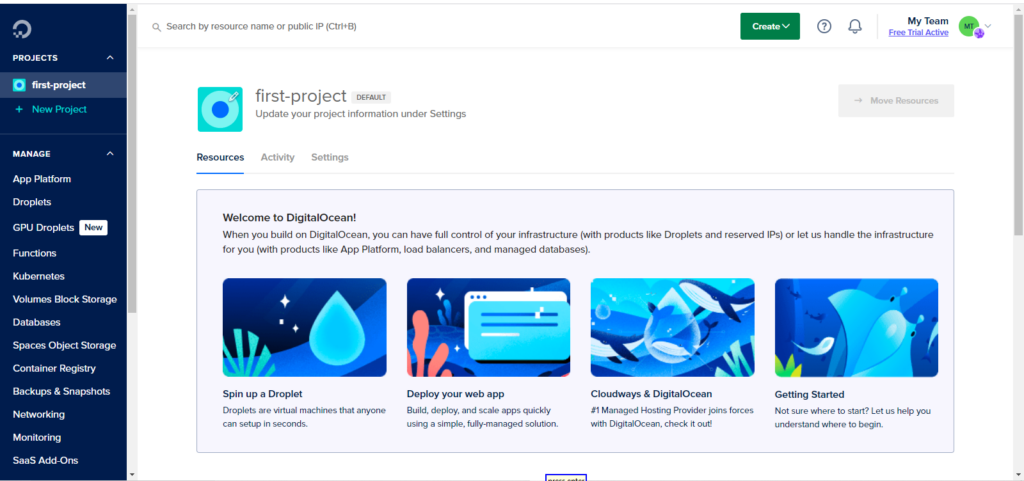
You should get a page that looks something like this:
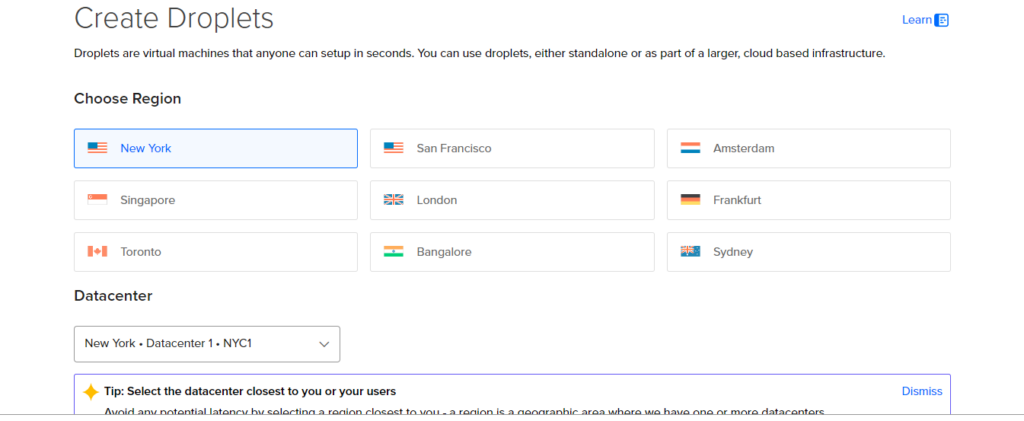
Now you can click on that first image or the link “Spin up a Droplet”.
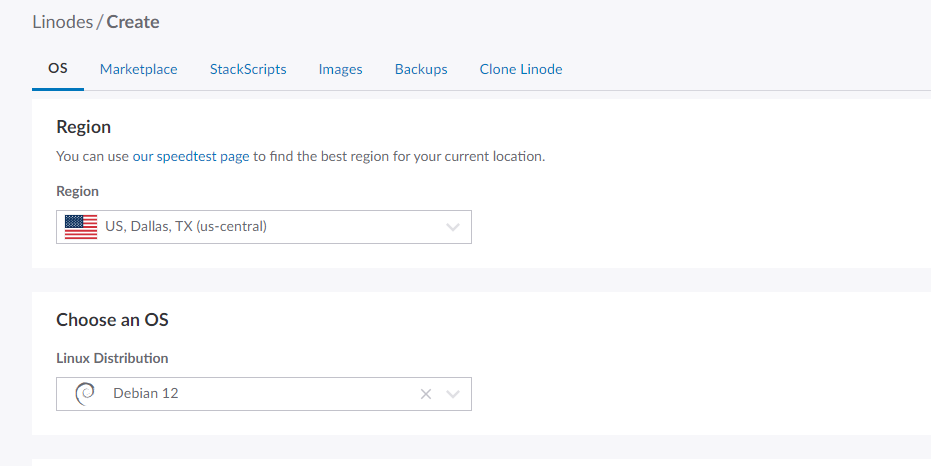
Choose your data center:
Then select your OS image:
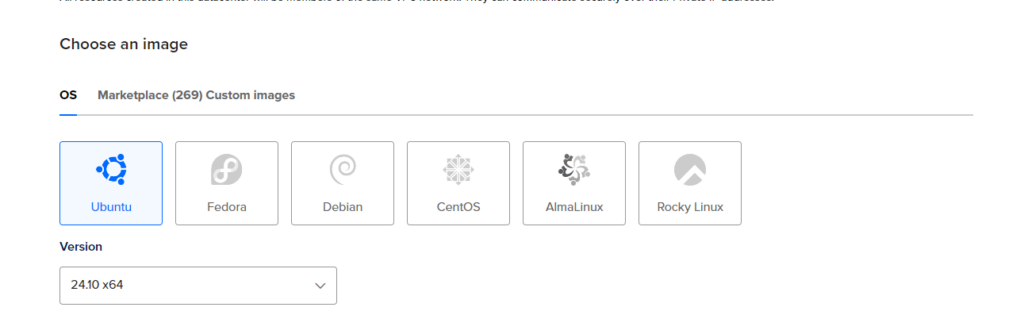
Special Note: as of December 2024, Virtualmin does not yet support Ubuntu 24.10.
Always confirm your distribution and version are compliant by checking here: https://www.virtualmin.com/docs/os-support/
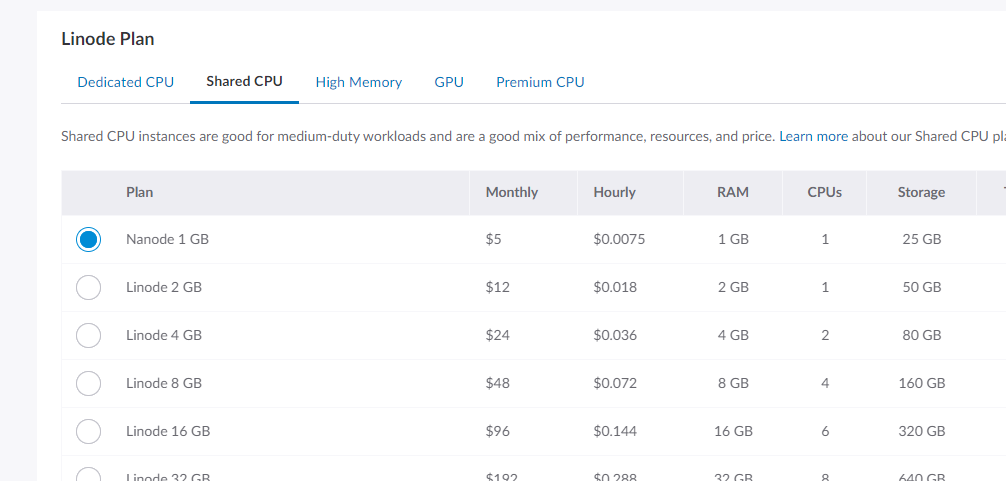
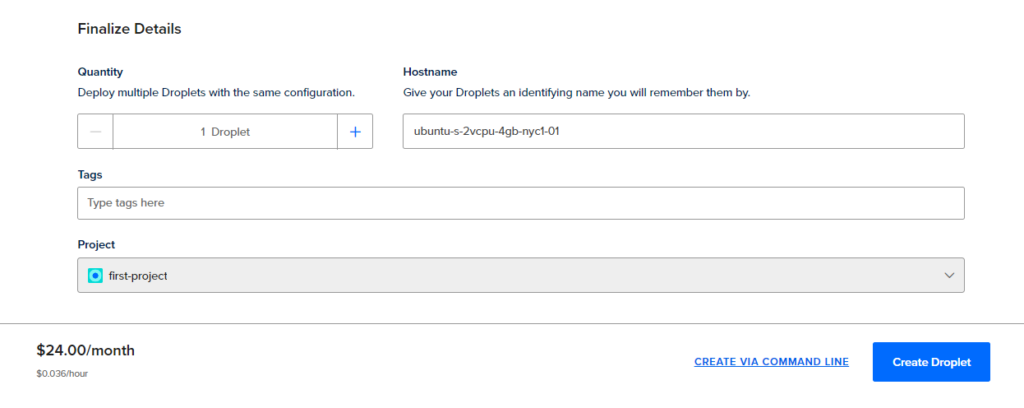
Next, choose your server’s specifications. I have a $200 credit that I want to take for a test drive. So I’m selecting a set up beyond my needs.

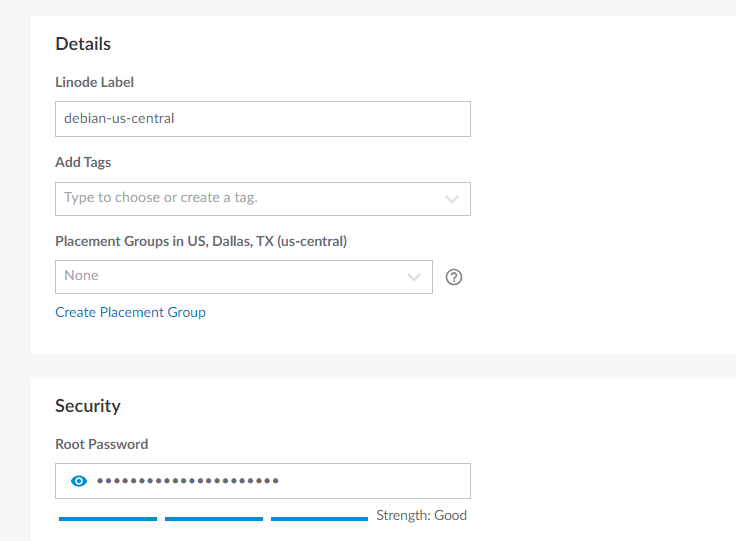
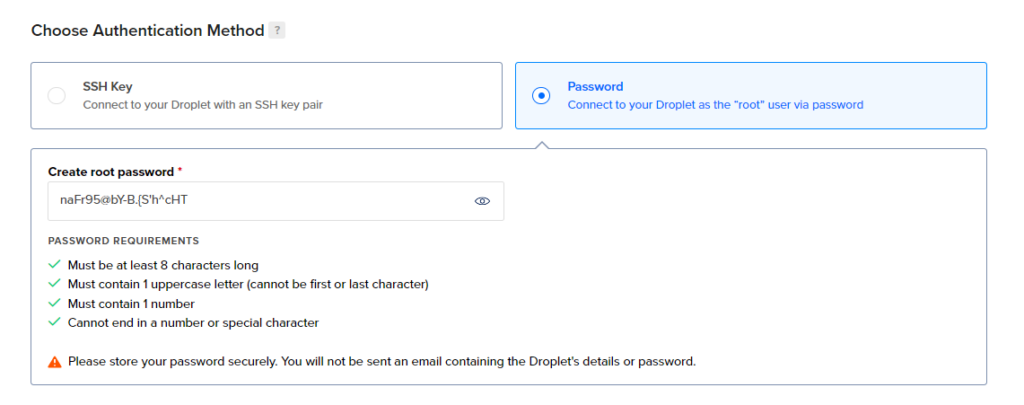
Scroll down on the page and enter a robust password.
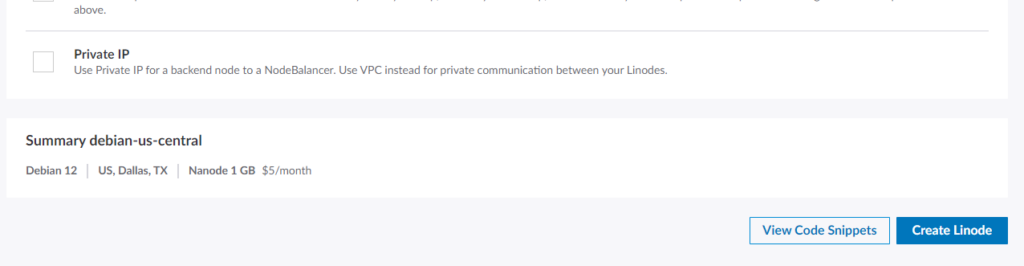
Now you can go ahead and click on the “Create Droplet” button on the bottom right.
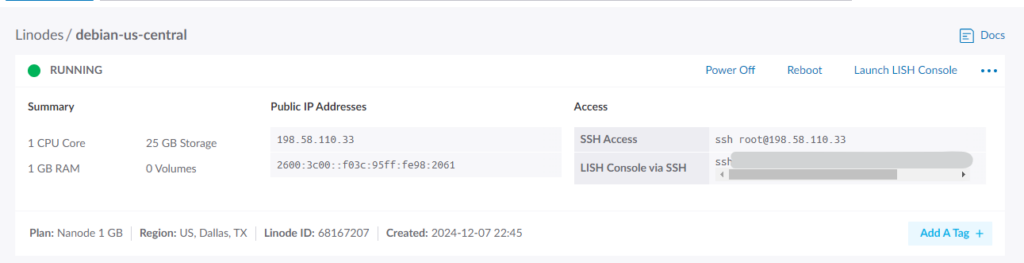
DigitalOcean is going to create your server. Will probably take several seconds. When complete, you will see something like this:
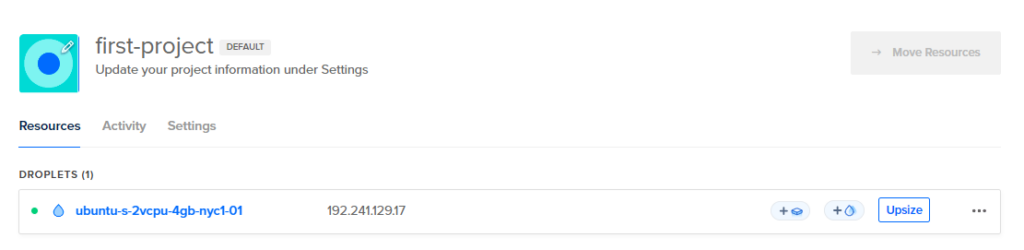
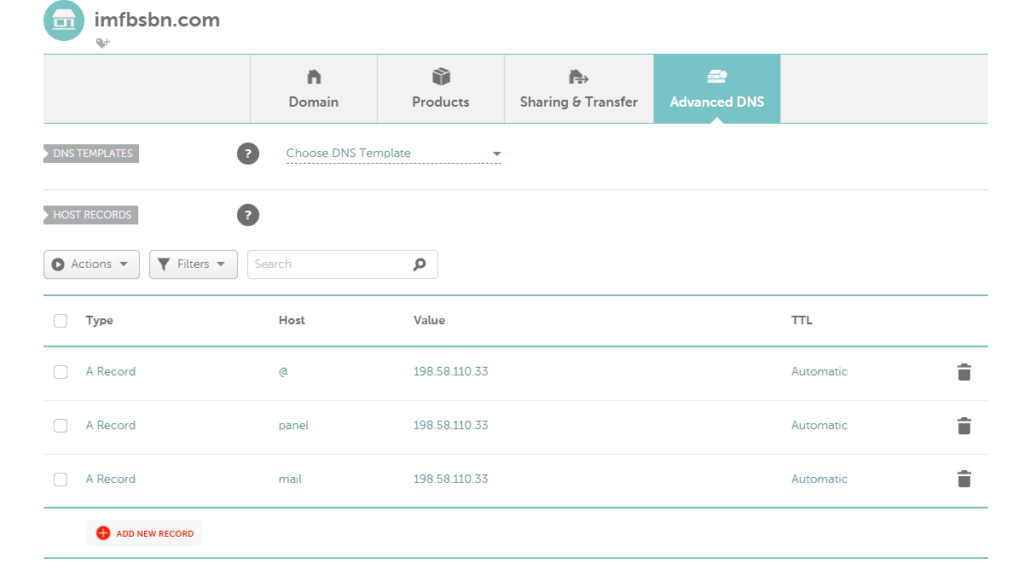
Now you have the IP address of the server. So we are ready to create the DNS records.
If your system does not have a fully qualified domain name (FQDN), the installer will stop and ask you to choose one. This is mandatory because many services rely on having a fully qualified domain name in order to function. Mail, in particular, but some Apache configurations and many of the Virtualmin-created configuration files, also require a valid fully qualified domain name to function correctly. A fully qualified domain name is one of the form host.example.com, or simply example.com (but do not use a name you’ll be hosting in Virtualmin).
– Virtualmin Documentation: https://www.virtualmin.com/docs/installation/automated/#questions-virtualmin-installsh-might-ask-you
Go back and read that last part again: but do not use a name you’ll be hosting in Virtualmin.
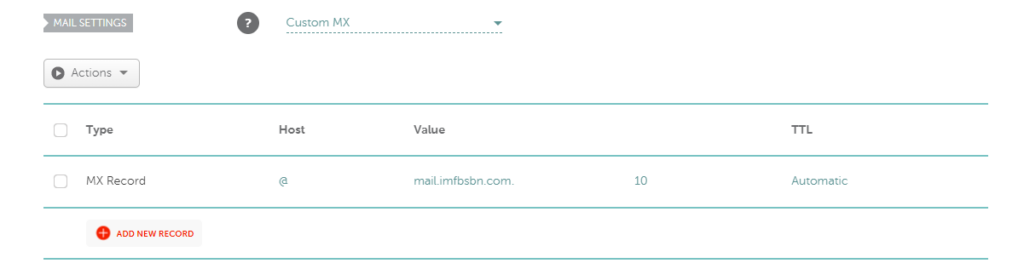
My test domains happened to be hosted at Namecheap. So I will add the following DNS records there.
On our new server, Virtualmin is going to use the FQDN panel.imfbsbn.com.
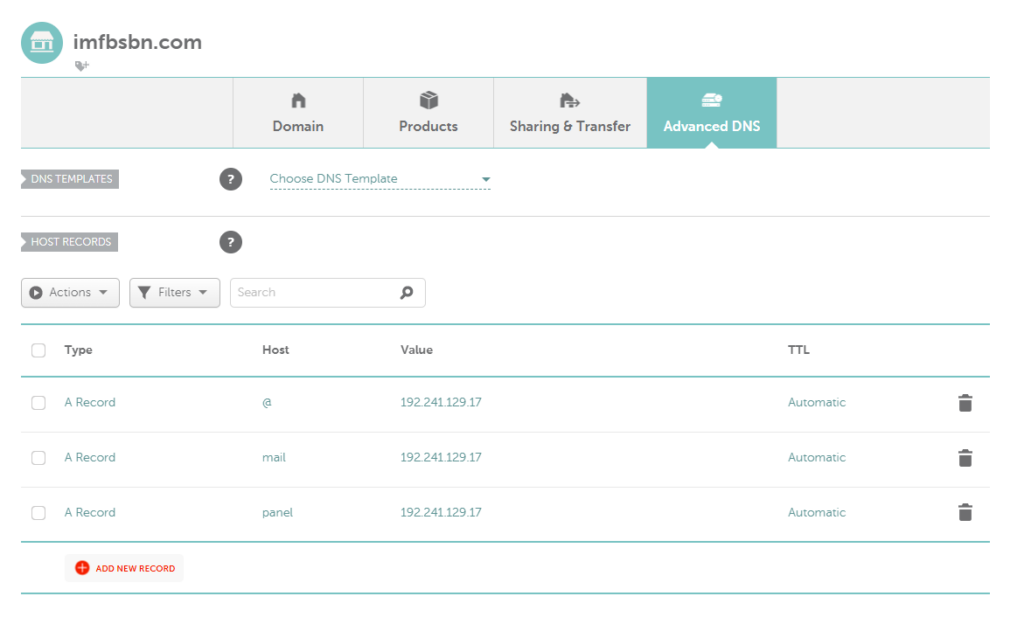
A little further down on the page (if NameCheap is your registrar) you can enter the MX record.
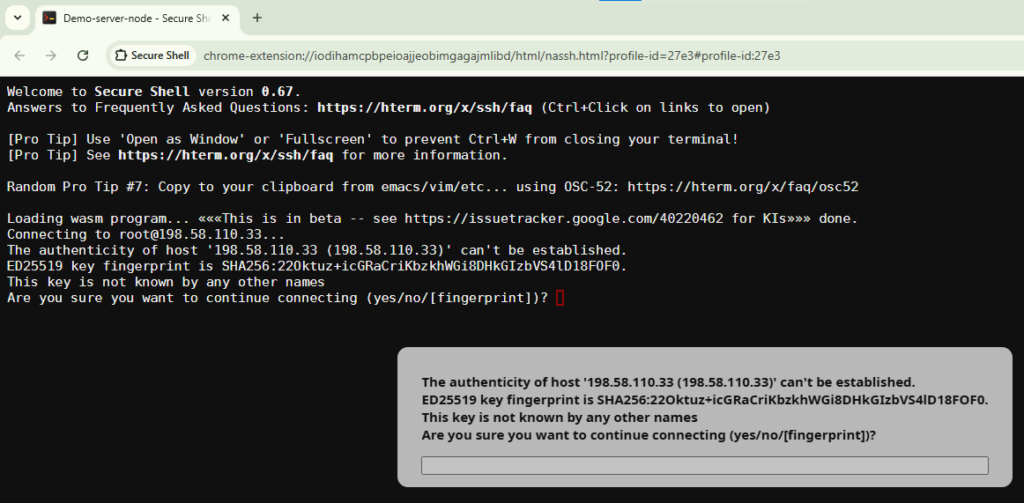
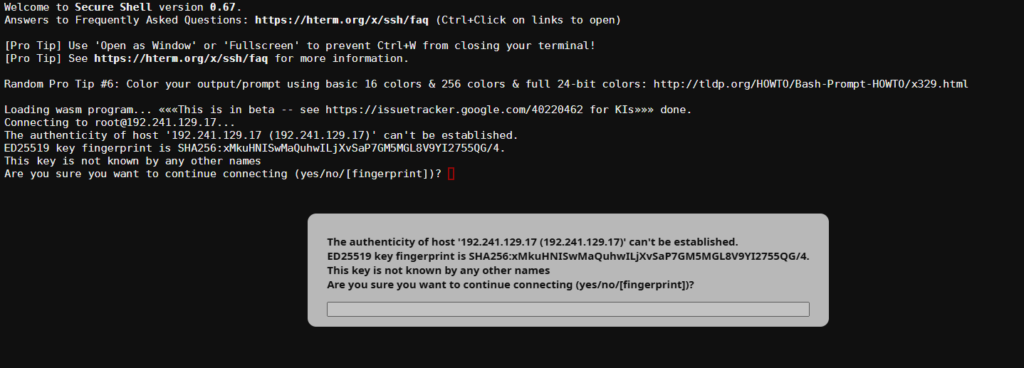
We are now ready to log into the server. Using your favorite SSH client, navigate to the server and login with user root and the robust password you previously entered.
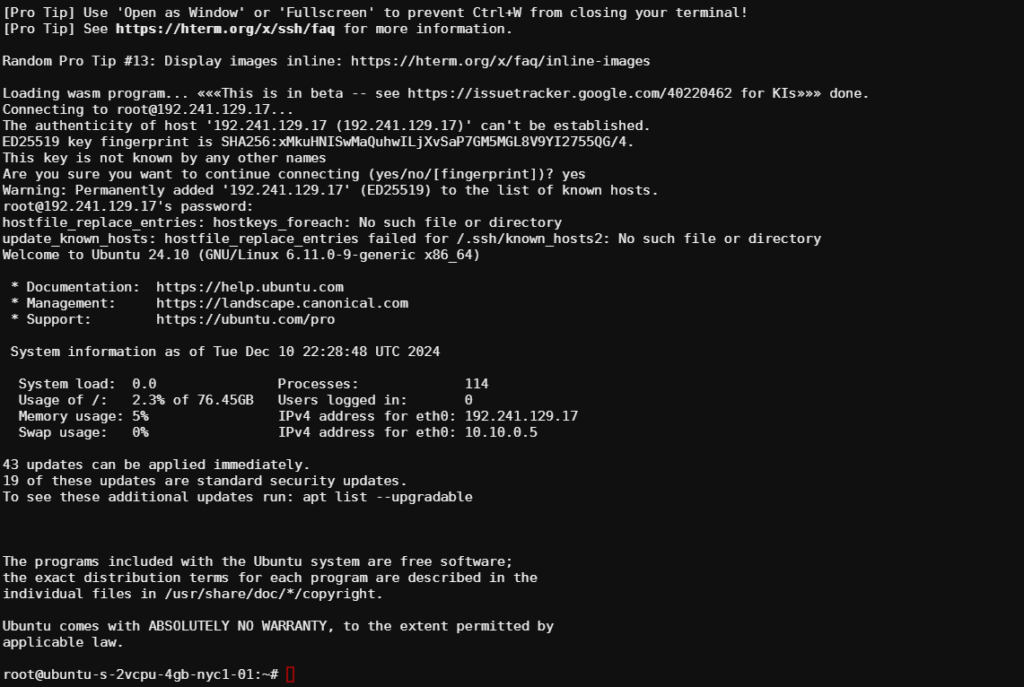
The very first time you log into the server the SSH client will not recognize the server’s digital fingerprint/key. So you will have to enter “yes” in order to continue.
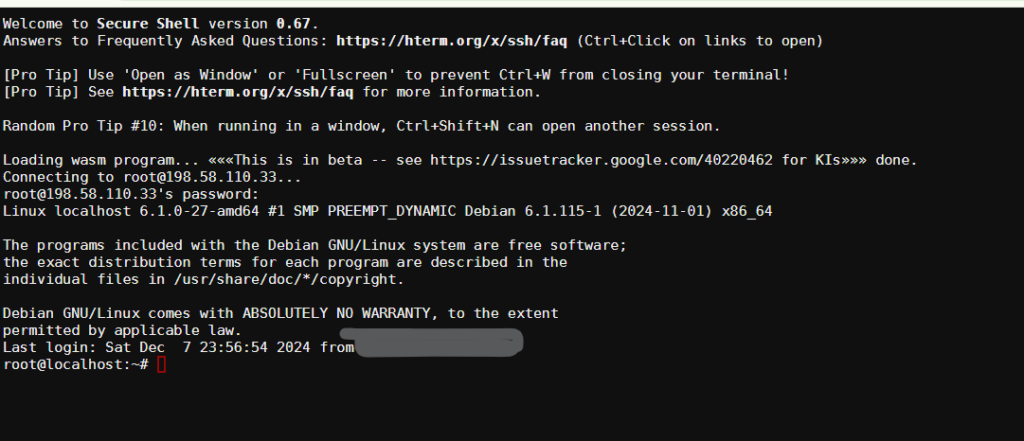
After that, you will be prompted for your password. Enter it & press enter.
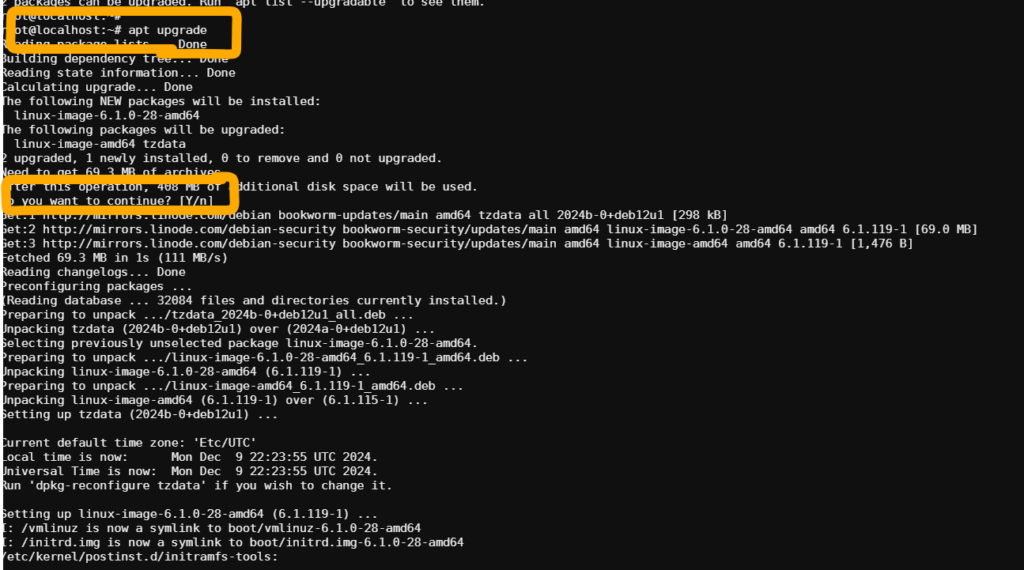
On our initial login, we see the OS is telling us that updates are available:
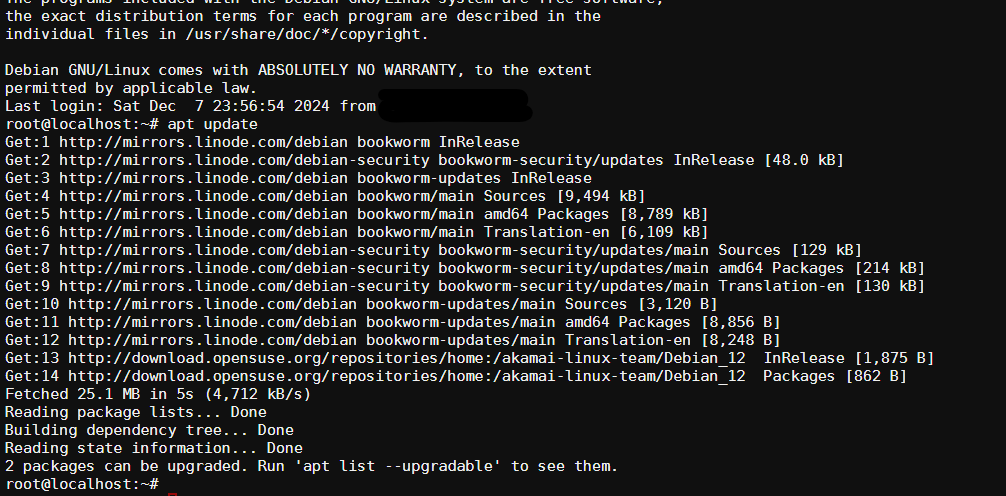
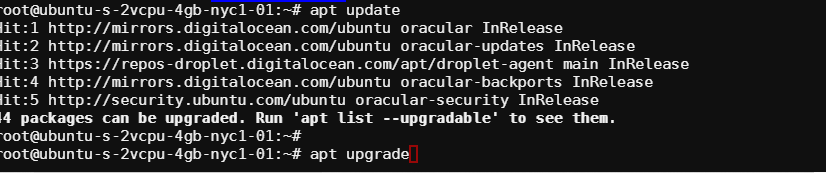
The first thing we want to do here is run the update command. Type in the following:
apt updateLike this:

Press enter to run the command.
Then we want to run the upgrade command. Type in the following:
apt upgradeLike this:
As usual, you have to press enter to run the command.
The system will show you a list of all the packages that will upgrade. When prompted, the “Y” is the default. So you can just press enter.
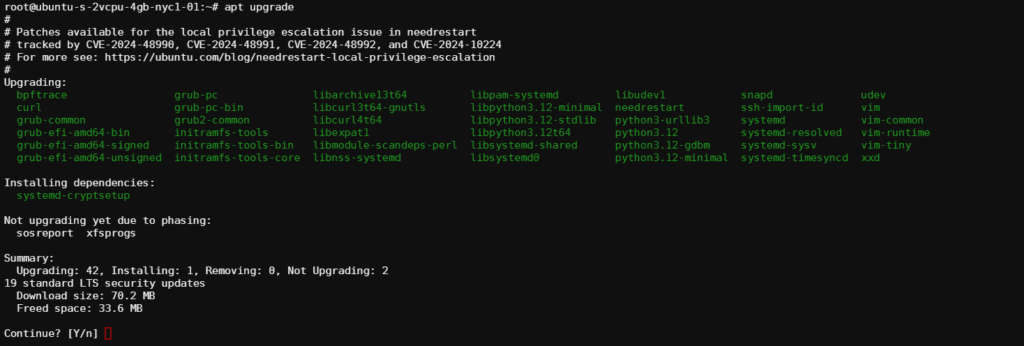
Just in case one of the packages updated the kernel is always a good idea to restart the machine. Type in:
rebootAfter you hit enter the machine will automatically restart. Should take about a minute.
Go ahead and log back in via SSH.
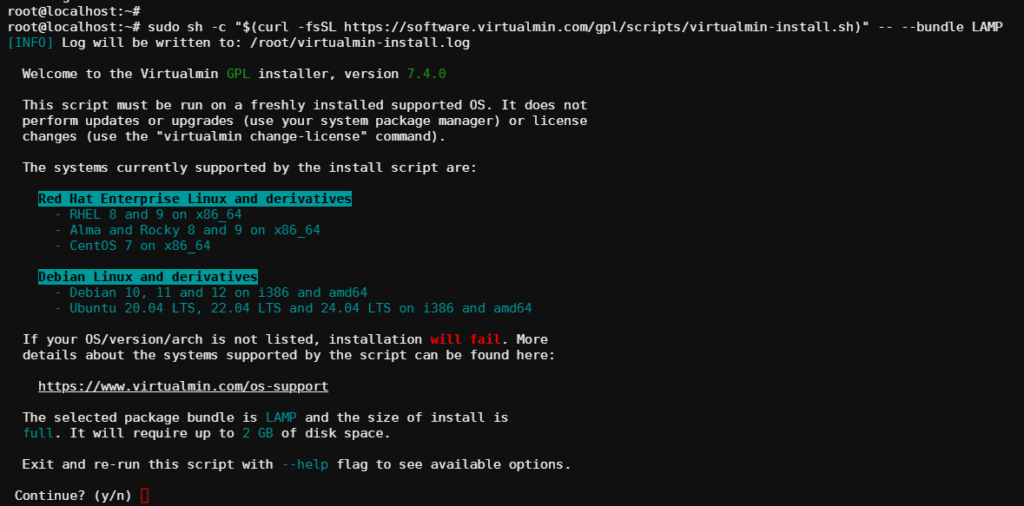
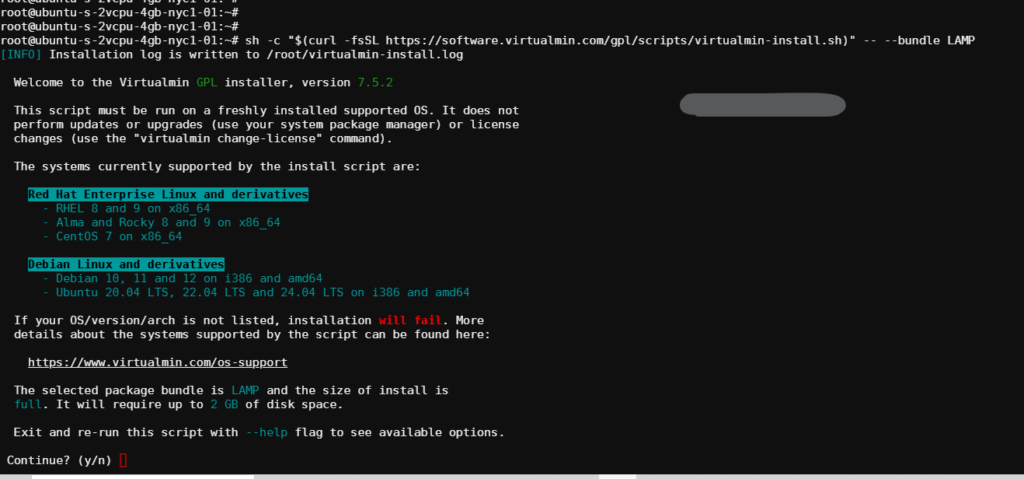
Now it’s time to install Virtualmin itself.
Copy and paste the following line into your SSH client:
sh -c "$(curl -fsSL https://software.virtualmin.com/gpl/scripts/virtualmin-install.sh)" -- --bundle LAMPand naturally, press the enter key.
NOTE: you should always check this page here for the most updated script: https://www.virtualmin.com/download/
Your server will download the installation script and begin to run it.
If everything appears to be in order, and you’re ready to go, press “y” and then press enter.
This script will download and begin the loading process.
At some point the installation is going to ask you about a fully qualified domain name. This is where you are going to enter:
panel.imfbsbn.comLike this:
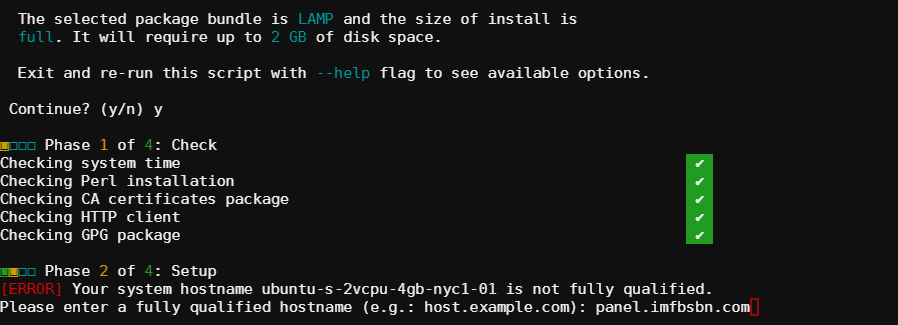
The installer will continue. Be patient. On small underpowered systems it may take 10-15 minutes. Even on medium horsepower servers it will take several minutes.
When it’s done you’ll get something like this:
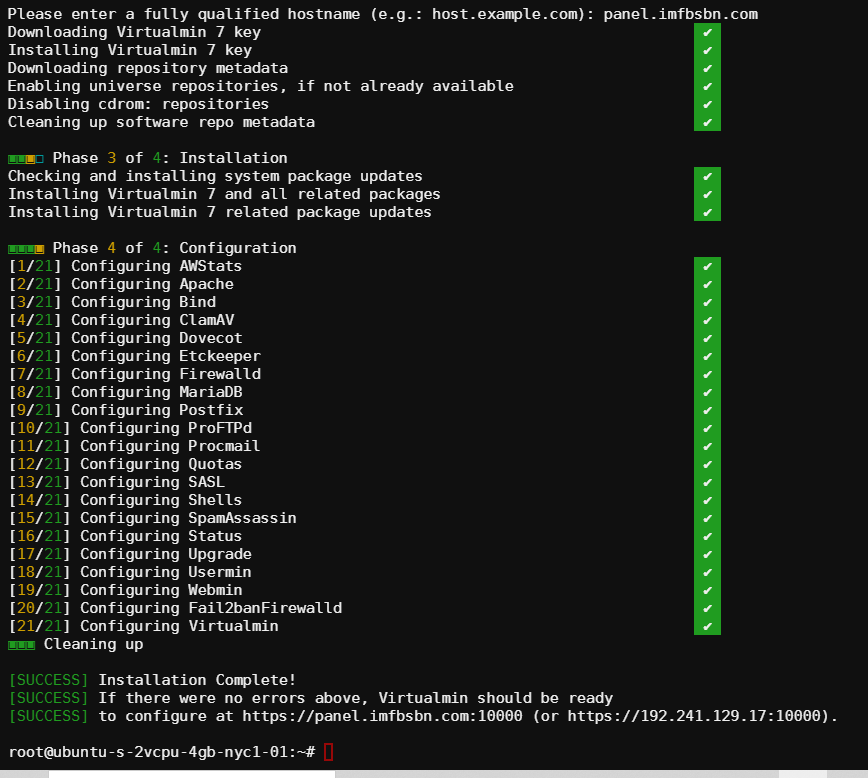
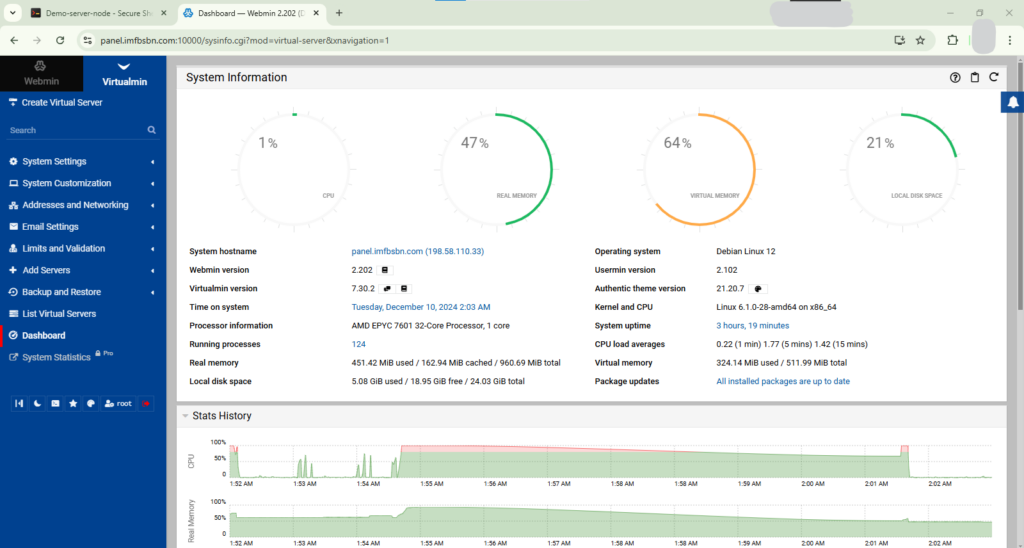
Congratulations! You have successfully installed Virtualmin.
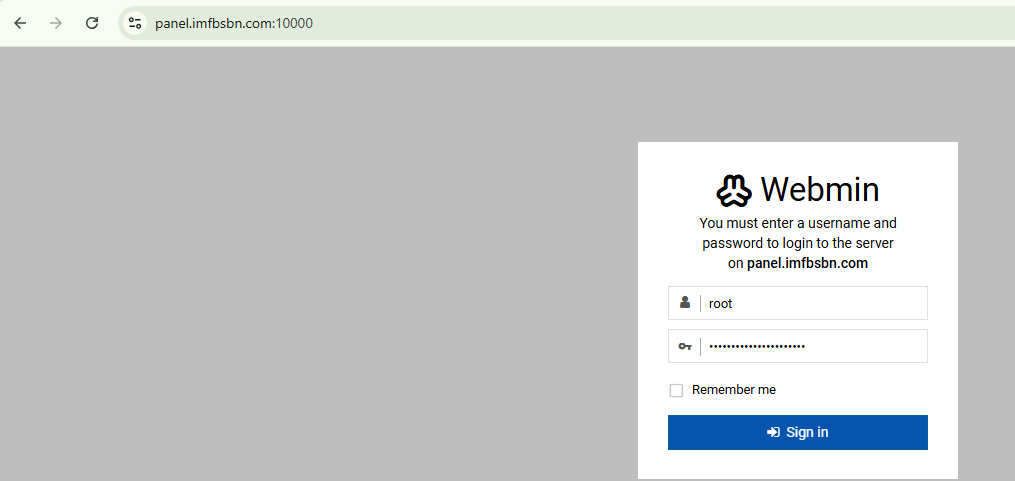
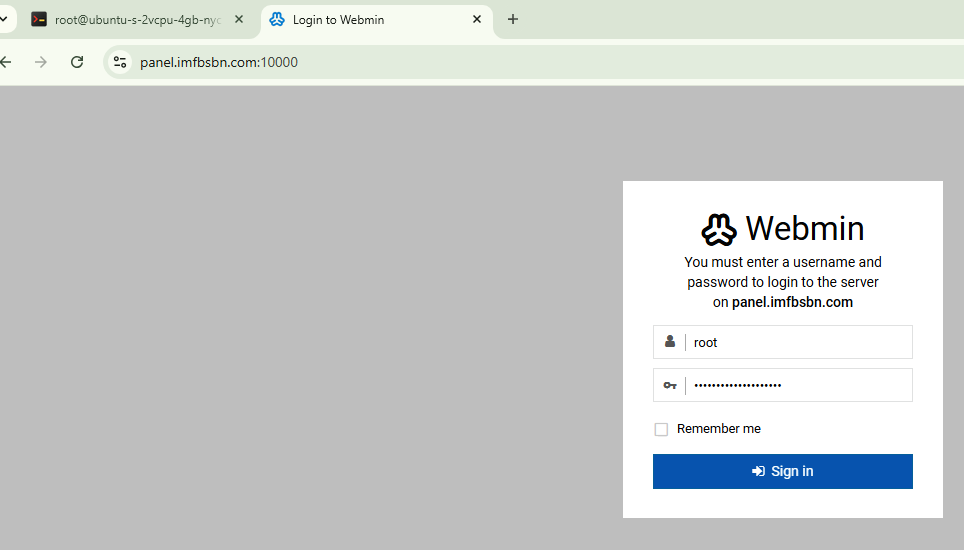
Direct your favorite browser to the FQDN at port 10000 just as instructed at the bottom of the image above.
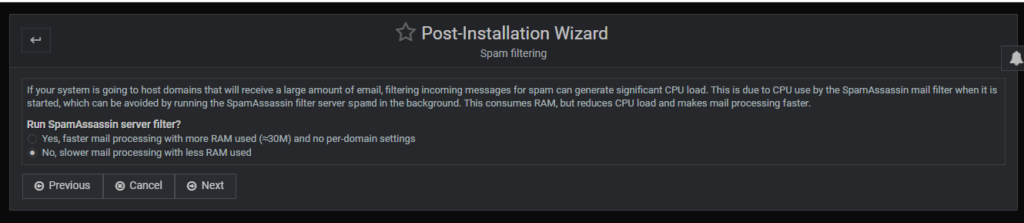
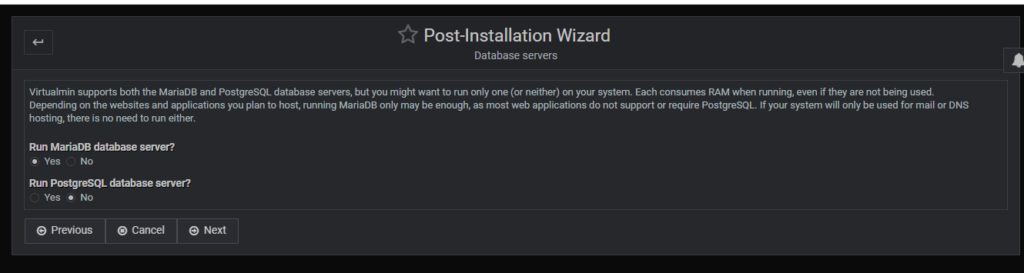
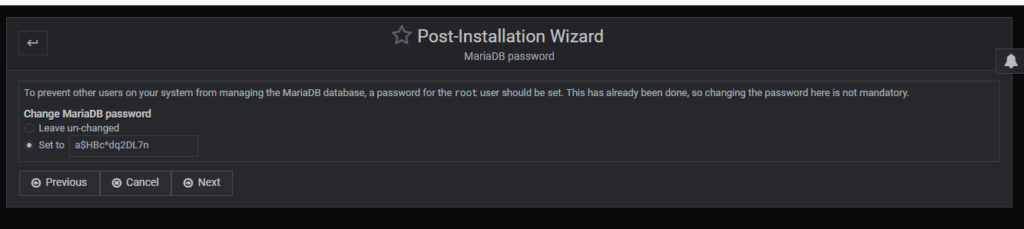
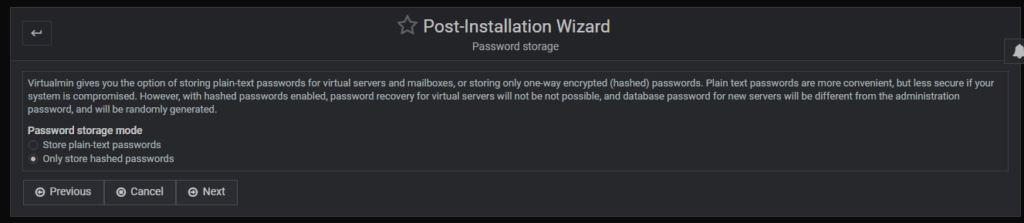
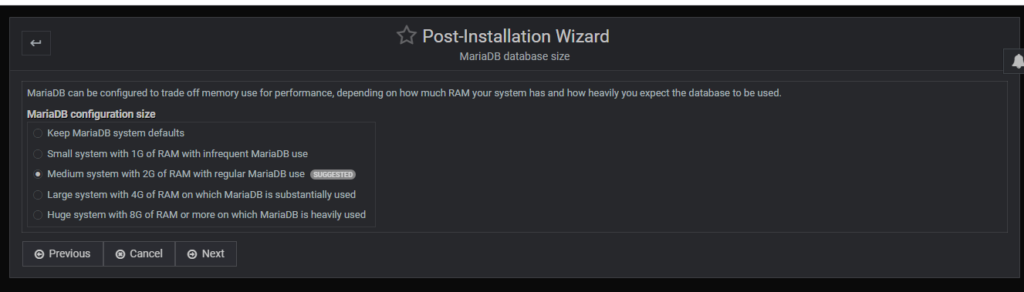
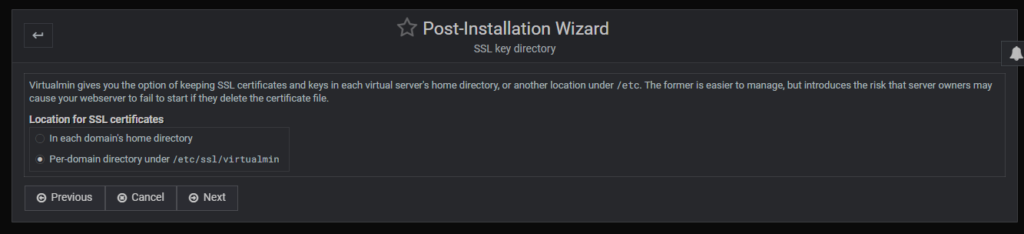
Once you sign in you will be taken to the Post-Installation Wizard.
For a walk through of the wizard see this post here: https://bblaze.xyz/post-installation-wizard-walk-through/
And that’s it. See the next post for some suggested initial steps.