Time to load PostgreSQL.
For those paying attention, when we installed Virtualmin loaded the “LAMP” stack.
That means we got: Linux, Apache, MySQL, and PHP.
So many newer (cooler) applications no longer use MySQL but PostgreSQL instead. So now is the time to get PostgreSQL loaded onto our Virtualmin server.
Naturally, there are several ways to do this. This is just “my way.”
Start by going to System Settings – – Features and Plugins:
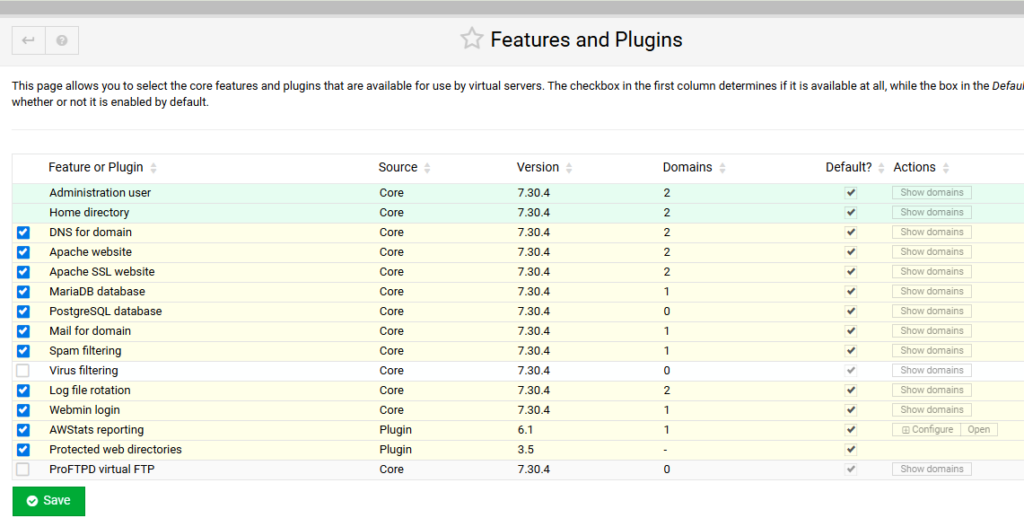
Click the checkbox next to PostgreSQL database. Then click the “Save” button.
Virtualmin will take you to an error page, telling you that PostgreSQL is not installed. On that page (I forgot to get a screenshot) are the instructions to go to the Virtualmin PostgreSQL module. From there Virtualmin will ask you if you want to install PostgreSQL. Yes, yes you do.
Go ahead and click on the install button.
When done, you should be looking at the Virtualmin module for the PostgreSQL database server.
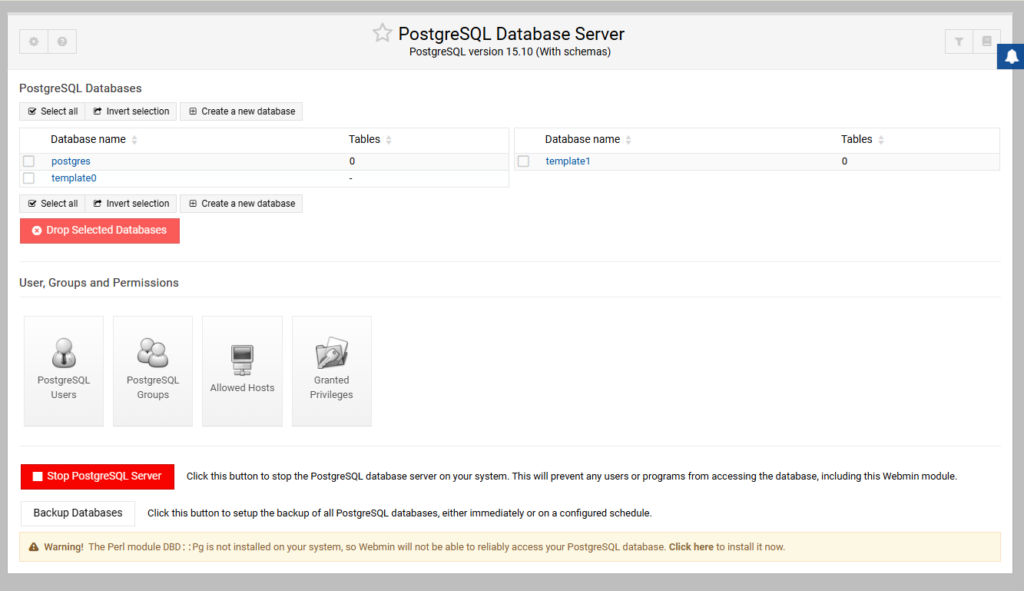
Notice that line at the bottom.
Go ahead and click on the “click here” in order to install the necessary Perl module.
Awesome! Now your Virtualmin server is running PostgreSQL and has all the tools for you to avoid the command line (for the most part.)
Installing phpPgAdmin2
Let’s start by creating a new virtual server.
Naturally, if Virtualmin is not handling your DNS records then create those first.
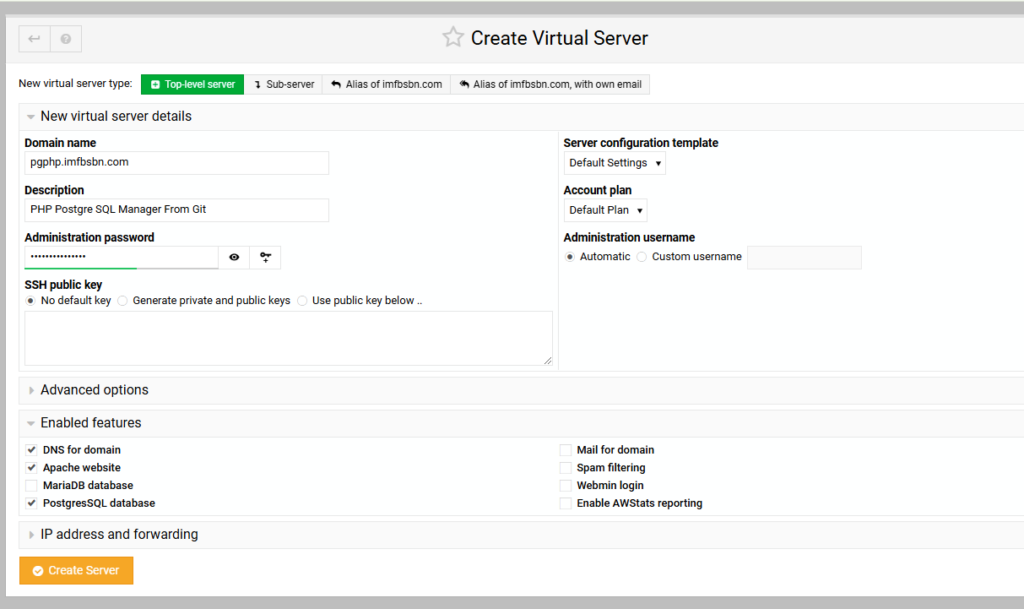
Just like adding any other domain name to the system, we need to enter the FQDM and make any other desired changes/additions.
- I am using Virtualmin’s DNS on the server, so that box remains checked.
- We are going to need Apache as the web server.
- And we want to have access to the PostgreSQL database.
So those are the only three checkboxes needed. SAVE THE PASSWORD. Go ahead and click the Create Server button.
Now here’s the thing, up until a few months ago – or until your preferred Linux distribution upgraded to PHP 8 – we would install phpPgAdmin as one of the Virtualmin included web applications. But the original version of phpPgAdmin does not support PHP 8. Thankfully an updated version is available. And also thankfully, installation is pretty simple.
So let’s install phpPgAdmin 2.
NOTE: I have the original version of phpPgAdmin loaded via the “web app” process (that’s how I discovered it doesn’t work.)
So in order to keep that version alive while testing another I created a subdirectory off the main directory. You don’t need to do that. But my process goes like this:
Create a new directory off of the /home/pgphp/public_html/ directory.
cd /home/pgphp/public_html
mkdir git
cd git
Then we’re going to download the application directly from Git.
git clone https://github.com/ReimuHakurei/phpPgAdmin.gitIf you don’t want to create the “git” directory, you can go ahead and run the above command directly in the /home/pgphp/public_html directory.
Now we can direct our favorite web browser to: https://pgphp.imfbsbn.com/git/phpPgAdmin/ (remove “git/” from the URL as appropriate.)
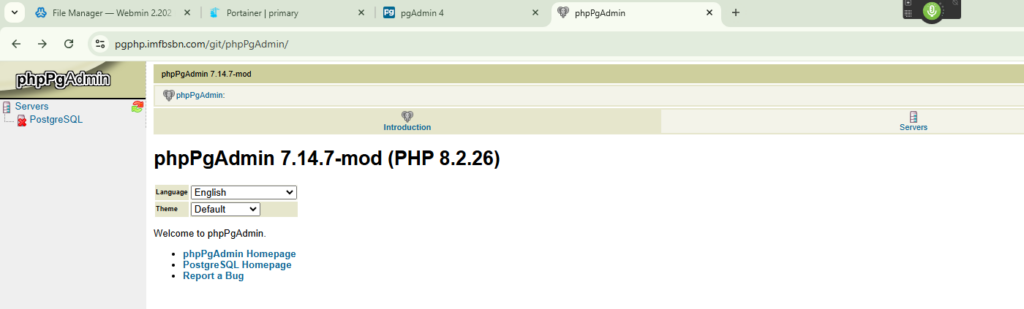
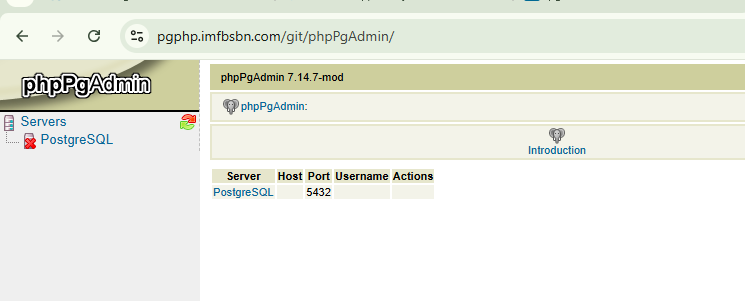
If you click on the “Servers” icon near the top right you should get this:
If you click on the PostgreSQL in the middle there, you will be taken to a login screen:
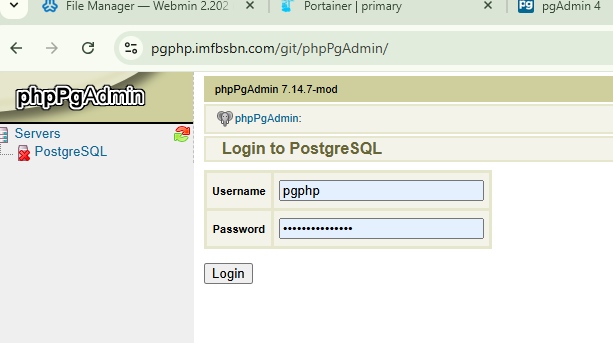
The username is the administrative username for the domain in Virtualmin.
The password is the password when you created the domain in Virtualmin.
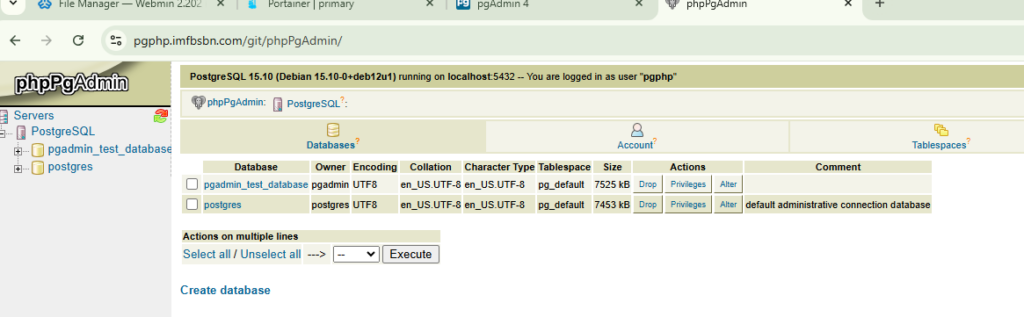
When you click login you should get something like this (I’ve been creating and dropping databases all day so your screen will look a little different):
That’s it!
Now you have loaded PostgreSQL and installed an updated version of phpPgAdmin.
In the next post I’ll show you how to connect to the PostgreSQL server from a docker container.