Let’s start with the why.
The reason you want to use databases (either MySQL or PostgreSQL) which are part of a Virtualmin domain is so they will automatically be included in any VM backups of that domain. That is, when a new domain is added to Virtualmin and either (or both) of the database boxes are checked, VM will automatically create the necessary database(s) and include include them in any backups (assuming the settings are correct.)
Consider it this way… You want to run Application_A and Application_B inside docker containers. However, each requires MySQL. So you have the option of:
- Having the server run 3 instances of MySQL: one native to the OS, one within the Application_A container, and one within the Application_B container, or
- Having the server run 1 instance of MySQL. Only the one native to the OS is required and Application_A & Application_B connect to it.
Running multiple instances of the same application is not very efficient. Further, backing up databases inside containers is… Well… Complicated.
Backing up databases tied to Virtualmin domains is incredibly simple and straightforward.
So let’s have at it.
Before going any further this tutorial assumes:
- Virtualmin has been correctly loaded on your system,
- Docker has been installed on your system,
- Portainer has been installed on your system, and
- PostgreSQL and its Virtualmin module have been properly installed.
If anyone is curious I’m working on the server hosted at Server Cheap (that’s not an endorsement, I have zero relationship with those people.)
First – We Add the Domain to Virtualmin
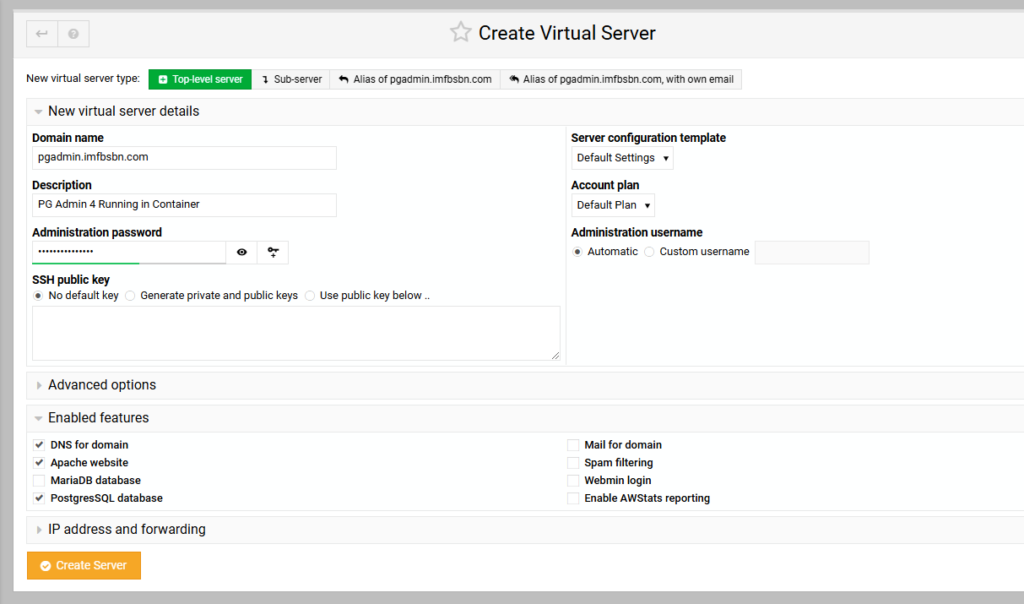
Here we are adding the domain name “pgadmin.imfbsbn.com”.
Because the administration username is going to be set automatically it’s going to be “pgadmin”.
In terms of features, we only need DNS, Apache, and PostgresSQL. Those are the only boxes that need to be checked.
Go ahead and create the server.
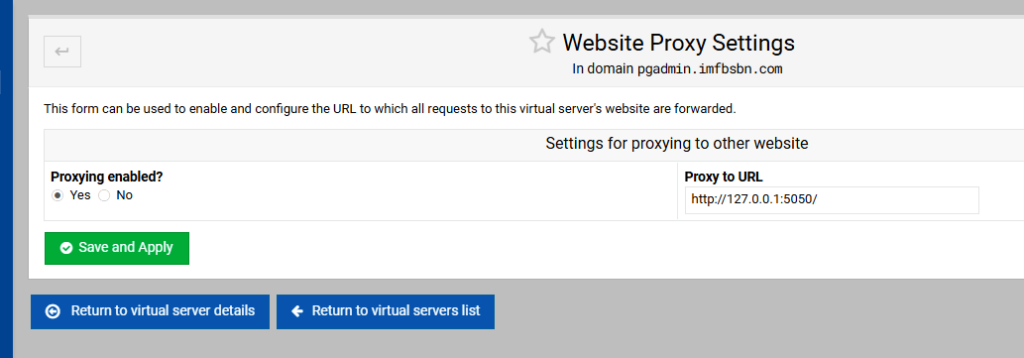
Second – We Create the Reverse Proxy To the Container
Now go to Website Configuration – – Edit Proxy Website and make the changes necessary to set up the reverse proxy to the container.
Third – We get Our Application Running in the Container
Next were going to log into Portainer and create a new stack.
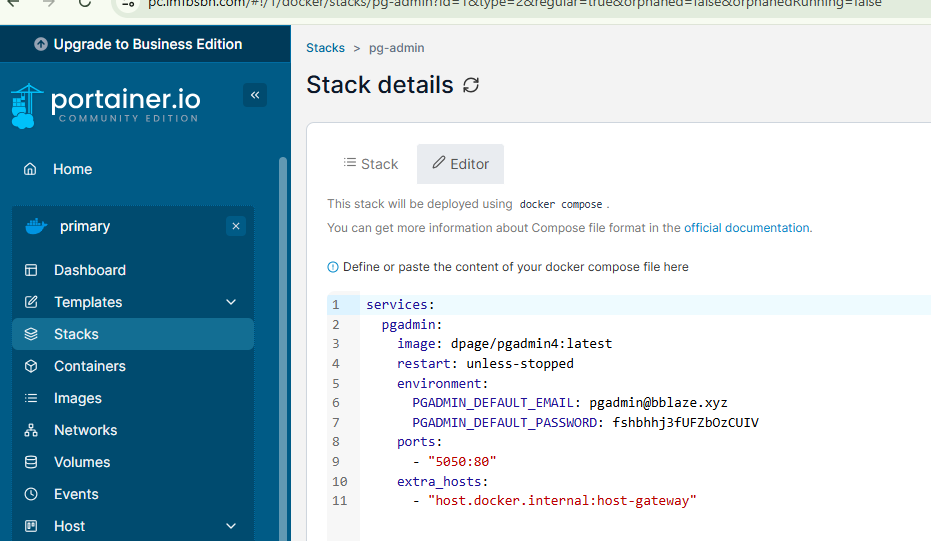
Here’s the code you need to enter in the stack:
services:
  pgadmin:
    image: dpage/pgadmin4:latest
    restart: unless-stopped
    environment:
      PGADMIN_DEFAULT_EMAIL: pgadmin@bblaze.xyz
      PGADMIN_DEFAULT_PASSWORD: fshbhhj3fUFZbUIV
    ports:
      - "5050:80"
    extra_hosts:
      - "host.docker.internal:host-gateway"
Then go ahead and deploy the stack.
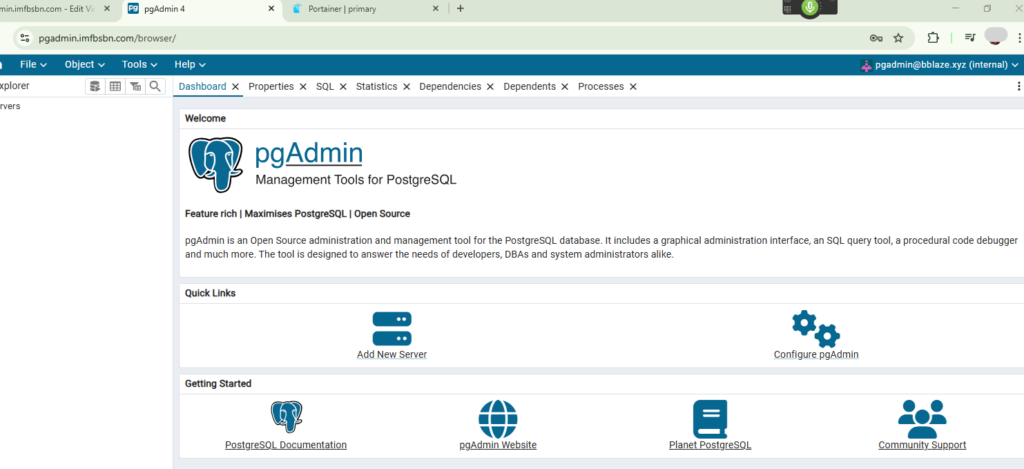
Once the container has loaded and is running you should be able to visit the domain name and see the login page for PG Admin 4:
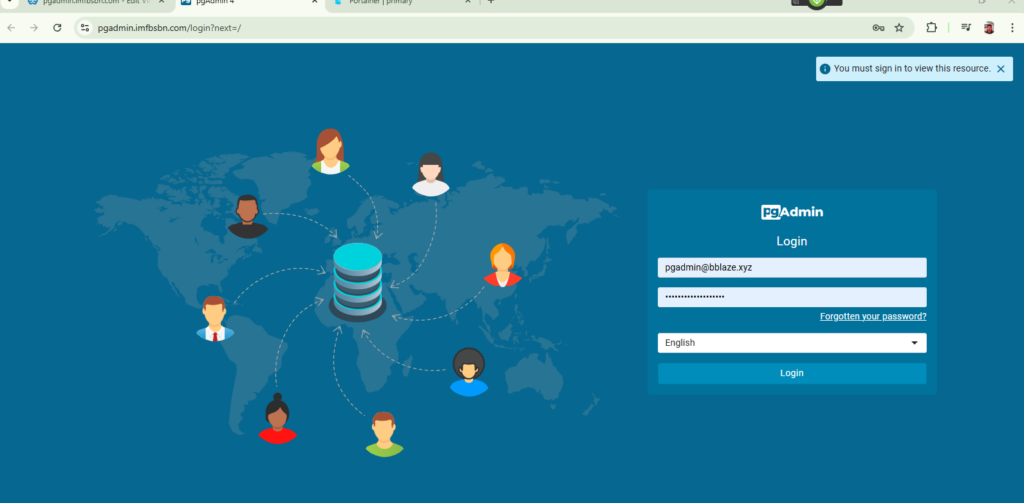
And if you enter the credentials from the stack you should be allowed to login:
Fourth – Configure PostgresSQL To Allow Host Connections
We have to make a few changes to a couple of files before the PostgresSQL server will allow our docker container to connect.
Let’s do the easiest first.
On our Debian system, we can use the Virtualmin file manager to navigate to /etc/postgresql/15/main…
NOTE: Because our domain is set up as a proxy, Virtualmin might not show us the file manager has a menu option. To use the file manager you may have to select an alternate domain hosted on the system or use Webmin.
Now you can right-click on the file postgresql.conf and then click edit from the pop-up window.
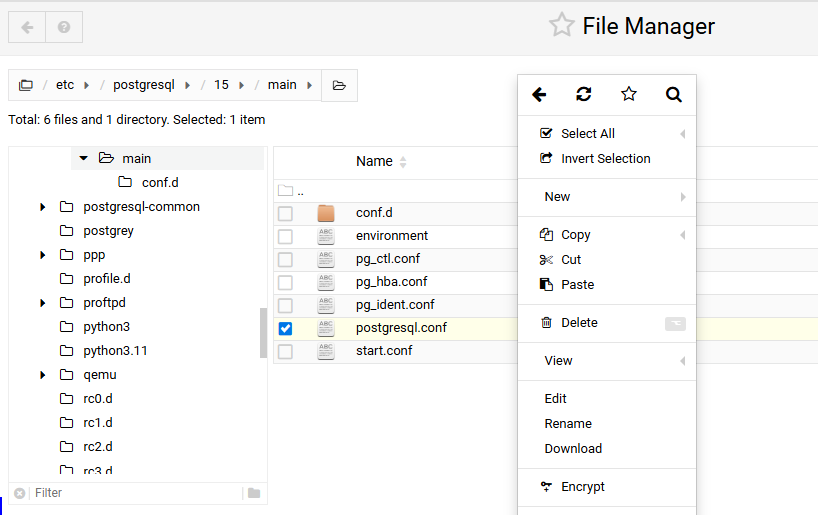
Virtualmin will pop open a window where you can edit this file.
Scroll down a couple of screens until you get to CONNECTIONS AND AUTHENTICATION.
In that section you will need to remove the # in front of listen_addresses.
You also need to delete ‘localhost’ and put in ‘*’ as shown below.
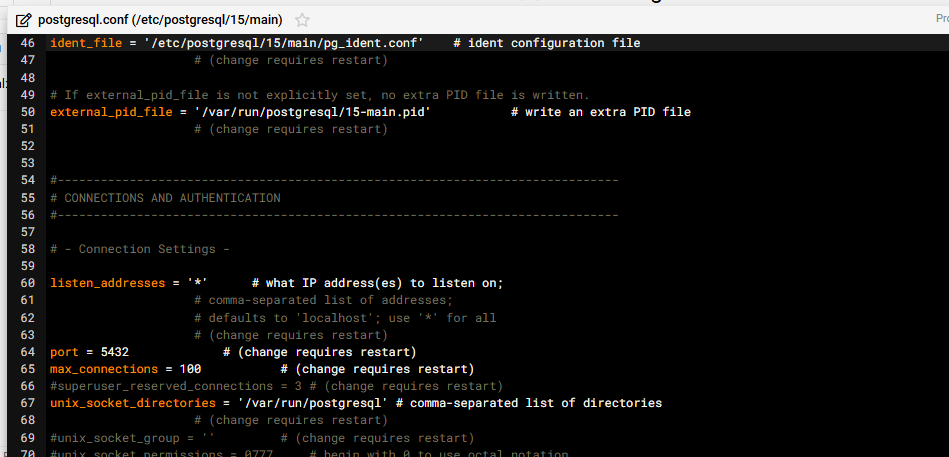
Save the file by clicking on the diskette at the top right of the pop-up window.
Now comes the tricky part.
Before continuing, we need to gather and confirm a little bit of information.
First we need to find out the IP address of our docker container running PGAdmin4. Thankfully, no commands are necessary. Portainer will simply show us the IP on the container page.
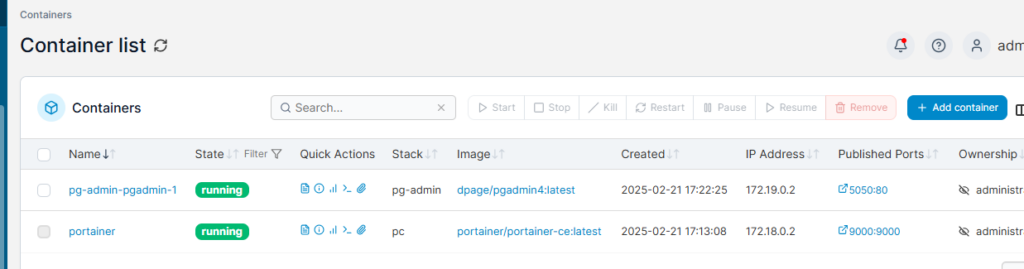
We can see that our PGAdmin container has an IP address of 172.19.0.2. We’re gonna need to know that in just a little bit.
Next we are going to confirm – in Virtualmin – our username and database name for Postgres.
For this we need to navigate over to the “Webmin” side of Virtualmin. To do that either press Alt-W or click on the Webmin tab on the top left side of the menu.
From there navigate to Servers – – Postgres Database Server:
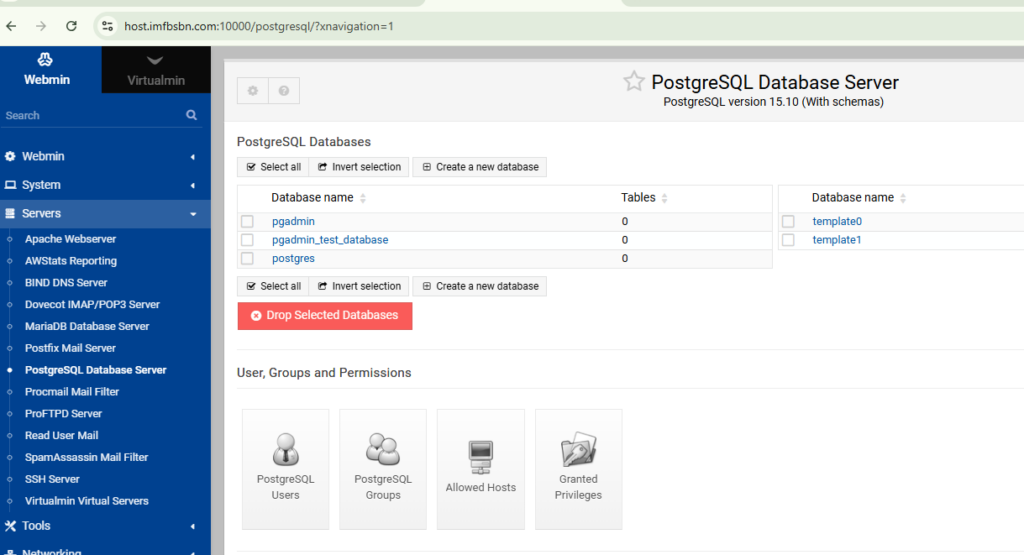
On this screen (shown above) we need to confirm that Virtualmin has created a database called “pgadmin”.
Now we are ready to click on the PostgreSQL Users button.

On the users page we want to confirm that Virtualmin has created a user called “pgadmin”.
Go ahead and click on the user pgadmin.
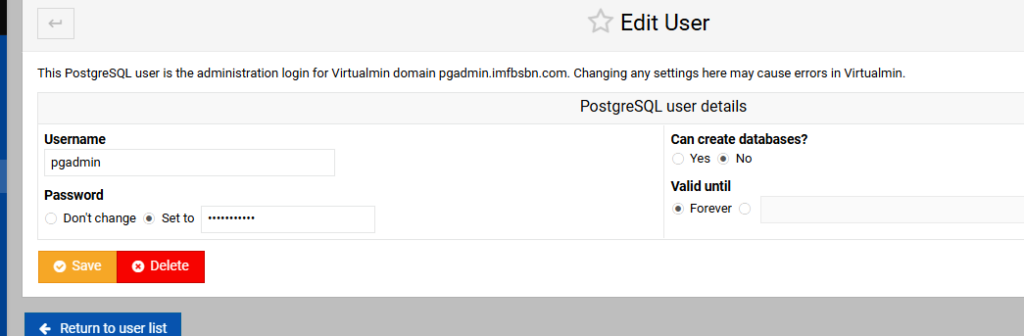
Here you want to ABSOLUTELY CHANGE THE PASSWORD and write it down. I’m not exactly sure what is going on here behind-the-scenes. But it appears that Postgres users are not initially assigned a password when created. So setting a password here is absolutely essential for continuing.
Now that we have confirmed our IP address, database name, username, and password, we are ready to proceed to the next step.
Click the blue button that says Return to Database List.
Click the Virtualmin button “Allowed Hosts”.
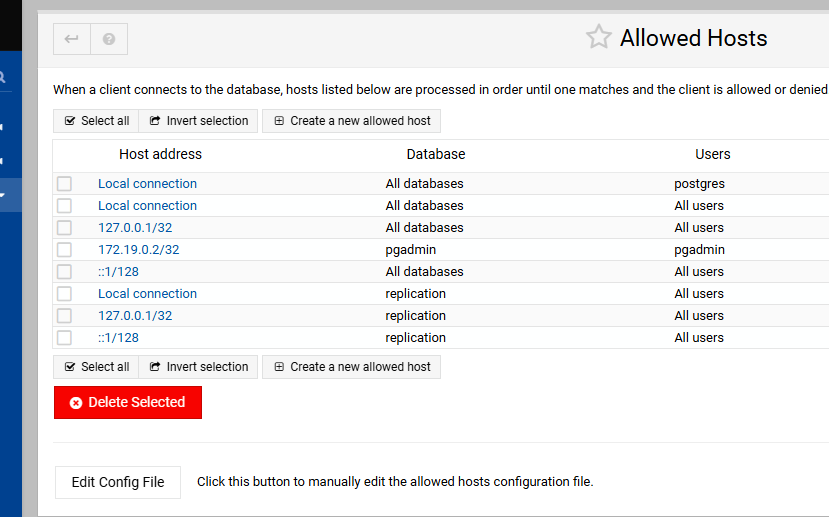
At the bottom left, click on that white button that reads Edit Config File.
Scroll down to the end of that file. You want to make it look something like this:

The line you want to add the look like this:
host pgadmin pgadmin 172.19.0.2/32 scram-sha-256This is telling PostgeSQL to allow access to the pgadmin database by the pgadmin user from IP 172.19.0.2 using sha-256 password encryption.
NOTE: if you get stuck you may want to test with lines #98/99 which I have commented out above.
After you have made the changes, save the file.
Again, click the blue “Return to Database List” button.
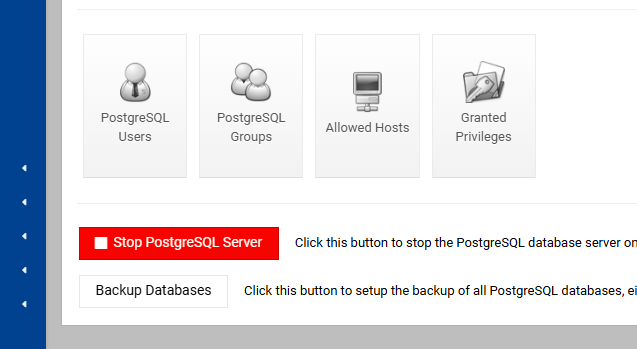
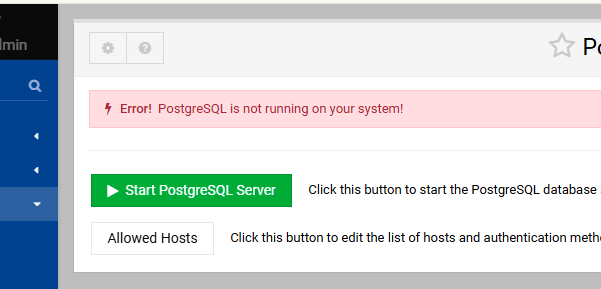
Restart the PostgreSQL server by using the “Stop” and “Start” buttons within Virtualmin.
Then…
Return to the browser tab where you have PG Admin 4 open.
Click on the button that says “Add New Server”
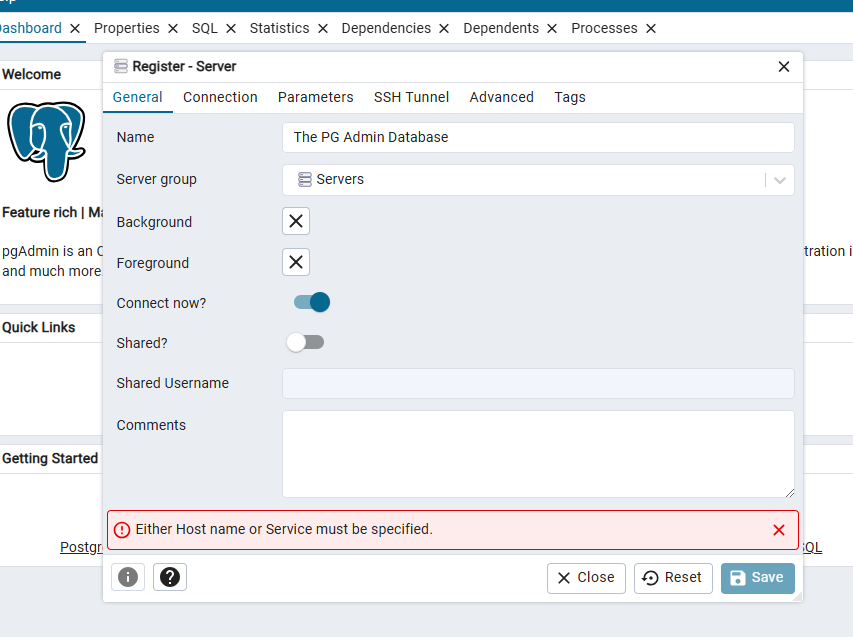
Enter whatever you want for the name.
Then click over to the connections tab:
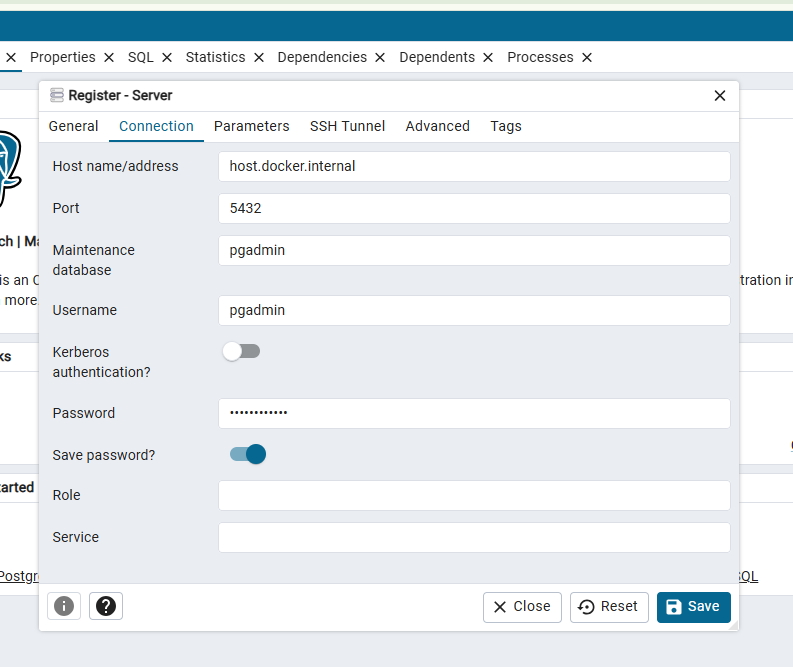
Enter data into the fields like above.
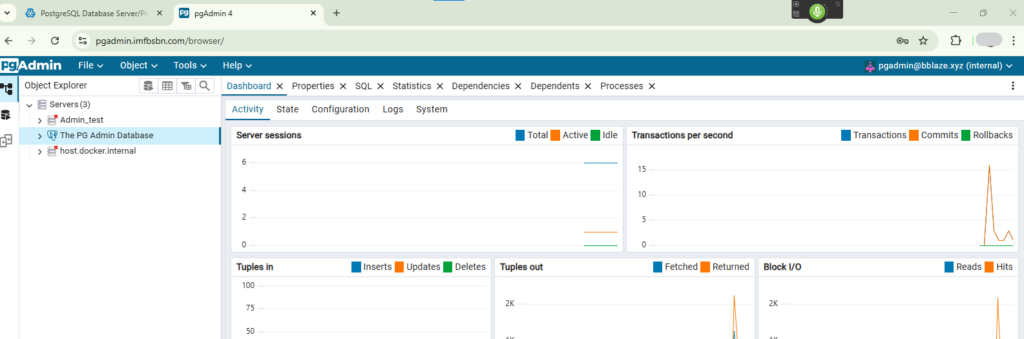
If everything worked as it should, you should see something like this:
Congratulations!
You just connected a docker container to the PostgreSQL server hosted natively on the OS.